
Testing the Aquila S2 desktop 3D printer continues with an examination of print results.
This is part two of a two part series. Part one is here.
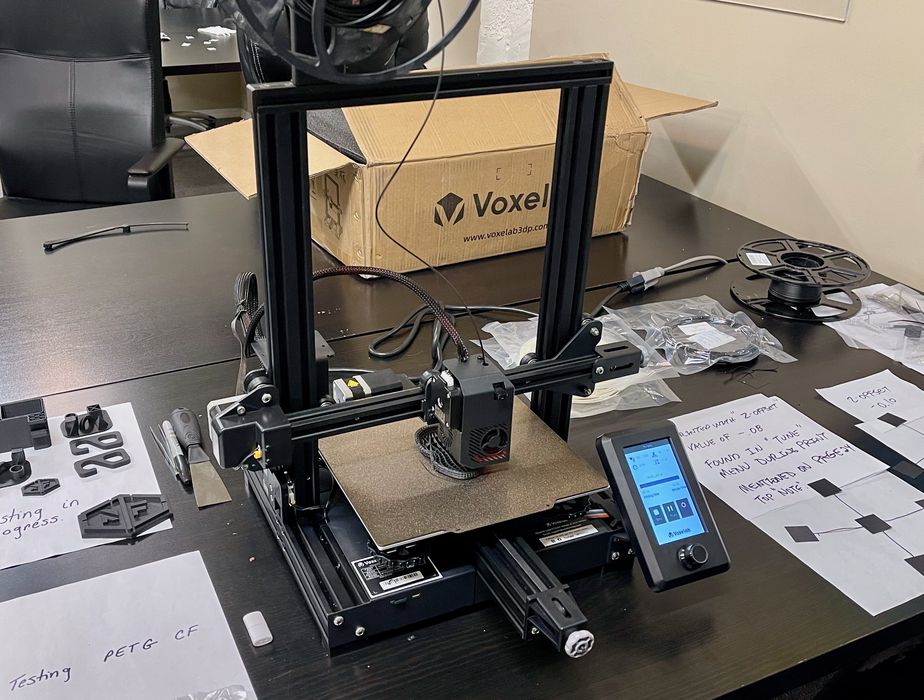
Aquila S2 Machine Setup and Calibration
Every 3D printer requires some calibration before it can be used for “live” 3D print jobs, and the Aquila S2 is no exception.
The calibration required for the Aquila S2 is to level the bed and set the z-gap between the nozzle and print surface. This is done through an automated procedure you can invoke from the front control panel.
That seemed to be all that was required for setup, but alas, we discovered a calibration problem later in our testing, so we’ll come back to this part.
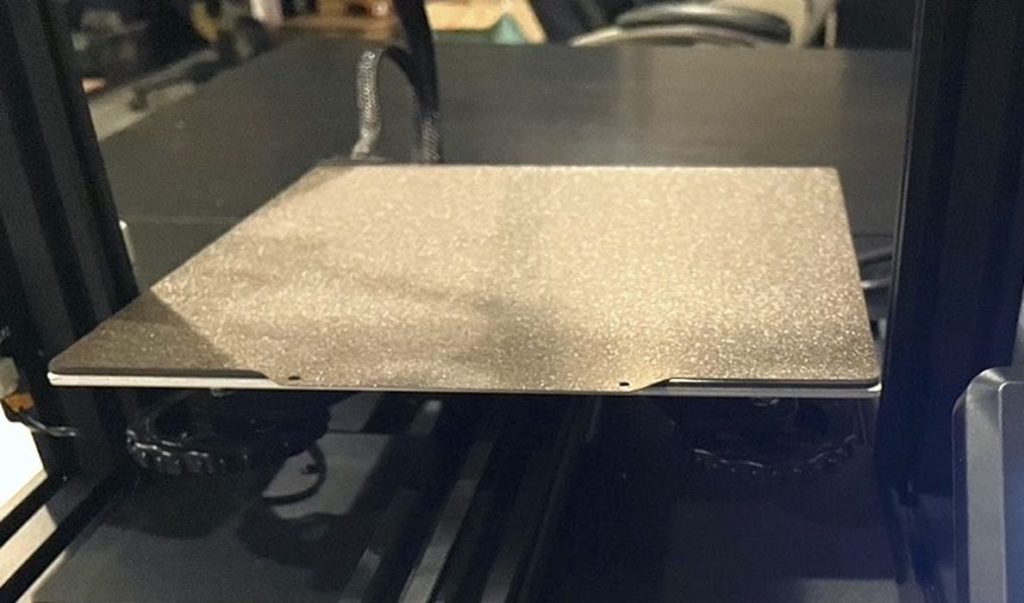
I should mention that the print surface for the Aquila S2 is a spring steel flexible plate that’s magnetically attached. It’s powder-coated with an adhesive material (likely PEI) that sticks down prints quite well. However, because of the powder coating, the bottom surfaces will be textured.
That is, unless you turn the bed over, where you’ll find a smooth surface for printing. Note that if you do this you will have to recalibrate the z-gap.
One strange inclusion in the toolkit was a large metal scraper, presumably to remove prints from the sheet. This is a bit strange because the prints are easily removed by twisting the plate — they just pop off. However, if you do have some residue to remove you could use this metal scraper, but if you’re not careful it could damage the delicate adhesive surface. We recommend using a plastic scraper instead, which is not included. You’ll also need long nosed pliers or tweezers to remove filament pieces left on the nozzle.
Aquila S2 3D Printing Experience
As is traditional we started our printing experience with the Aquila S2 using pre-sliced jobs provided by Voxelab. These should have been prepared with optimal print parameters, so we could test without worrying whether we had incorrect parameters and focus on whether the machine is mechanically built correctly.

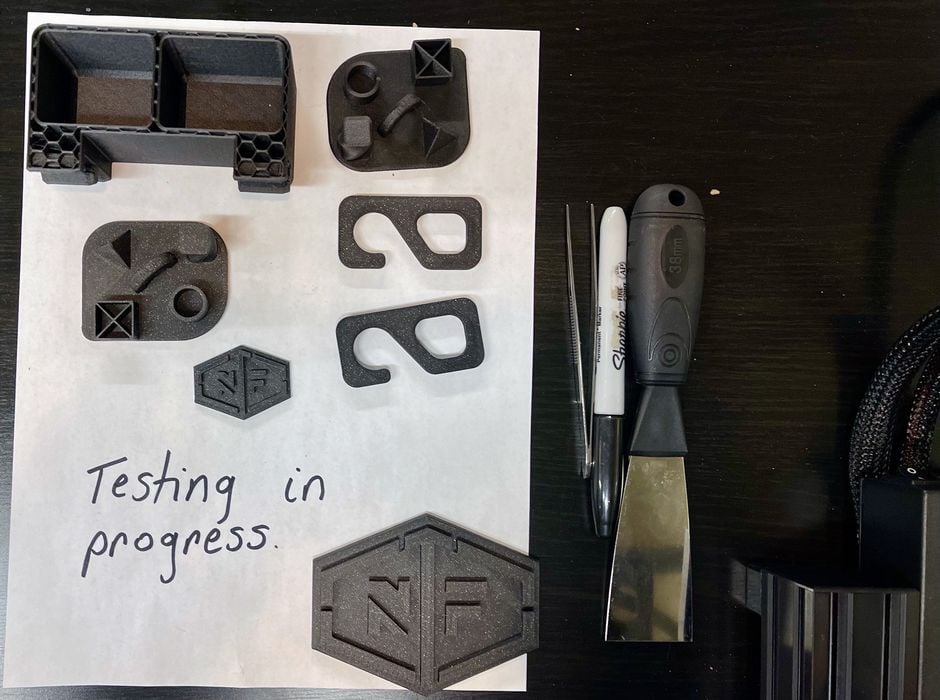
As it turned out, our first print was entirely successful. Here you can see a sample print of a test object, made with one of the supplied materials, PLA-CF. It came out beautifully without incident.
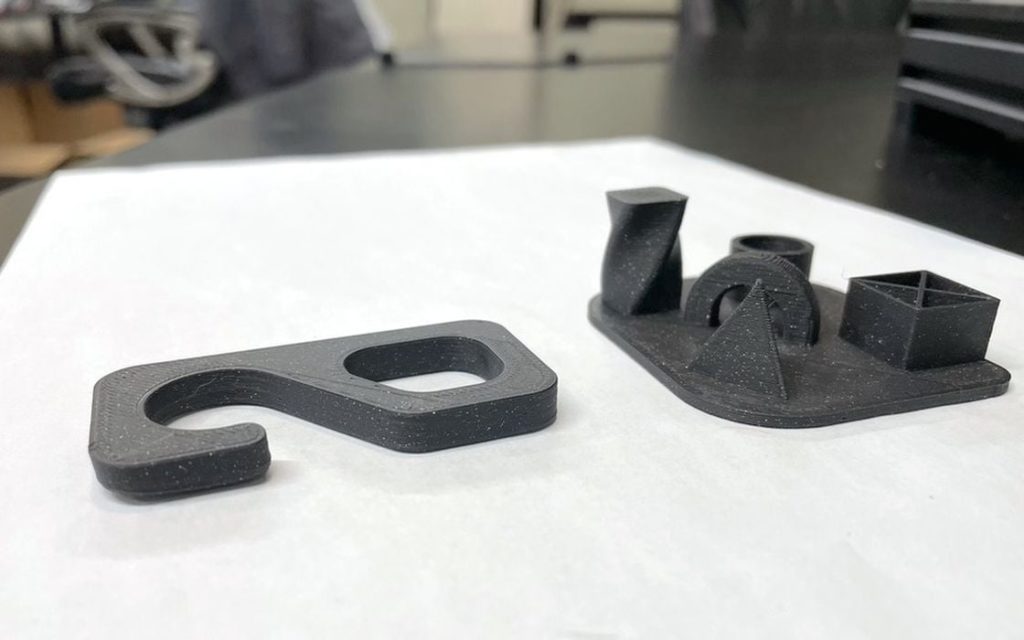
Subsequent test prints using pre-sliced code also worked very well.
Then it was on to the next step where we would slice our own 3D models and print them. This is where we ran into an issue.
Whereas the pre-sliced jobs all printed quite successfully, all of our own sliced models failed miserably. They wouldn’t stick to the bed, even using the same temperatures and materials as the pre-made jobs.
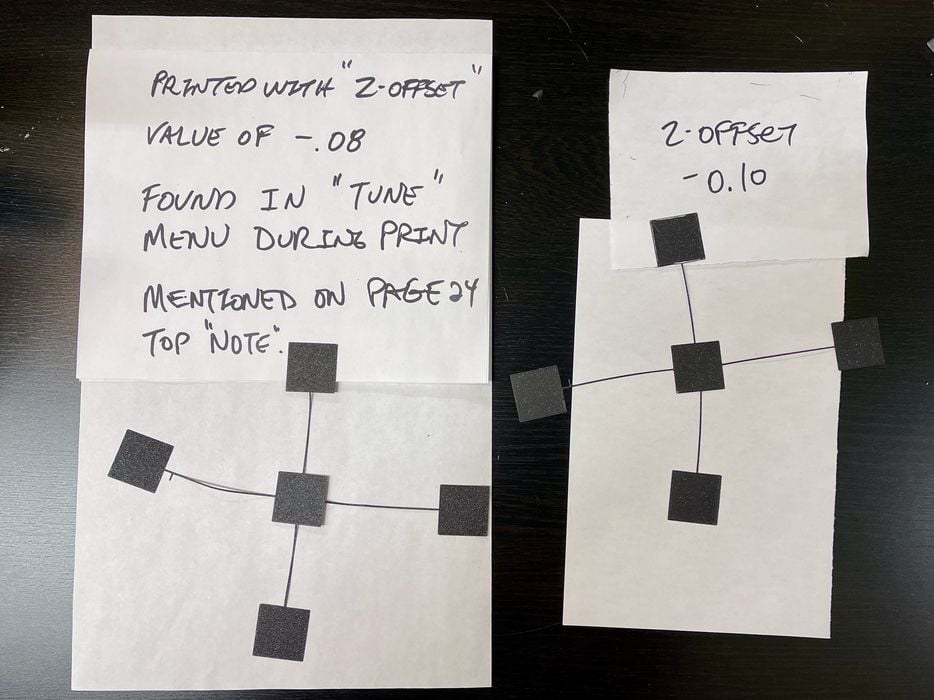
Any prints sliced on Voxelmaker print with the nozzle too high, which is why they failed.
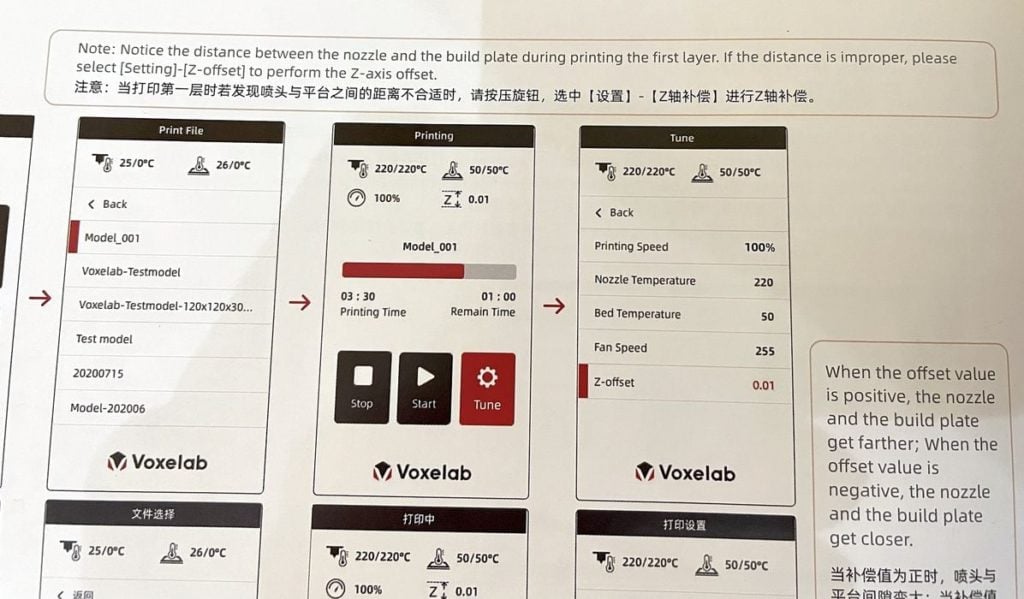
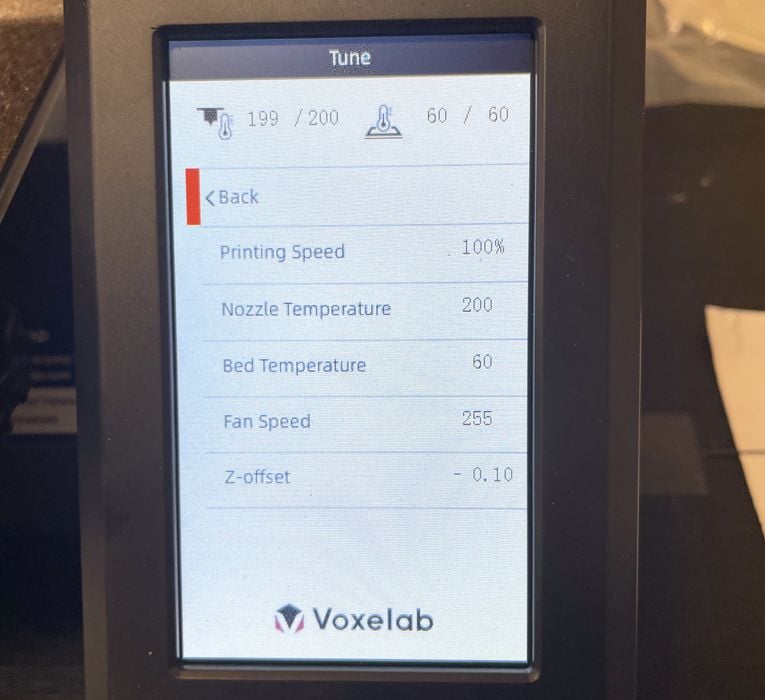
It took a bit of troubleshooting to figure out that you need to adjust the z-offset to be -0.10mm for all prints to correctly stick to the bed and print successfully.
Bizarrely, the offset does not persist and therefore you need to adjust it EVERY TIME you print! This is done using the live tuning feature on the front panel.
We discovered if you use the Ultimaker Cura slicer instead of Voxelmaker, the adjusted z-offset stays in force between jobs. This suggests there is something required in VoxelMaker to correct the problem.
The only mention in the Aquila S2 user guide was this note:
“Notice the distance between the nozzle and the build plate during printing the first layer. If the distance is improper, please select (Setting)-(Z-offset) to perform the Z-axis offset.”
That doesn’t quite explain the behavior we observed, as we had to do this on every job.
It’s not clear what’s happening here, but it’s definitely something the folks at Voxelab should look into. The fix may require either a firmware upgrade or a software upgrade, or perhaps both. I suspect that many novice 3D printer operators will fall into this “gap” and not find their way out.
One important thing we noticed was the nozzle: it’s brass! We were curious why the machine uses a brass nozzle (and there’s a spare brass nozzle too), when the Aquila S2 is to support CF filaments, which are incompatible with brass. The tiny but very rigid carbon fibers will gradually eat away at the relatively soft brass nozzle, causing the diameter to widen over time. A steel nozzle would be recommended instead of brass, and anyone using the Aquila S2 for CF printing should definitely swap out the brass nozzle.
We were quite excited to try the PAHT material included with the shipment, as it’s a relatively unusual 3D print material with high temperature resistance. In fact, it has to be printed at 260-280C.
That’s no problem for the Aquila S2, which can handle 300C.
Except there was a problem.
Voxelmaker would not let us slice a 3D model with a temperature higher than 250C. After further investigation, it turns out the Aquila S2 firmware needs to be upgraded for it to work with temperatures up to 300C. The user manual needs updating to include this and the company’s website needs updating to include PAHT as a supported filament.
While we’ve listed some complaints here, the fact is that the Aquila S2 was very capable when 3D printing objects.
The printer runs very quietly. I worked around the corner from the printer and found I was often getting up to see if it was still running, it is that quiet!
Aquila S2 Conclusion
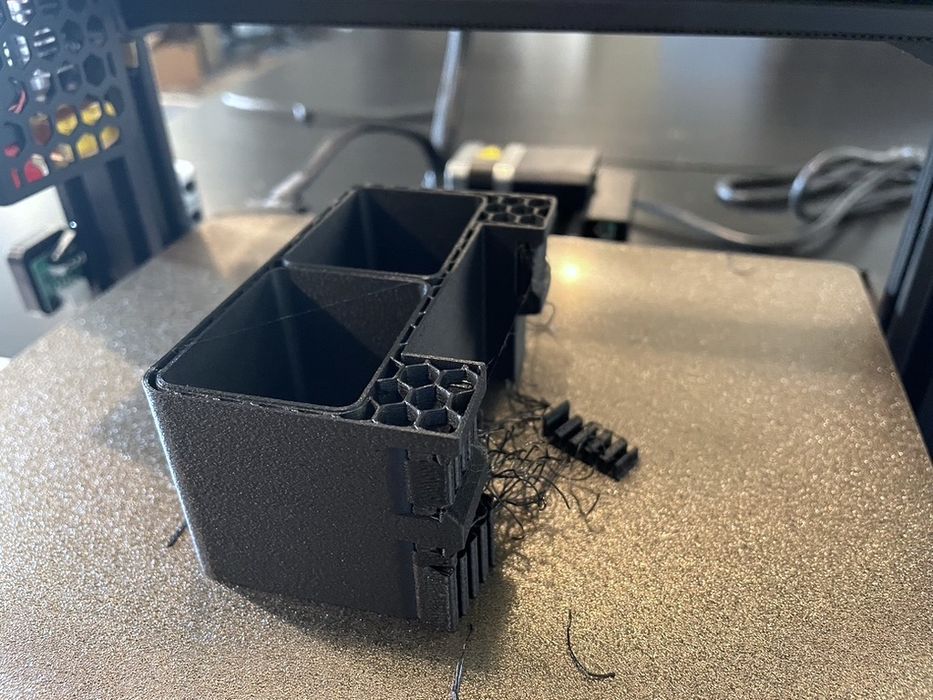
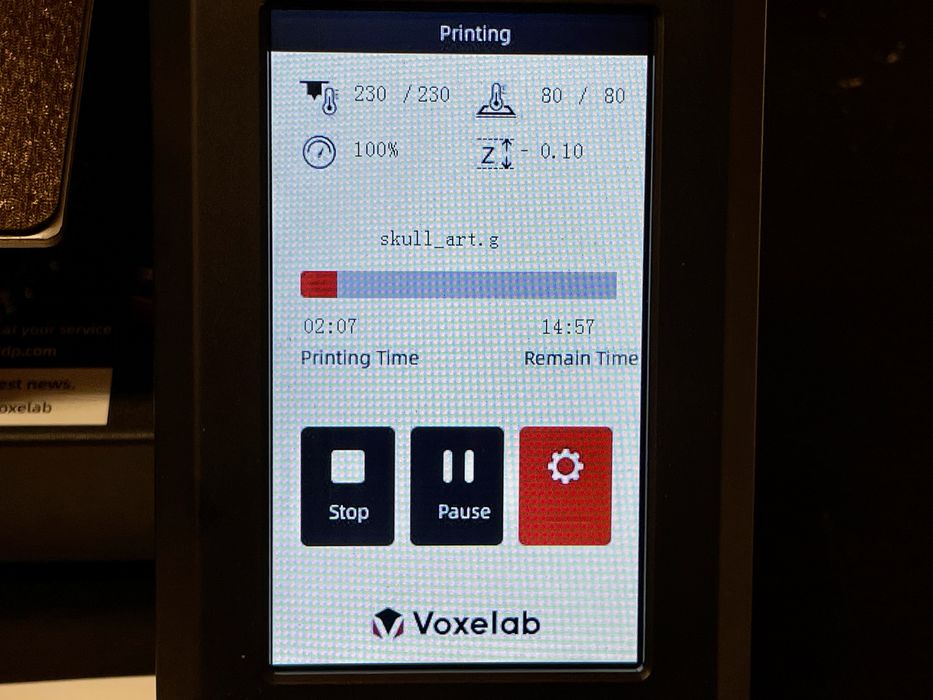
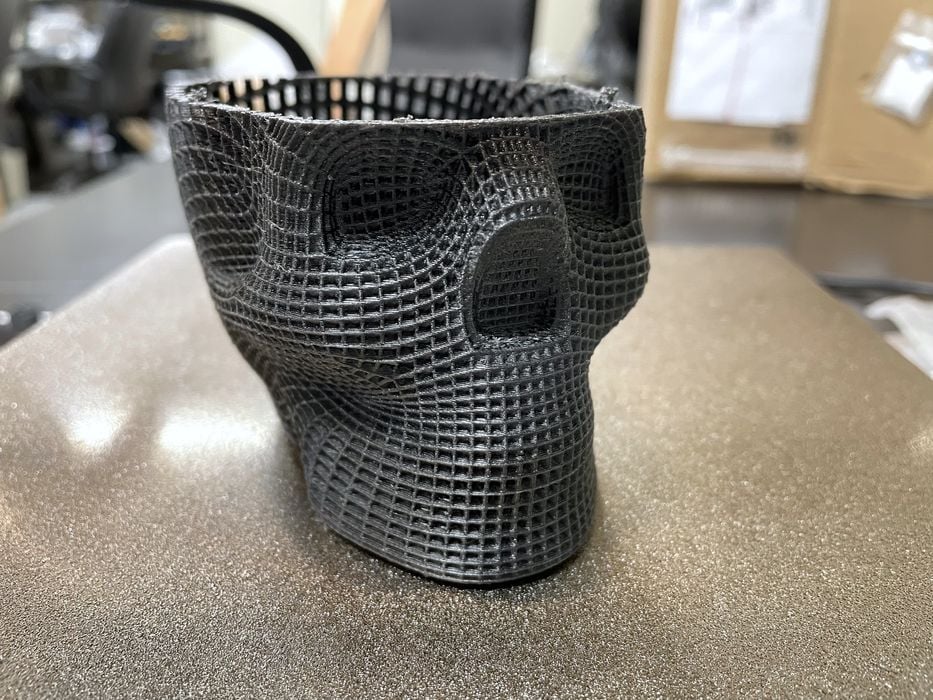
Prints made on the Aquila S2 are very high quality. Here you can see a complex skull 3D model printed, which didn’t quite finish because we ran out of the small amount of PETG-CF during the print overnight. It printed extremely well otherwise.
Other prints also had similarly good quality. I believe that if Voxelab could sort out the minor software issues with the firmware, Voxelmaker and the z-gap issue, this machine would be top notch.
We continue to find Voxelab 3D printers to have high quality parts and very good value for the price. You do need to have deep knowledge in the components and how a 3D printer works to be able to complete assembly of the DIY kit successfully.
If you want to buy a high quality, higher temperature-capable printer, and don’t mind a little troubleshooting, I recommend the Aquila S2 DIY Printer Kit, which is available for less than US$300.
This is part two of a two part series. Part one is here.
Via Voxelab and Flashforge