
Our testing of the Sovol SV01 Pro 3D printer continues with a look at operations.
This is part two of a three part series, please read parts one and three.
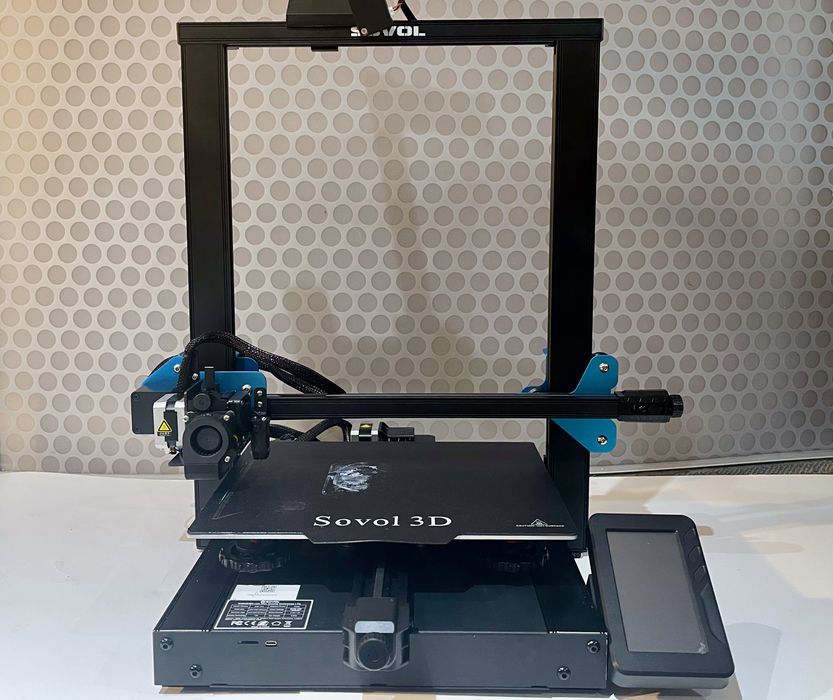
Sovol SV01 Pro 3D Printer Operations
Sovol provides a microSD card with a couple of pre-sliced 3D models on it, so that’s where I started. The card includes a print of the XYZ calibration cube, as well as the classic #3DBenchy.
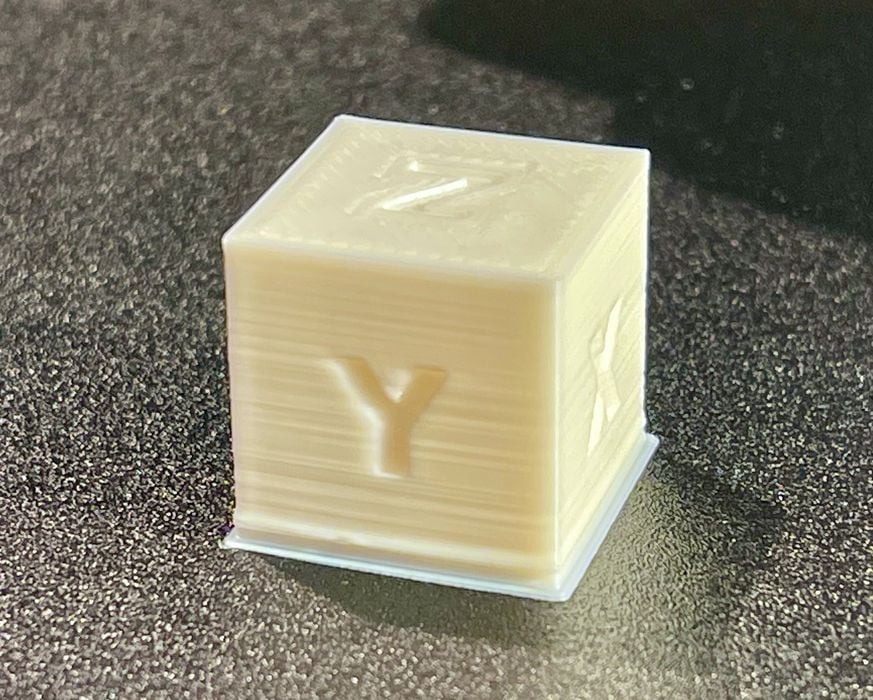
I tried printing the XYZ cube and it came out ok.
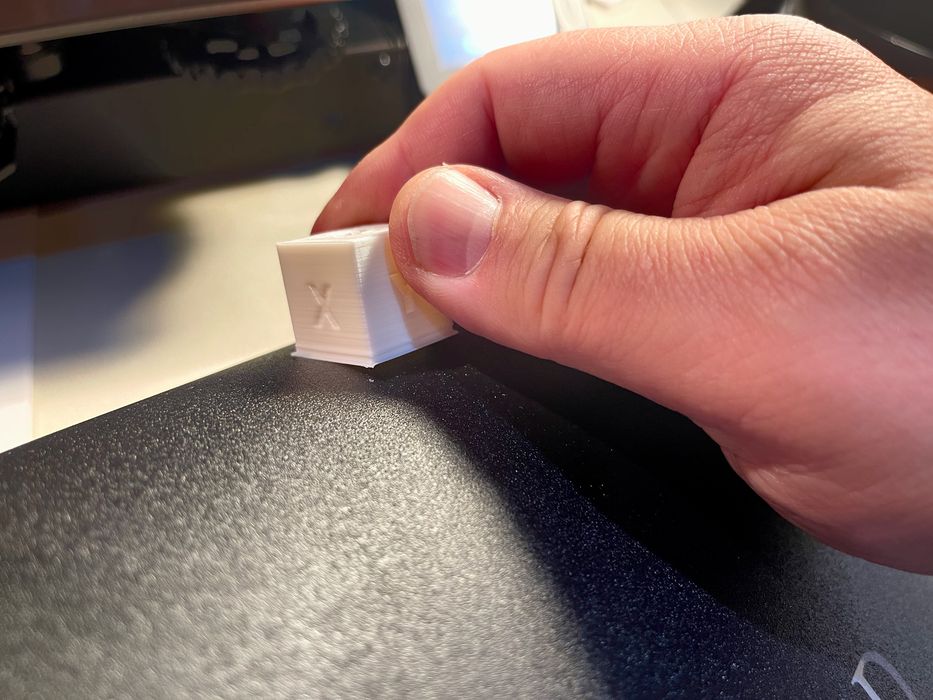
But then I first encountered the magnetically attached print surface. I found it rather difficult to remove the print. The problem is that the print surface is NOT a spring steel plate as used in other 3D printers. Instead it’s a rather floppy affair that bends very easily. So when you bend the surface, it just “folds” at the edge of the print and doesn’t “go under” the print to release it.
I ended up yanking the print off, and the removable surface really didn’t help with releasing the print at all.
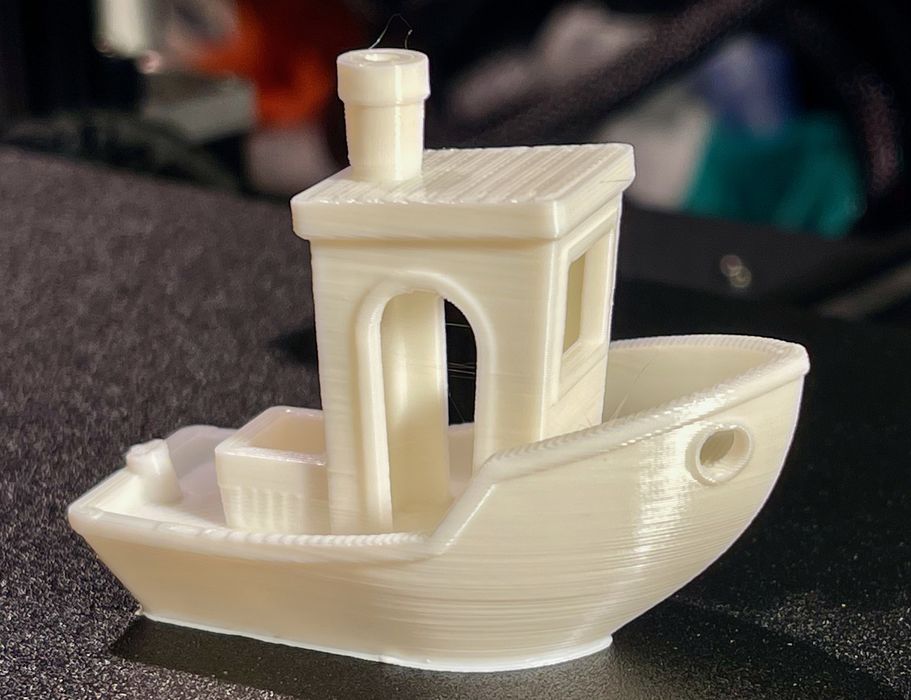
I tried printing the #3DBenchy, and it came out quite well.
At this point it was time to print some of my own designs, and I prepared a couple of items to print in PLA.
However, when the first print started on the second layer, the machine began emitting some crazy sounds. Listen to the video here to see what happened.
I contacted Sovol to diagnose the problem, which we suspected to be a fan issue.
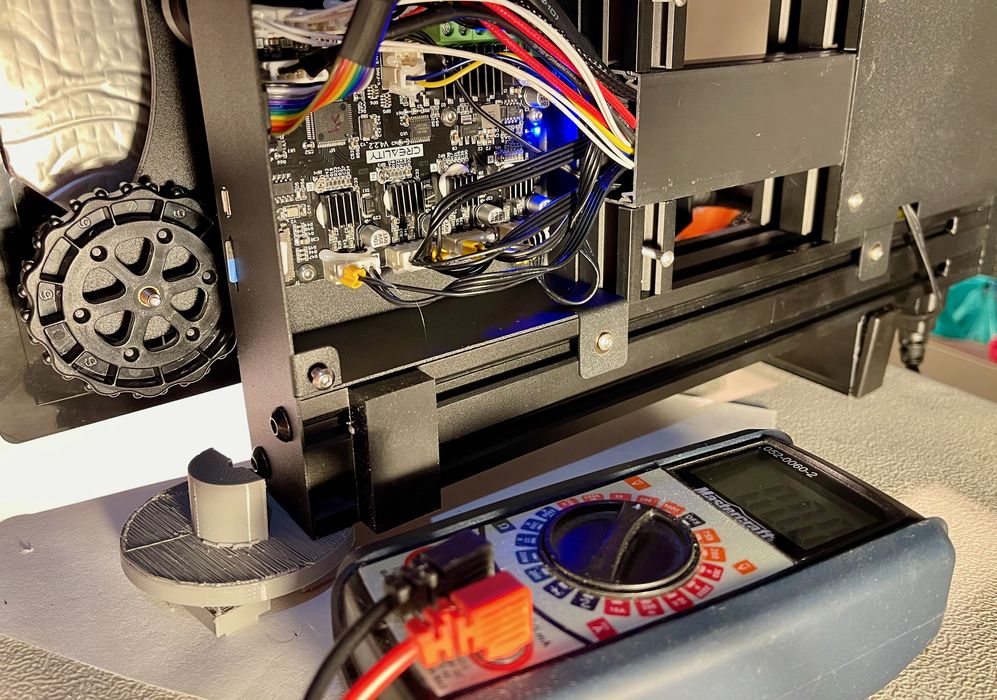
I had to disassemble the bottom of the base unit to get at the problematic fan, which was cooling the mainboard. This required unplugging the fan and very carefully measuring the voltage on the fan plug, which was a proper 24V. Thus the fan was bad.
After a couple of days Sovol was able to get me a replacement fan, which I quickly installed. Immediately the unusual noises disappeared and I was able to continue testing.
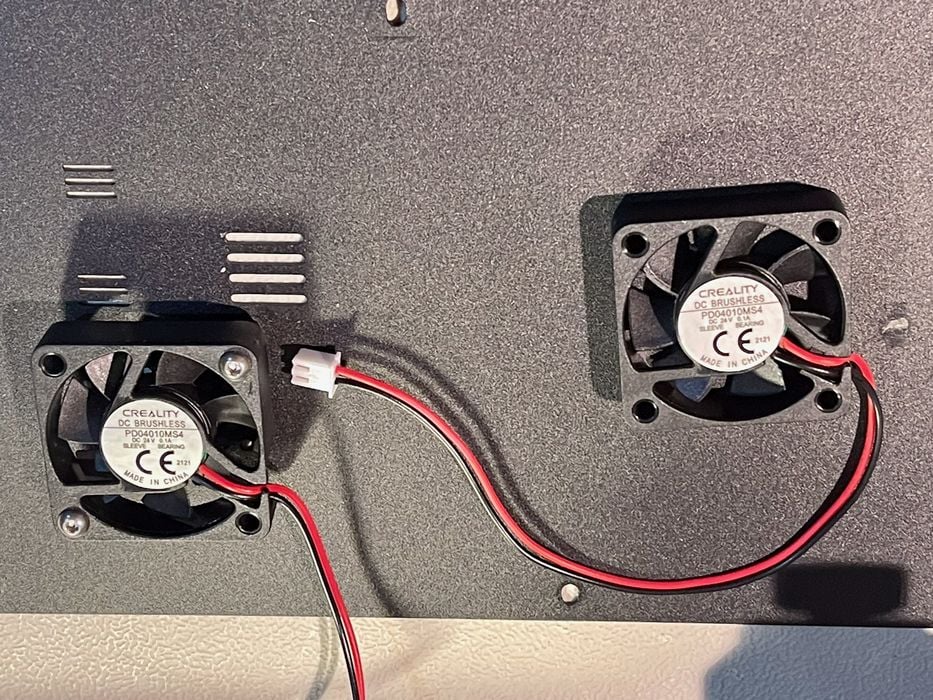
Then I noticed something interesting. The fans were both Creality hardware.
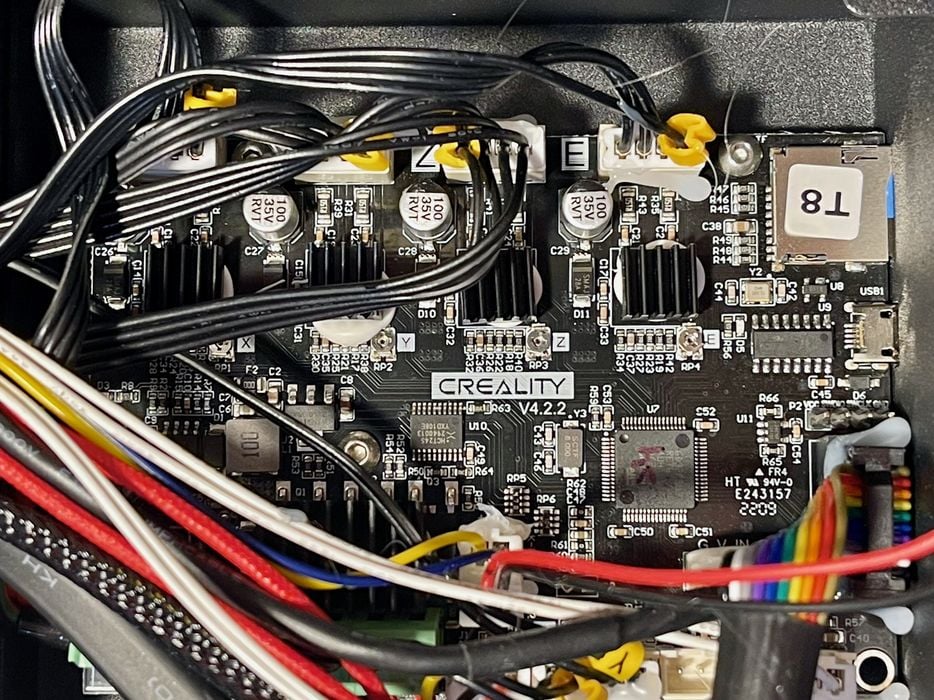
And the mainboard was also made by Creality, which was visible after I opened up the machine.
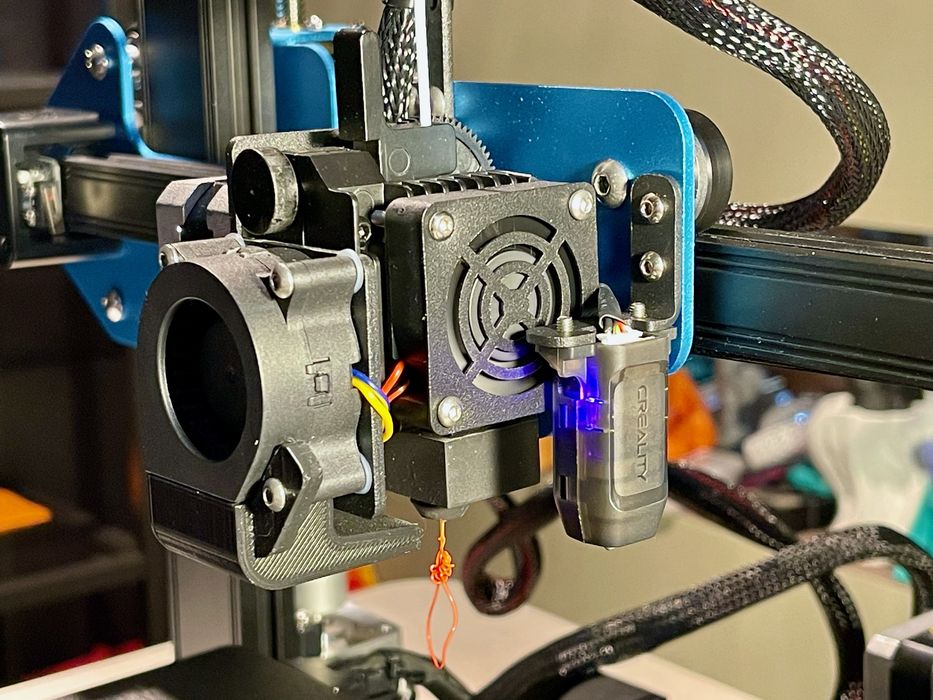
And the touch sensor was actually a CR-Touch, Creality’s component. It seems that Sovol is using a lot of Creality hardware under the covers on the SV01 Pro.
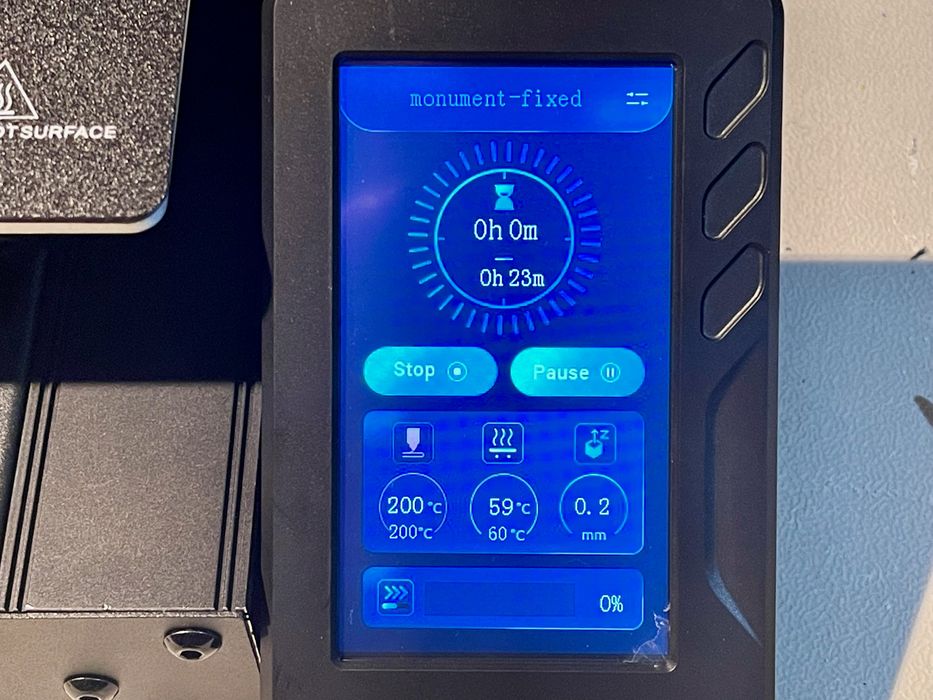
Eventually I was able to resume testing and obtained many successful prints, as well as a few failures. But more on that later.
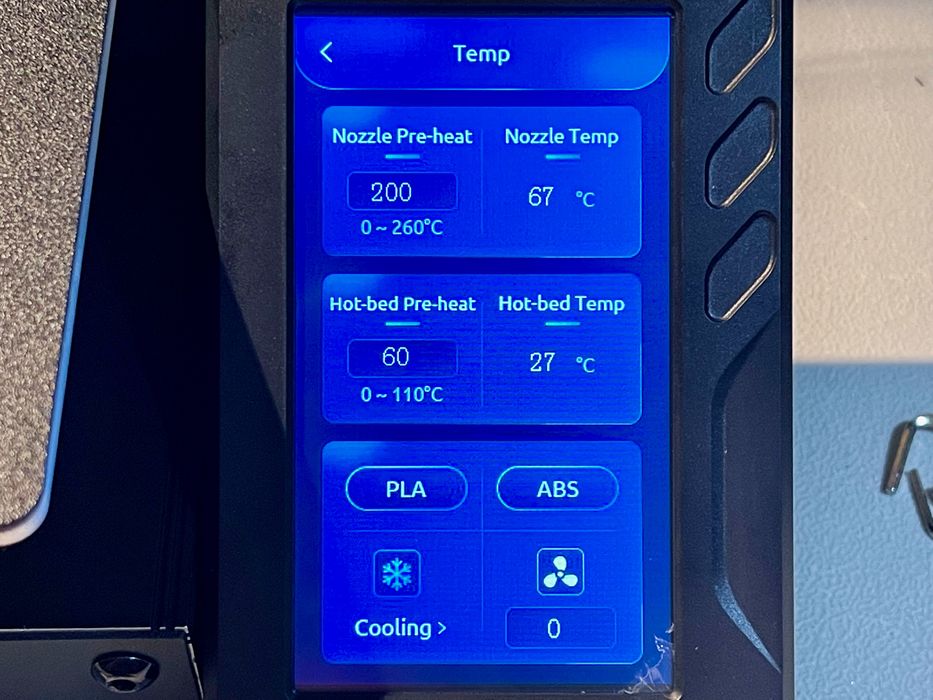
I should talk a bit about the touchscreen interface on the SV01 Pro. It’s quite usable, but it’s different from what I expected and had a few bugs.
The main screen is mostly clear, except for the giant “Select The File” button. It may seem obvious later, but this is how you print something. Sovol has used different terminology here for that, where most machines would have something like “Print from SD card” or similar, instead of “Select the file”.
There were quirks like that throughout the interface, but once you get through them they seem easy to remember and use.
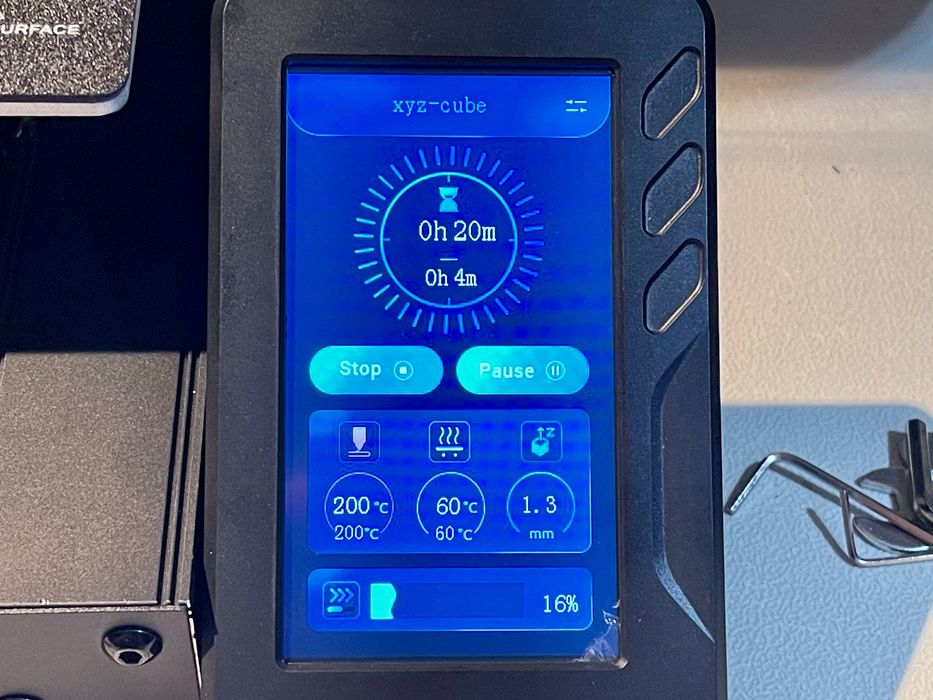
When printing this screen is shown, and there are buttons to easily tweak and tune the operations during printing.
I would do this, for example, to tighten up the Z-gap if the material wasn’t sticking very well.
Something I did find frustrating with the interface was that the remaining time estimate seemed to change hugely during prints. This is an effect you see from time to time on different 3D printers, but it appeared frequently on the SV01.
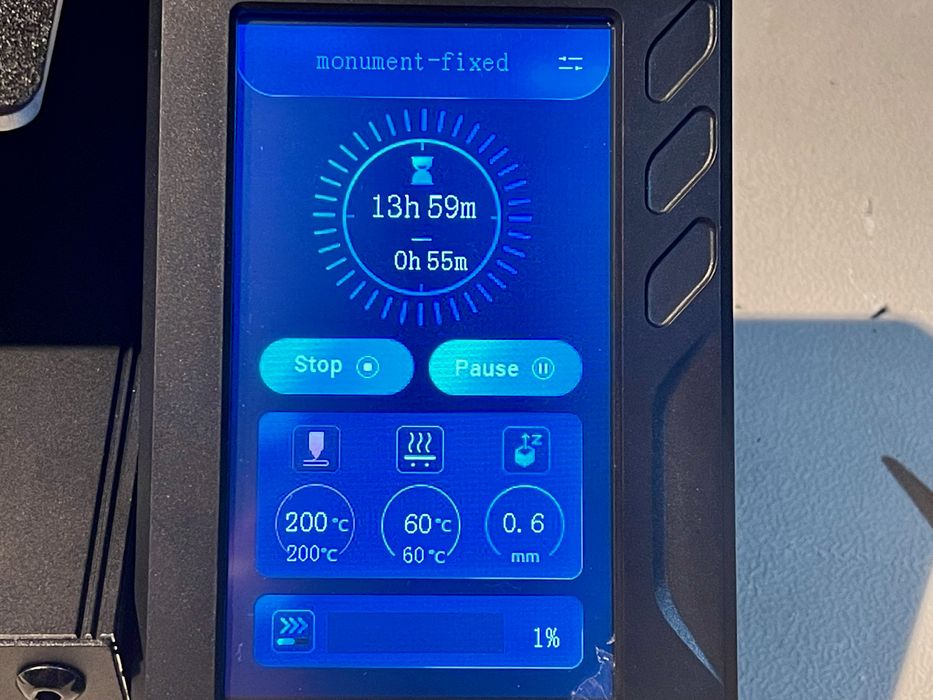
There were times where the estimated remaining time would be wildly off, but then correct itself later. Eventually I realized you simply couldn’t trust it.
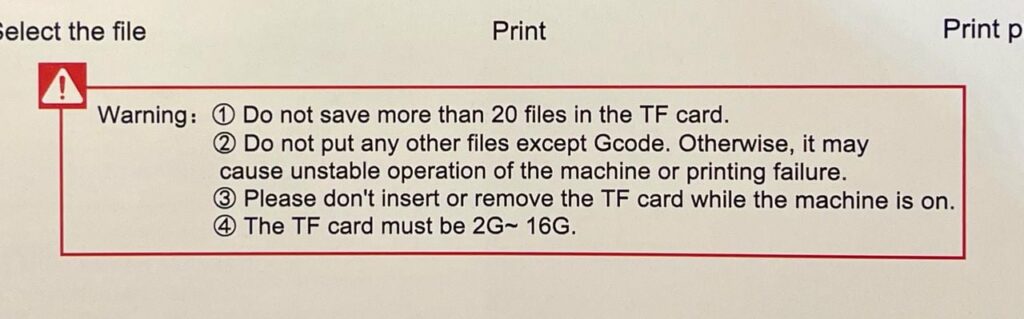
Then there was these instructions in the manual. Of interest is that you can apparently only store 20 GCODE files on the card, even though you can certainly fit far more. Why was this limit present?

The answer is that the user interface is hard coded to show exactly four panels of five filenames. No more, no less. You can actually scroll through blank panels! This is a really odd thing to see. However, it doesn’t affect the printing at all.
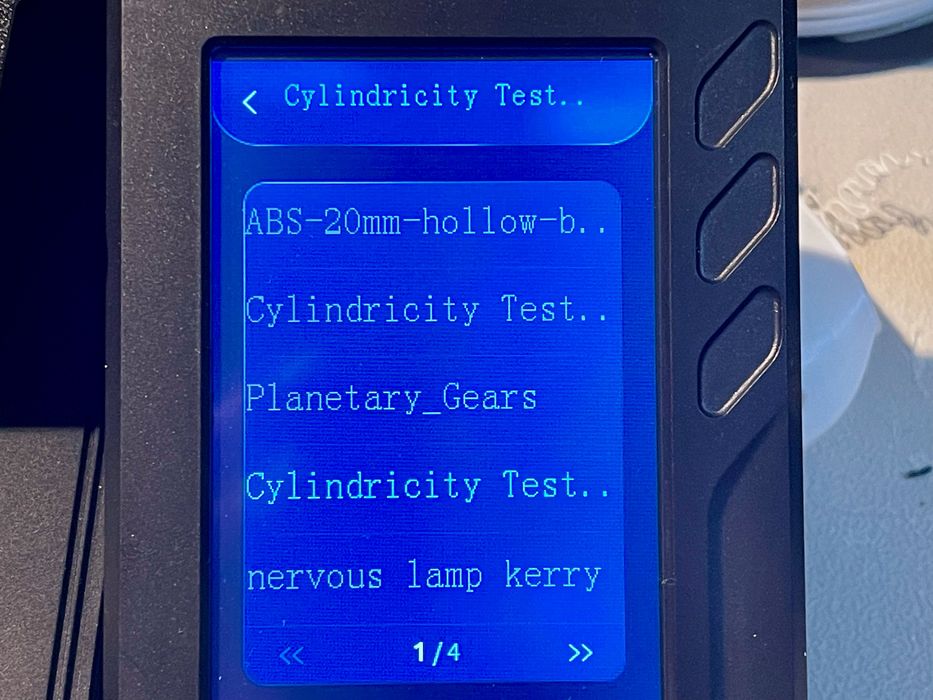
One bug that did affect printing was that the filename display does not scroll. In other words, if you happen to have a filename that has the same characters at the beginning (and I often do, printing version 1, 2, etc.) you cannot distinguish which version is which on the touchscreen as above. This should definitely be fixed.
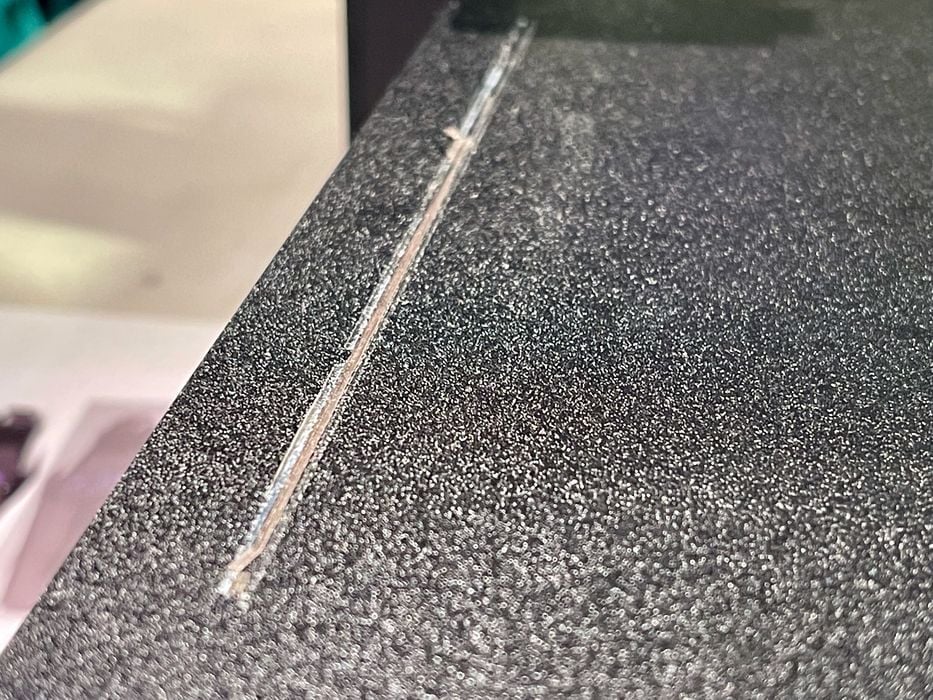
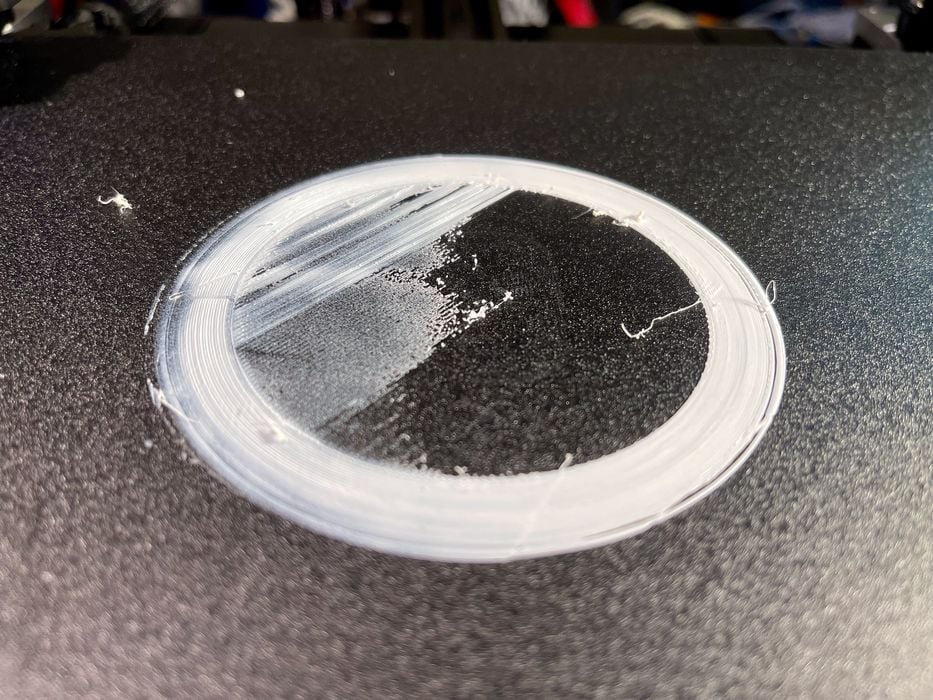
noticed a growing issue with the print surface. On each print launch, the printer would prime the extrusion flow by dumping two lines of filament in the same place on the left side, as you can see above. After several prints I realized this line was going to be present forever. With the somewhat coarse surface, material would accumulate and be impossible to remove.
I noticed another problem that occasionally occurred when changing filaments. While filament loading is easy (heat up, open the idler and push the filament down), removal was sometimes really difficult.
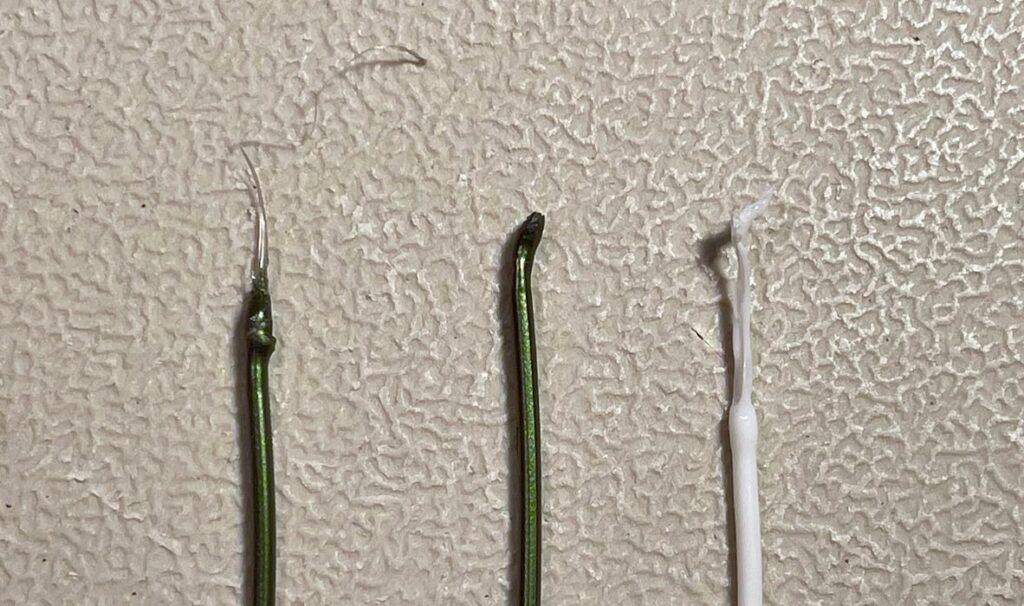
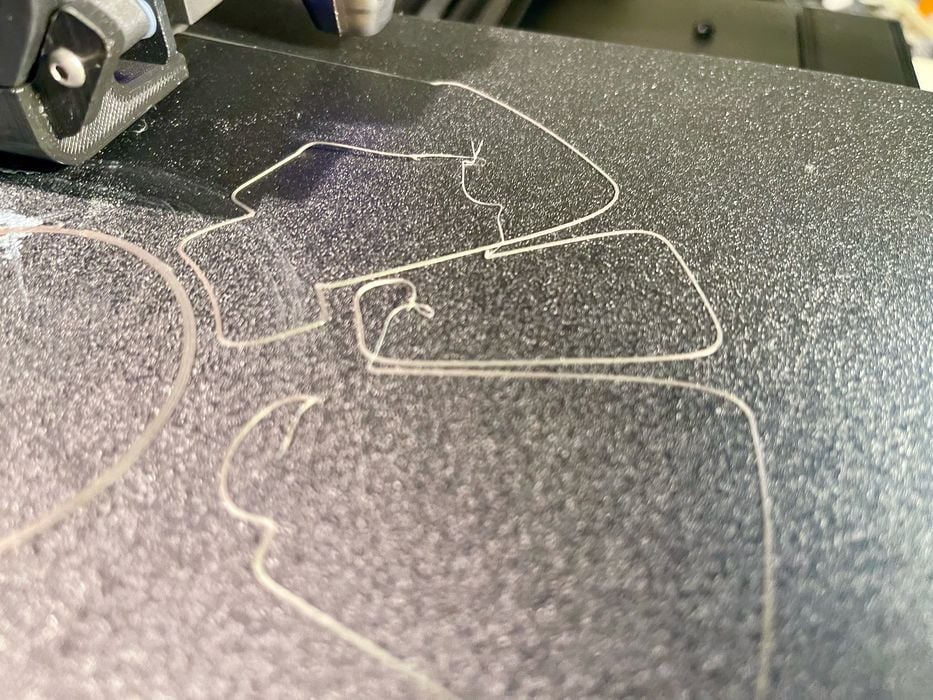
I would find that the filament would not exit on its own and I would have to pull very strongly to get it out. Eventually I realized what was happening. In the image above you can see the filament heads that I removed: each has a bit of a mushroom top that is too wide.
What seems to be happening is that the hot end’s geometry allows the filament to cool into this shape, causing difficulties when removing it.
My process for removal evolved into first extruding some forward at an extra-hot temperature, then retracting and pulling it out while still soft.
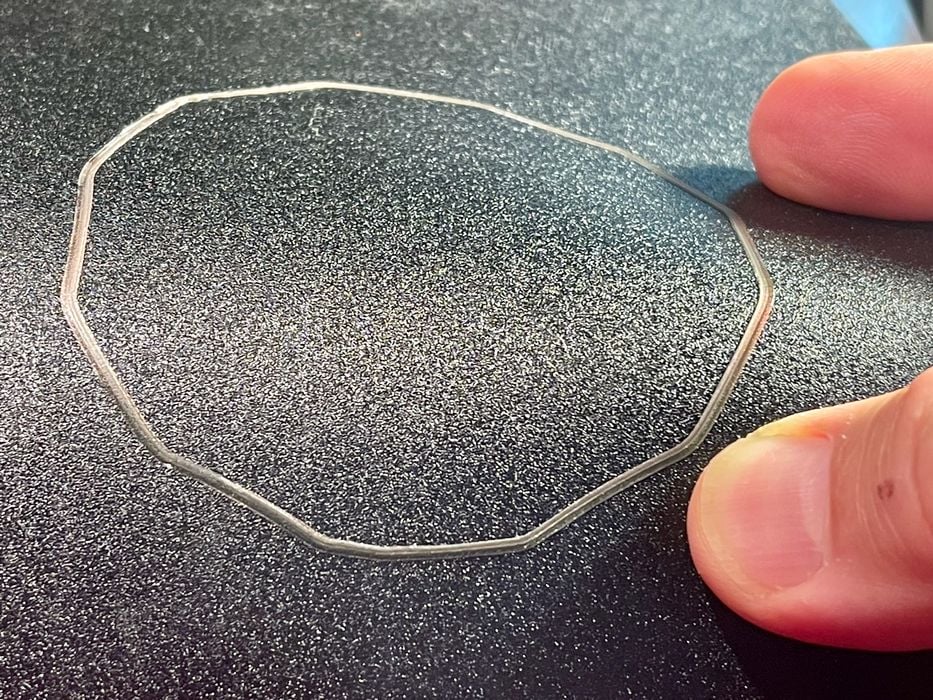
Finally, I began to dislike to extra-flexible print surface as it consistently was difficult to remove thin extrusions.
Because of this the surface would gradually accumulate material, leaving huge areas that simply could not be cleaned off.
The surface would often not stick to prints, even after extensive washing, re-leveling and tightening the z-gap. Sovol should really replace this print surface with something better.
This is part two of a three part series, please read parts one and three.
Via Sovol