
Our look at the Kingroon KP5L 3D printer concludes with a look at software, print quality and final thoughts.
This is part three of a three part series, please read parts one and two.
Kingroon KP5L 3D Printer Software
The KP5L does not ship with any proprietary slicing software, and instead uses Ultimaker Cura. This is a very common approach by makers of inexpensive 3D printers, so this wasn’t a surprise. After all, Ultimaker Cura is a really good slicer, too.
The SD card only contained an older windows version of the software, and no versions for Mac OS or Linux. For those platforms you’ll have to find current versions on Ultimaker’s site.
Since we already had the latest version of Ultimaker Cura installed on our computer, we decided to go with that. By the way, Ultimaker Cura version 5 is significantly advanced over prior versions, so we strongly recommend upgrading to that version as soon as you can.
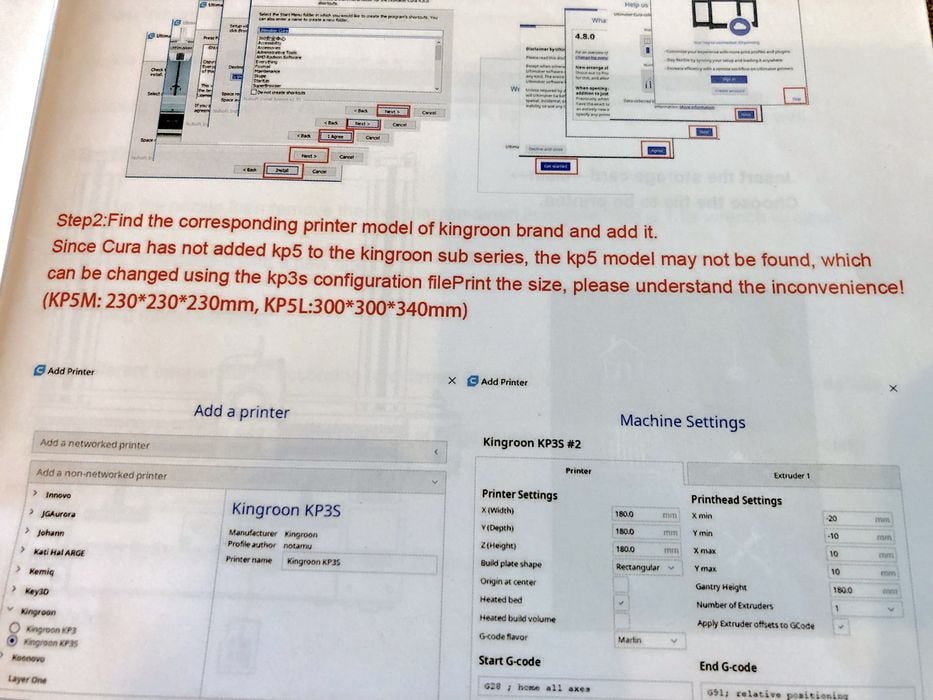
As mentioned in the Kingroon installation instructions booklet, the KP5L is too new to be included in Ultimaker Cura’s default list of installable printers, so their solution was to choose the Kingroon KP3S and then Manually edit the build size to 300 x 300 x 340 mm in the Machine Settings tab.
Aside: the software procedures are likely challenging for novice operators, and it would be a good step forward to make setting up Ultimaker Cura a bit more smooth.
Once we had a manually configured KP5L in Ultimaker Cura, we did a quick check of the SD card to see if there were any additional material profiles that we needed to install for filament types, but we found nothing to add.
We were now ready to slice and print some of our own test models!
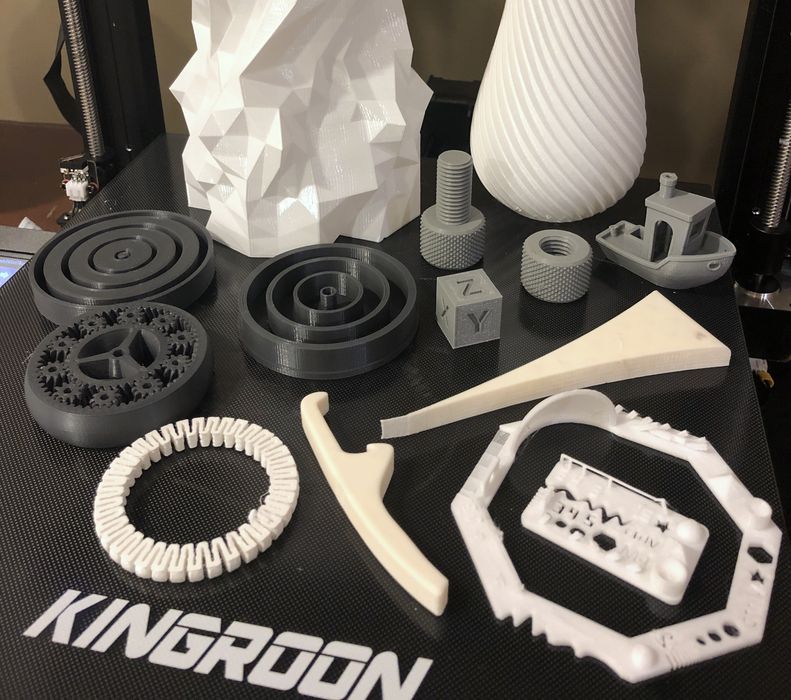
Kingroon KP5L 3D Printer Print Results
We started with our typical calibration prints using PLA to see how well Cura was setup for slicing prints for the KP5L.
The prints for the first part of the review came out quite stringy and we had some first layer adhesion issues.
We began by re-leveling the bed to best mitigate the slight warp and then searched Kingroon.com to see if there were any filament profiles to download.
In the end we found a good article from Kingroon giving us exactly the info we needed!
We manually created profiles for PLA, TPU, ABS and then made a PETG profile based on ABS. It would have been quite handy if such profiles had been included with the SD card, but we were happy to be on our way to better prints.
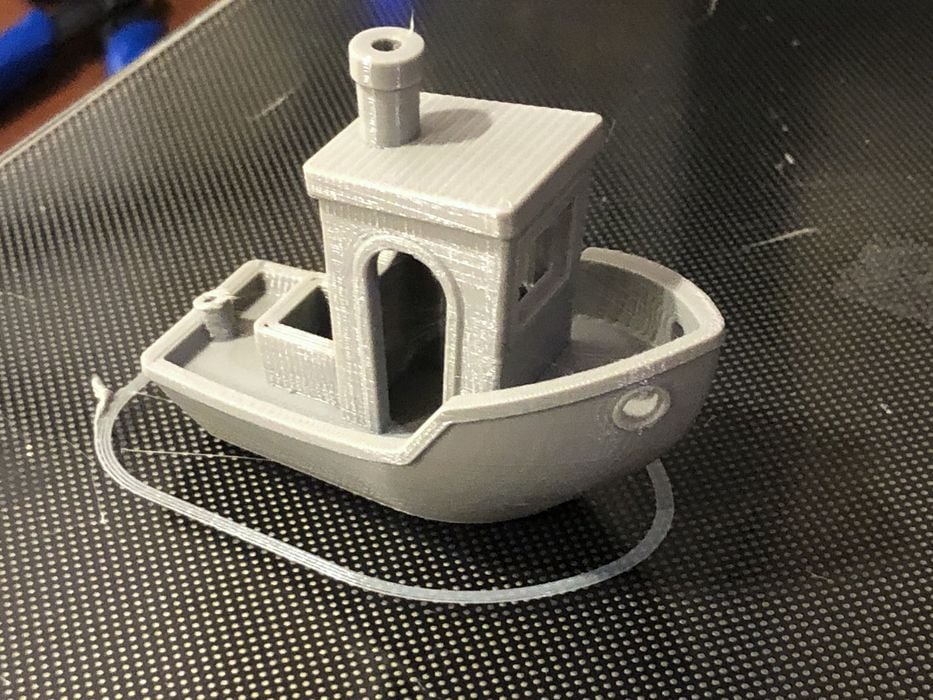
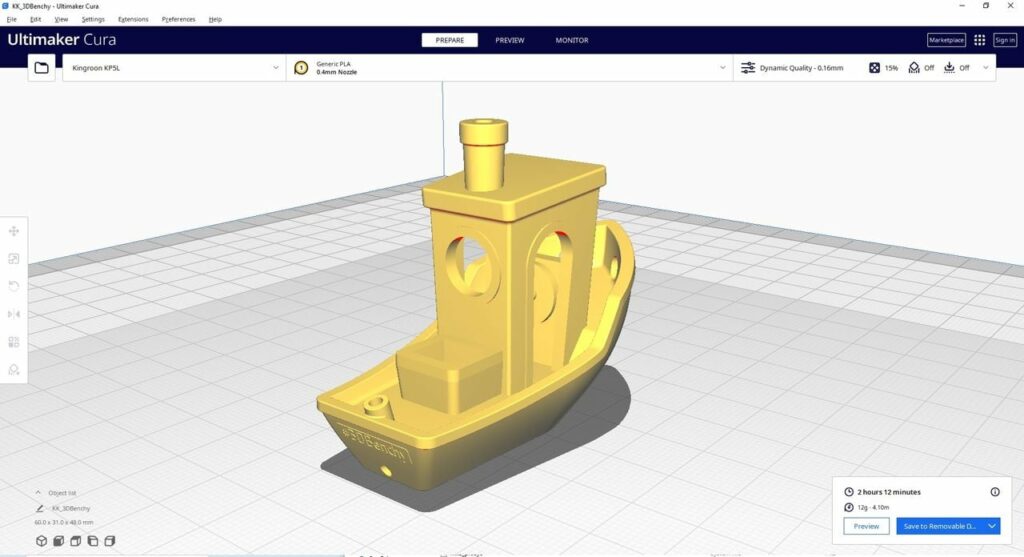
When we ran a Benchy this time it was almost perfect!
During the course of the review we ran into a few problems where the printer began making some very unprinterly sounds.
The extruder fan began making a loud warbling noise that went away if tapped with a finger and the x-axis was lightly squeaking as it moved back and forth.
Kingroon was contacted and promptly gave excellent suggestions to try. We loosened the screws on the extruder fan (in case the fan body was being flexed) and doing so instantly stopped the noise!
Adding some additional lubrication to the x-axis rail and lowering belt tension made it quiet as a mouse.

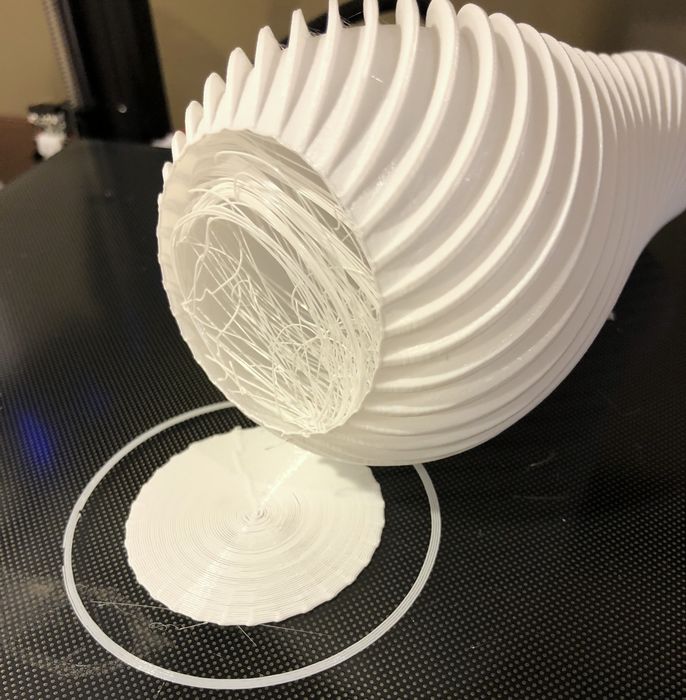
We made a few errors of our own by forgetting to click “Remove All Holes” when we ran our spiral vase print with the “Spiralize Outer Contour” option. What looked like massive stringing issues turned out to just be gcode instructed printing.
Sometimes issues with printers are your own, not the fault of the manufacturer!
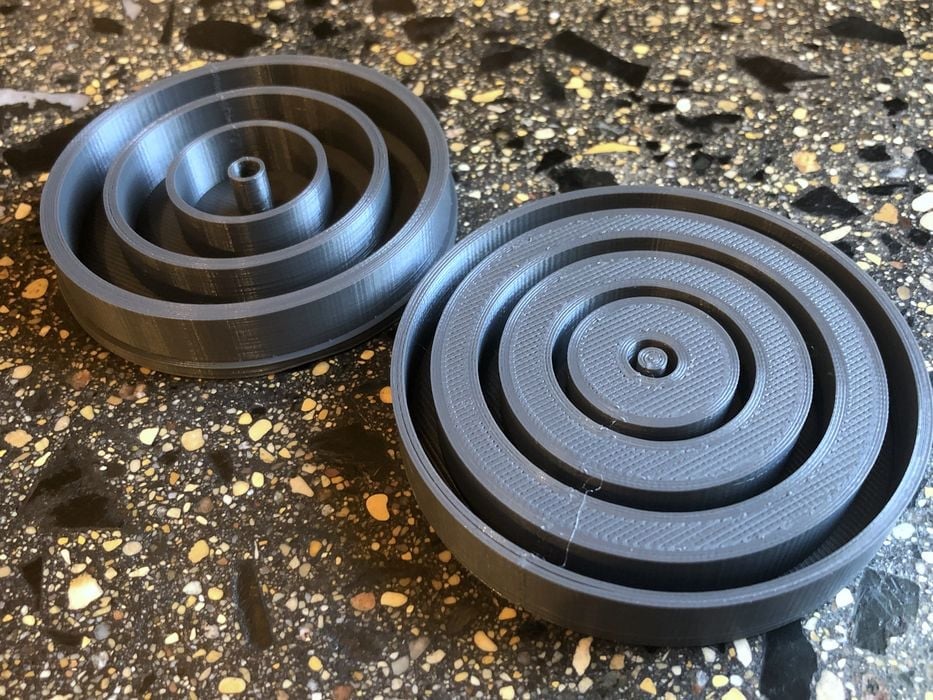
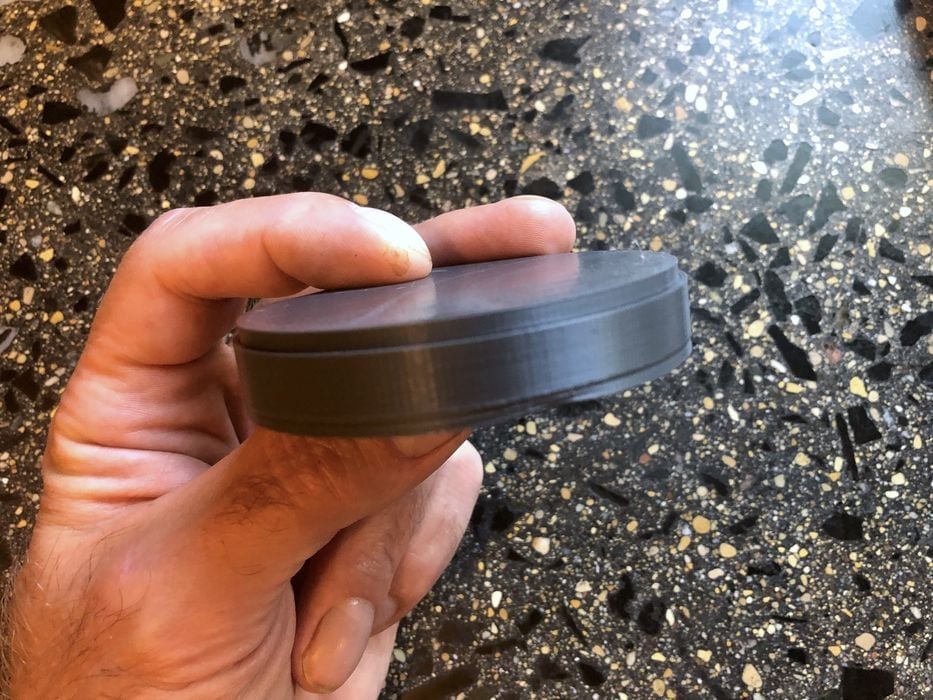
We were very pleased with the dimensional accuracy of the MakerBot Cylindricity Test print, as both halves of the test fit together perfectly right after being plucked off the cool build plate.
We also noted that Ultimaker Cura had estimated this print to take approximately 8h54m, but in fact the actual print time turned out to be a longer 10h6m. This type of estimation discrepancy is commonly found in this type of 3D printer, so no surprise there.
In fact all the prints had some time discrepancy, but this really mattered only in longer run jobs.
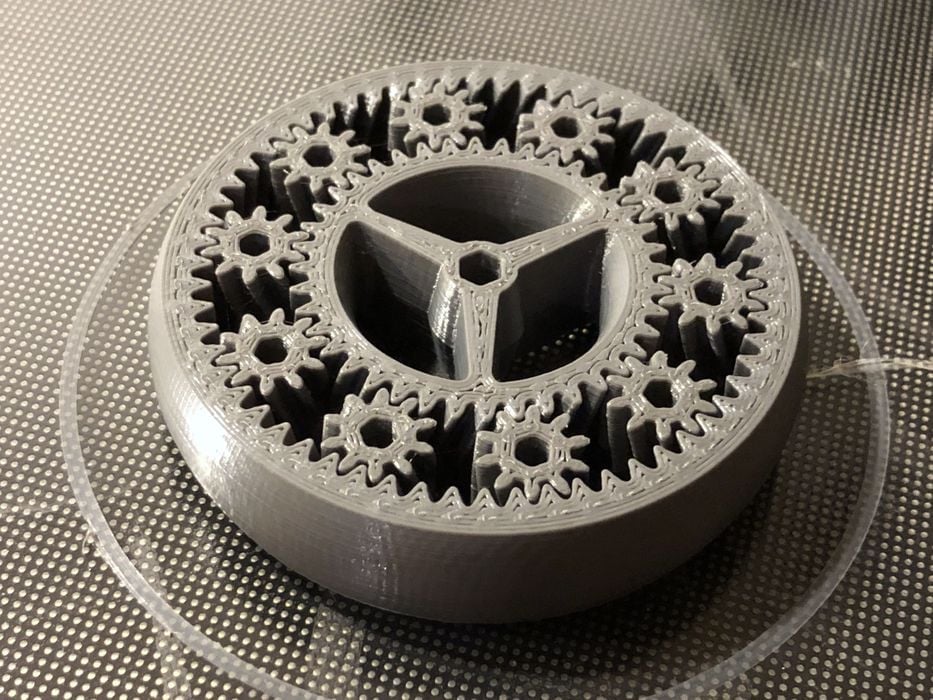
Our Planetary gear print also turned out quite well. It was initially locked in place but freed up easily with some coaxing and then could be spun by holding the center hub and spinning the outer ring quickly with a finger. We were quite impressed!
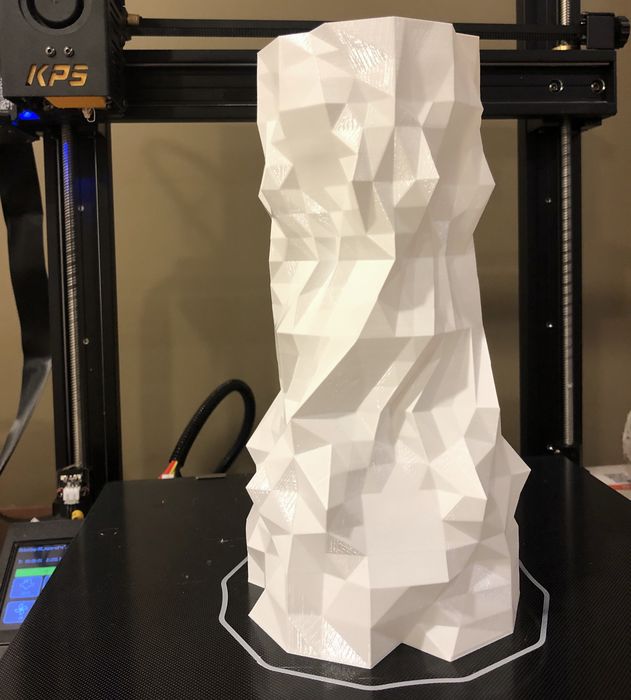
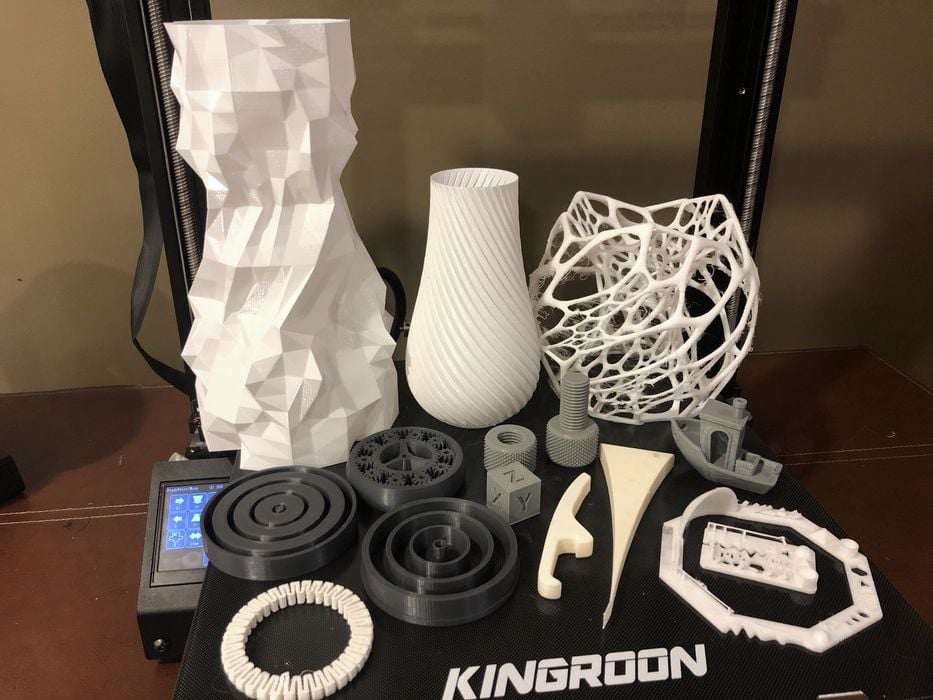
Our tallest attempt was a PETG vase print that was 231.5mm tall and it had no problem hanging on to the print surface for the duration.
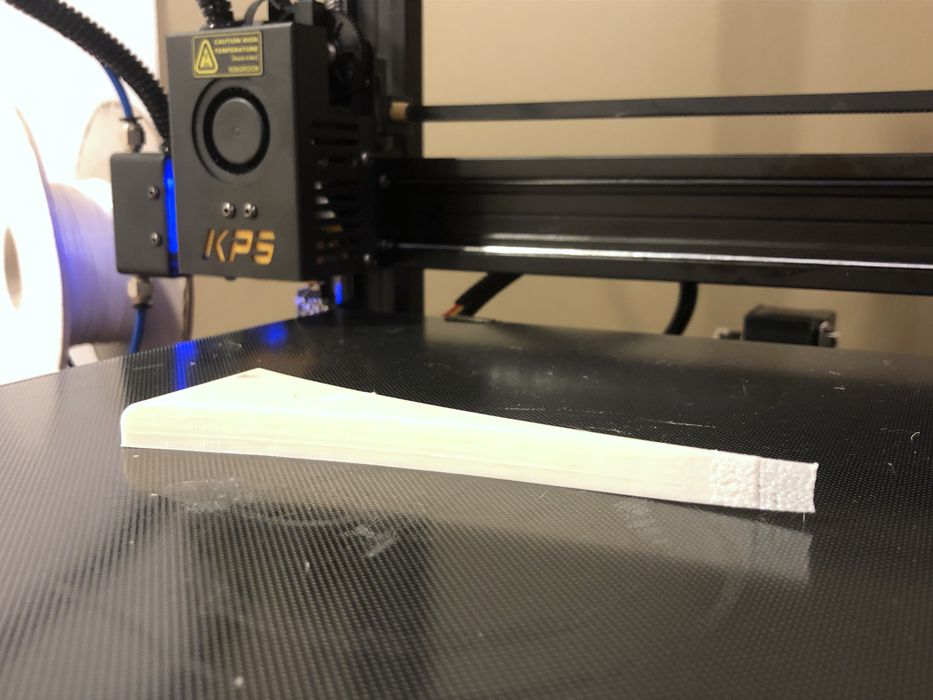
As did our ABS warp test, which lifted off the glass plate only slightly on the thin end.
Our TPU bracelet test print turned out perfectly.

We did have one failure with our Nervous Lamp print, but to be honest it is a tough print and it did manage to somehow recover and hang on to make it to the end.
We had one other hardware issue close to the end of the review where the power supply fan started to make a similar noise to that of the extruder fan.
Kingroon suggested loosening the fan screws and if that did not solve the problem, they would ship a replacement power supply along with the build plate from our earlier issue.
Kingroon KP5L 3D Printer Final Thoughts
The KP5L was excellently packed for shipping and went together pretty quickly. Some of the build instructions were overly simplified or not included in the instructions booklet, but these would not be a big deal for anyone not building their very first 3D printer.
The filament sensor is nice to have, but its location and the extra tubing & fittings made it hard to load filament. That said, Kingroon advised in one of our chats that they have already addressed the issue and were relocating the filament sensor to make things better.
As with any new product there are always a few hiccups to deal with and a warped bed and a few noisy parts aren’t that big of a deal, especially given the excellent customer support from Kingroon and how well the printer performed once it was tuned in. It’s likely they will figure out the plate issue and fix it in subsequent customer shipments.
Adding filament profiles to the SD card to install into Ultimaker Cura certainly would make the printer perform well right away.
Also, a bed leveling probe of some type or simply enabling manual mesh bed leveling in Marlin would help mitigate any issues with the flatness of the build plate.
We found that the full DIY version of the KP5L has an uncompiled version of Marlin available for download, which would be of interest to any intermediate or advanced users who want to customise Marlin.
Despite having a few issues that needed to be sorted out, in the end the KP5L delivered high quality prints that had a good degree of dimensional accuracy and great surface finish, which is all that really matters. We also experienced very good support from the Kingroon staff, who were always responsive and friendly.
The top of the printer frame proudly boasts the slogan “Best 3D Printer”, which is a rather bold statement to make. While they may not be there quite yet, they are certainly well on their way.
KINGROON
KP5L 3D PRINTER
★ BEGINNER 6/10
★ ENTHUSIAST 9/10
★ PRODUCTION 6/10
BEST FEATURES
✔︎ Affordable cost
✔︎ High quality with profiles
✔︎ Great plate adhesion
QUESTIONS
✖︎ Incomplete instructions
✖︎ Filament path awkward
✖︎ Missing firmware features
This is part three of a three part series, please read parts one and two.
Via Kingroon
I’m having a significant problem getting 1st layer adhesion with kingroon PETG filament. Prints start off well, then the object detaches around 10 – 20% thru. I’ve tried printer tape and glue stick to no avail. Releveling the print bed, raising and lowering extruder and bed temperature. 0.4 mm and 0.6 nozzle – brass and steel. With and without a skirt or brim. Not sure I’ve found the Kingroon filament profiles. I’ve successfully printed many PLA objects. Filament is stored in a sealed container with desiccant and I’ve put the filament in a dryer prior to printing. Ordered filament from other sources to try. At a loss for other things to try.
Could you please provide me with the profiles you created for the Kingroon KP5L printer in Ultimaker Cura, thanks.
Sorry if I sent the message again.