
Our review of the Anycubic Photon M3 concludes with an examination of the software environment, print quality and final thoughts.
This is part three of a three part series, please read parts one and two.
Anycubic Photon M3 Plus Software
There are a couple of software components used with the Photon M3 Plus.

The first and most important is the slicer, Anycubic’s Photon Workshop. This is a pretty decent job preparation tool that provides all the usual functions. I’ve used it quite a bit when testing this and other Anycubic equipment, and find it more than adequate.
Where it may lack function is in advanced automated support generation, a common problem with resin 3D print slicers. Photon Workshop does generate supports, but I almost always find I have augment what it believes the supports should be with my own additions. Occasionally you’ll see islands that really should have supports, but don’t.
It is possible to slice 3D models using other slicers, and then simply load the GCODE up onto the Photon M3 Plus.
I should note that Anycubic is quite aggressive in updating Photon Workshop and I’ve seen multiple updates during my experience with them. In fact, I received an update during the Photon M3 Plus testing.
The second software component is the Anycubic Cloud, which is accessed from the Anycubic mobile app, the third piece to the software puzzle.
Recall that the Photon M3 Plus includes a WiFi connection, and that’s what enables the cloud and app to work. Of course, you must connect to your local WiFi network, and I was curious how this is done.
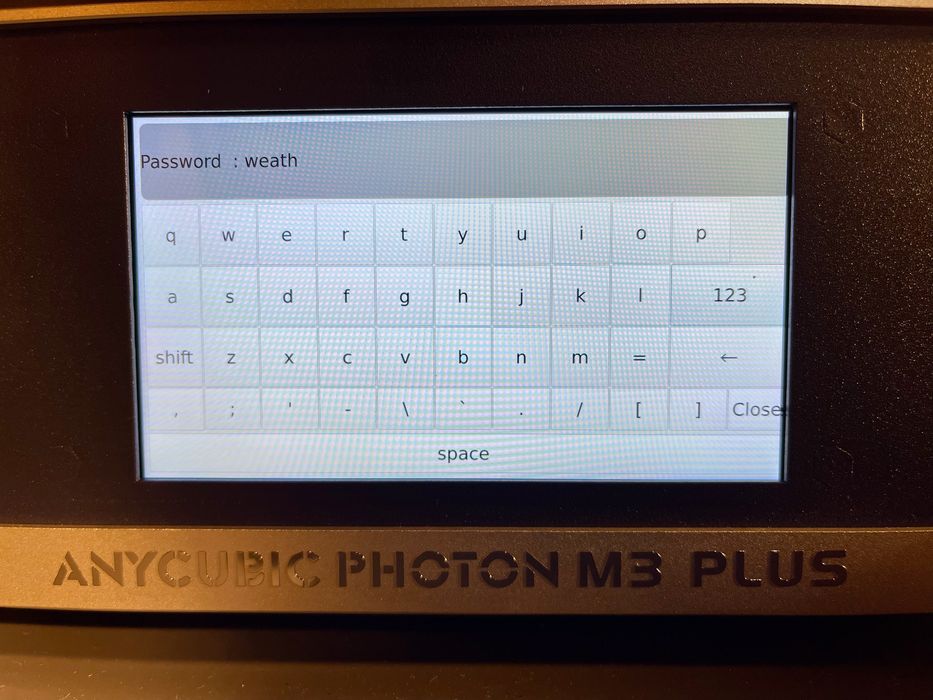
Many machines I’ve used involve very convoluted processes for setting up a WiFi network, but that’s not the case on the Photon M3 Plus. Amazingly, it displays a standard keyboard on the large touchscreen and you can simply type in your SSID password.
Once you’ve set up the WiFi network, the Photon M3 Plus connects to the Anycubic cloud.
This is where it gets interesting, as you can operate the Photon M3 Plus almost completely from the mobile app. Of course, you’ll need to sign up to the Anycubic Cloud online before you can proceed, which is easily done.

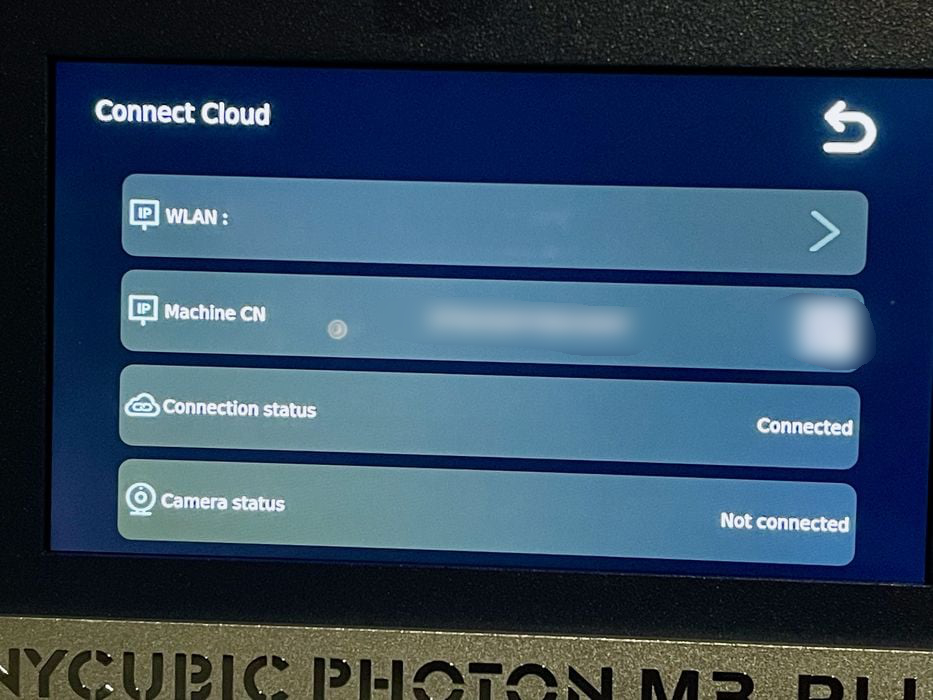
Then you can add your printer to your account. You’ll need to specify the “Machine CN”, a long code that uniquely identifies your machine. Note that I’ve blurred mine out in the image above so you can’t take over my machine!
It’s also possible to use the QR code on the right via the mobile app and camera to catch the Machine CN instead of typing it in. This is quite convenient — and I’ve blurred that out, too.
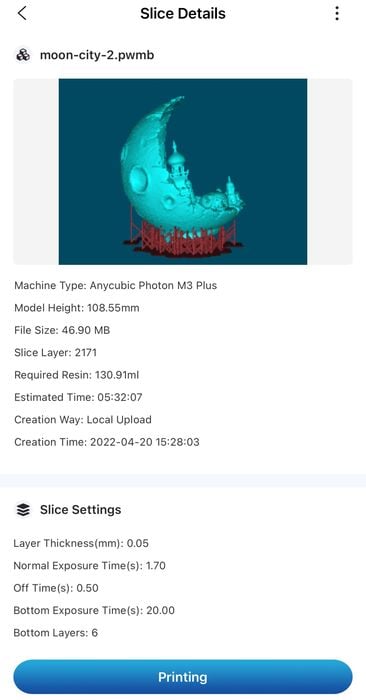
But how do you get sliced files to the printer? It’s actually a very easy process:
- Sign into your Anycubic account in Photon Workshop
- Import a 3D model to Photon Workshop
- Set up and slice the 3D model
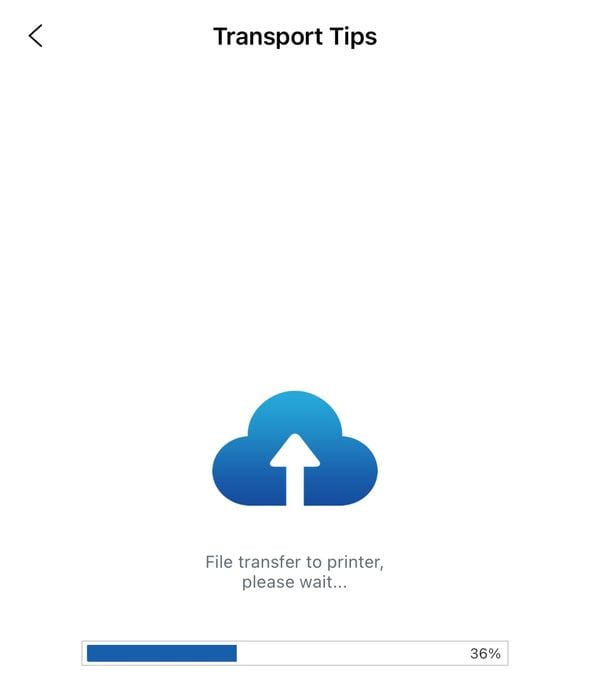
- Save the GCODE to your Anycubic Cloud account
There’s one annoying problem I noticed at this point: Photon Workshop doesn’t seem to remember your previous login to the cloud. In other words, each time you launch Photon Workshop, you must sign in again. I’m hoping Anycubic changes the software to keep your login token for at least a few weeks before expiry.
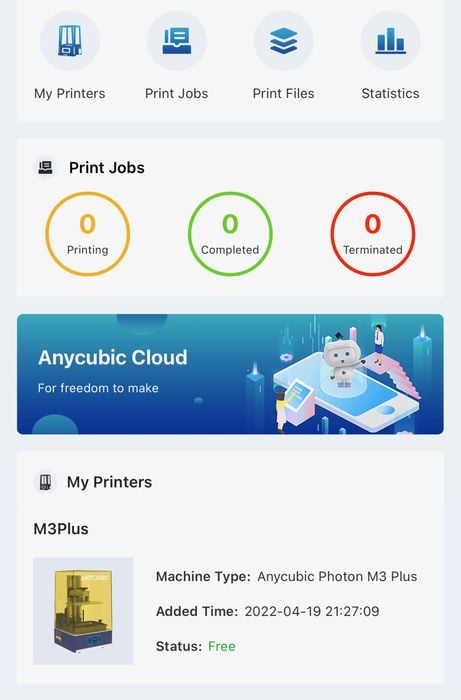
At that point the sliced file appears as a “file” in your Anycubic account. You simply select it, pick a printer from those you’ve added and the print starts!
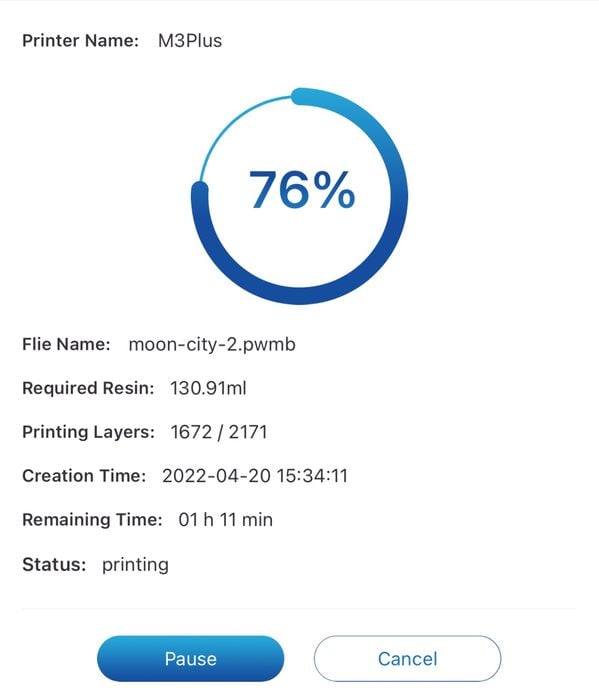
Monitoring the progress of the job is easy from the mobile app, as it shows both layers and time remaining, and is accurate.
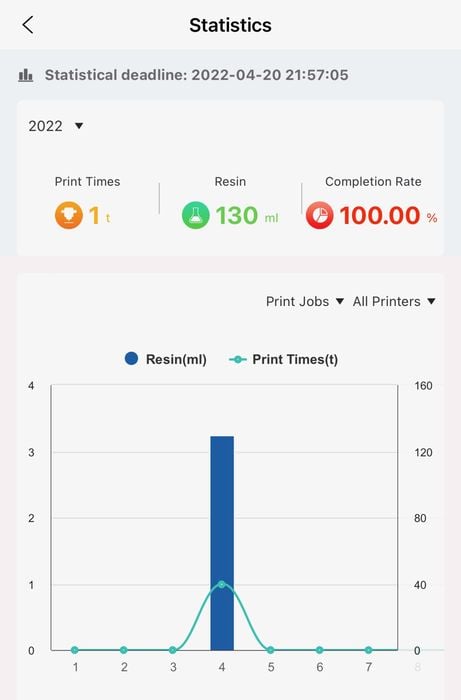
There is an unusual statistical display that shows the consumption of resin over the elapsed time of the print job. I’m not sure how I can use this information, but it is interesting.
If you happen to have the optional camera installed, you’ll be able to see the progress of the print job. This means if there is a failure you can quickly stop the job and avoid wasting precious resin.
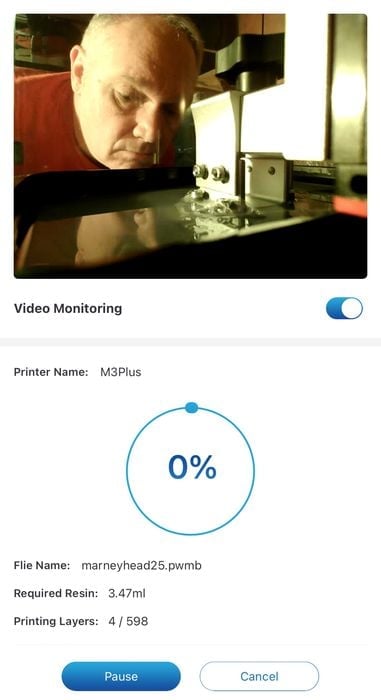
While the camera works very well, I found one issue: it is only active during a print job. This means that you cannot check the machine to see if the build plate is clear before starting a job. That’s unfortunate, as it means you must physically visit the machine to perform the check, thus reducing the app’s benefit. I checked with Anycubic, and they say they are aware of the issue and intend on providing this functionality later this year with a software update.
I should also point out that the Anycubic Cloud is available on the Internet, which means you can monitor and control your Photon M3 Plus from anywhere, not just your local LAN.
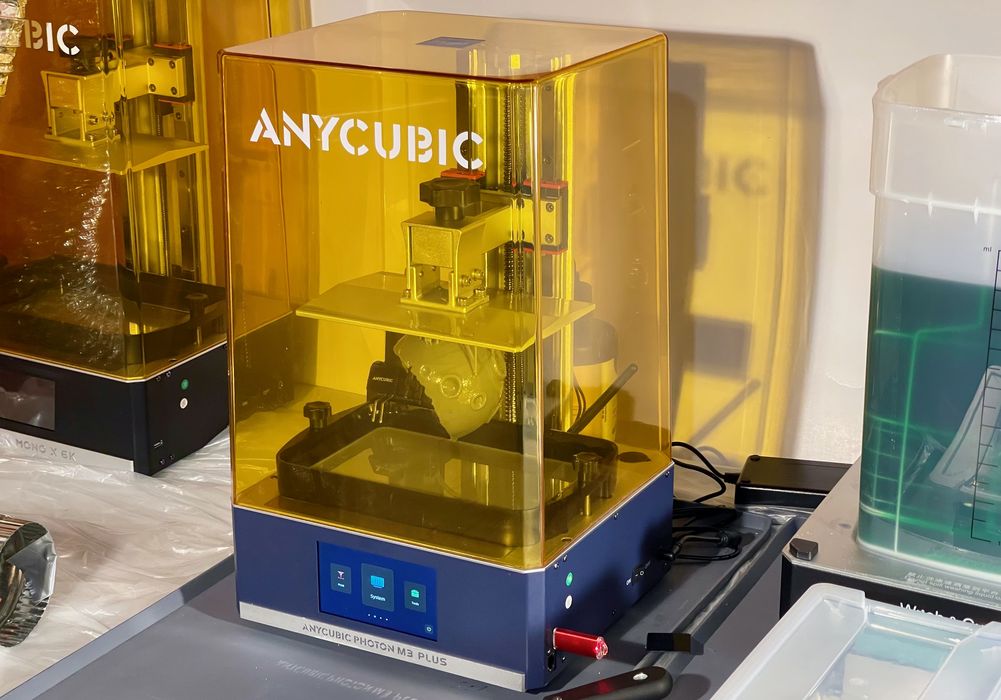
Anycubic Photon M3 Plus Print Results
I found the Photon M3 Plus to be a very reliable resin 3D printer; the only print failures I had during testing were due to my poor placement of support structures. I suppose it could also be said that Photon Workshop might have done a better job of automatically generating supports in those instances, however.

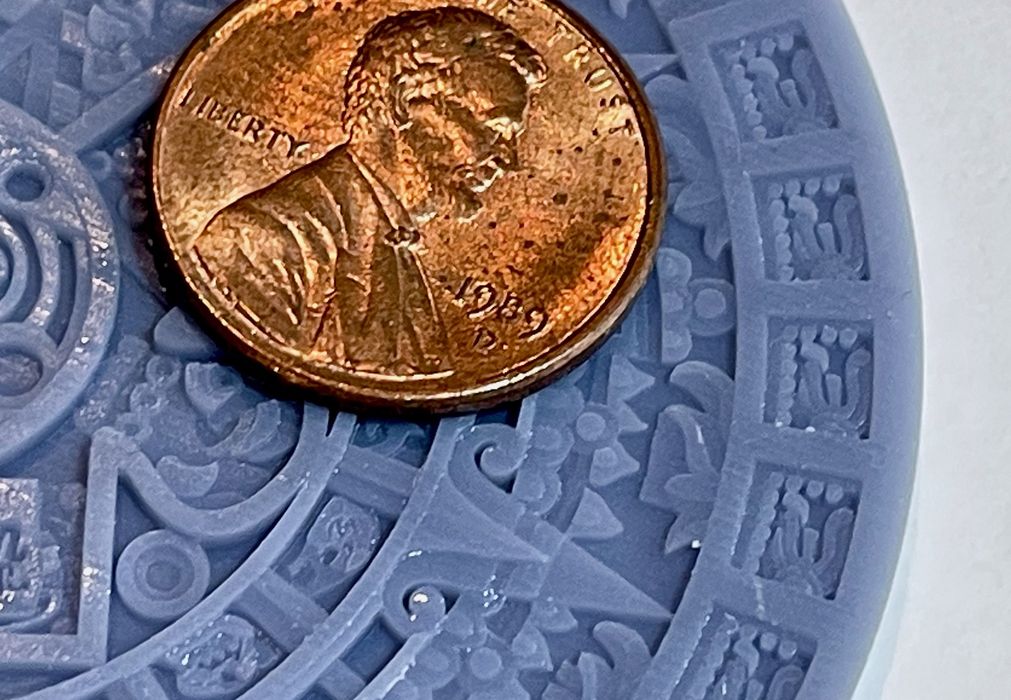
As for the print quality, I found it to be outstanding, no doubt due to the 6K LCD panel’s huge number of pixels. Here we see a highly detailed Aztec sculpture.
And again with a close up view of the detail, with a coin for scale.
My standard “Robert Head” print came out extremely well. It’s difficult to see layer lines, especially after you tune the resin parameters carefully.
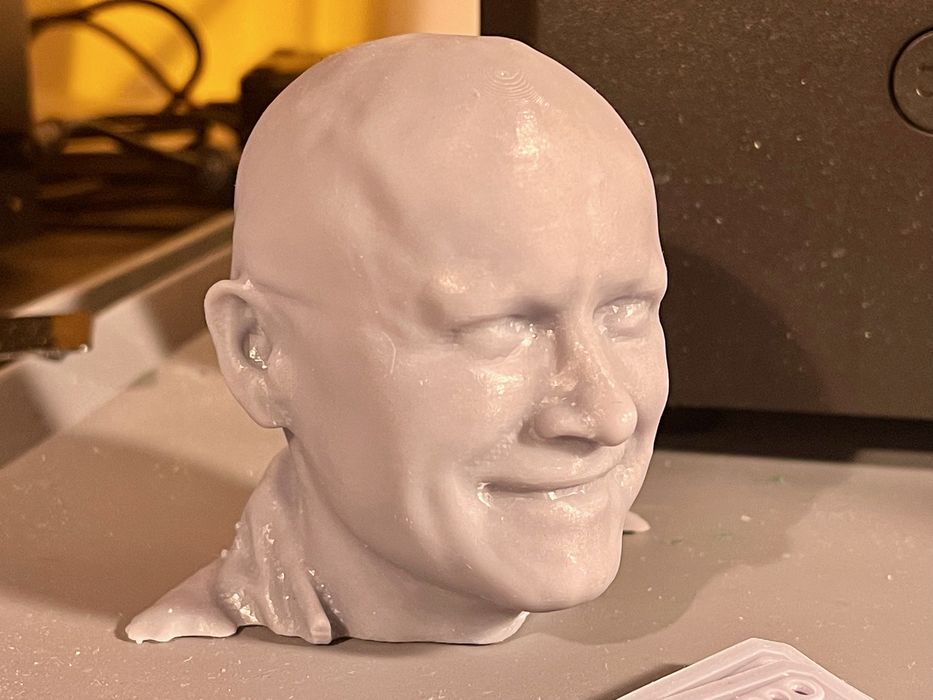
There seems to be no issues with the quality of prints made on the Photon M3 Plus
Anycubic Photon M3 Plus Final Thoughts
The Photon M3 Plus is a terrific desktop resin 3D printer. It includes quite a few advanced features, provides a reliable 3D printing experience and produces prints of excellent quality. I intend on using this machine going forward for my high resolution prints.
The Photon M3 Plus is available from Anycubic at a list price of US$699.
ANYCUBIC
PHOTON M3 PLUS 3D PRINTER
★ BEGINNER 7/10
★ ENTHUSIAST 9/10
★ PRODUCTION 6/10
BEST FEATURES
✔︎ Outstanding print quality
✔︎ Automated resin refill
✔︎ Fancy cloud system
QUESTIONS
✖︎ Loose build plate mount
✖︎ Camera only during printing
✖︎ Support generation
This is part three of a three part series, please read parts one and two.
Via Anycubic