
Just prior to its release, we obtained a Kobra Go 3D printer from Anycubic and gave it a good test.
This is part one of a three part series, please read parts two and three.
Anycubic Kobra Go Background
Anycubic is one of the leading providers of desktop 3D printers, having made many different models over the years. We’ve been privileged to do hands on tests of several units recently, and now we’re doing another one: the Kobra Go.
Anycubic has several different lines of equipment, and one of them is the Kobra line, which is a set of open-gantry style devices of varying size. Our previous experiences with Kobra equipment were quite good, so we were expecting a lot from the Kobra Go.
However, this device is unique in that it carries an incredibly low price: only US$189 at product launch. This is perhaps the lowest price we’ve ever seen for a competent desktop 3D printer. There have been lower prices on some machines in the past, but none with the features and capabilities of the Kobra Go.
Anycubic Kobra Go Specifications and Features
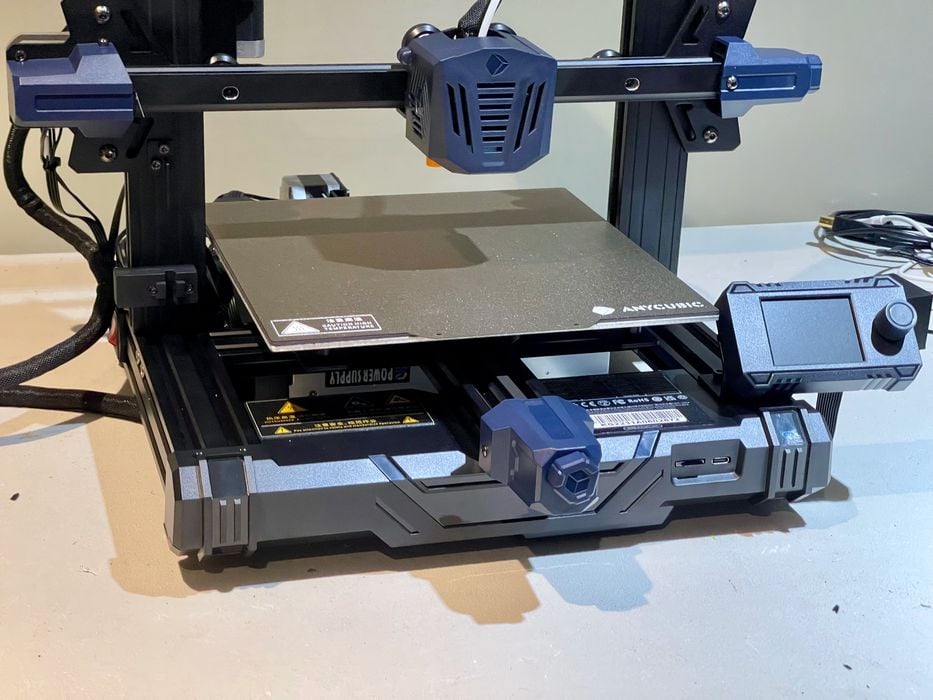
The Kobra Go is a FFF-style 3D printer, and it uses standard 1.75mm filament with a 0.4mm nozzle. The system’s build volume is a healthy 220 x 220 x 250 mm, enabling it able to print most common objects. The extruder is a Bowden-style affair, with a short tube leading to the hot end.
The system includes a heated print surface, up to 110C, enabling it to theoretically handle materials like ABS. There’s also a magnetically attached removable print plate that allows for easy print removal with a twist of the plate.
Those are pretty standard features, and you’d find them on any low-priced 3D printer. But here is where the Kobra Go is different: it includes a number of so-called advanced features normally seen on more expensive gear. These include:
- Anycubic’s LeviQ automated leveling process (25 points)
- Filament out detection and handling process
- Color control screen
- Belt adjustment knobs
How does Anycubic achieve this low pricing with such features? Their approach is to reduce their assembly work in production. In other words, YOU are doing a lot of the assembly. Yes, the Kobra Go is a kit, and of a type I haven’t seen for years.
Most of today’s “kits” are really just the assembled machine that has the gantry removed. Install the gantry and you’re done. That’s not at all the case with the Kobra Go, as there are many bags of bolts and parts to put together.
Anycubic terms this assembly process as a kind of feature, where you might have fun and learn about the machine. Having assembled many different 3D printers, and some involving piles of parts, I was a bit skeptical.
Let’s see what happened.
Anycubic Kobra Go Unboxing and Assembly
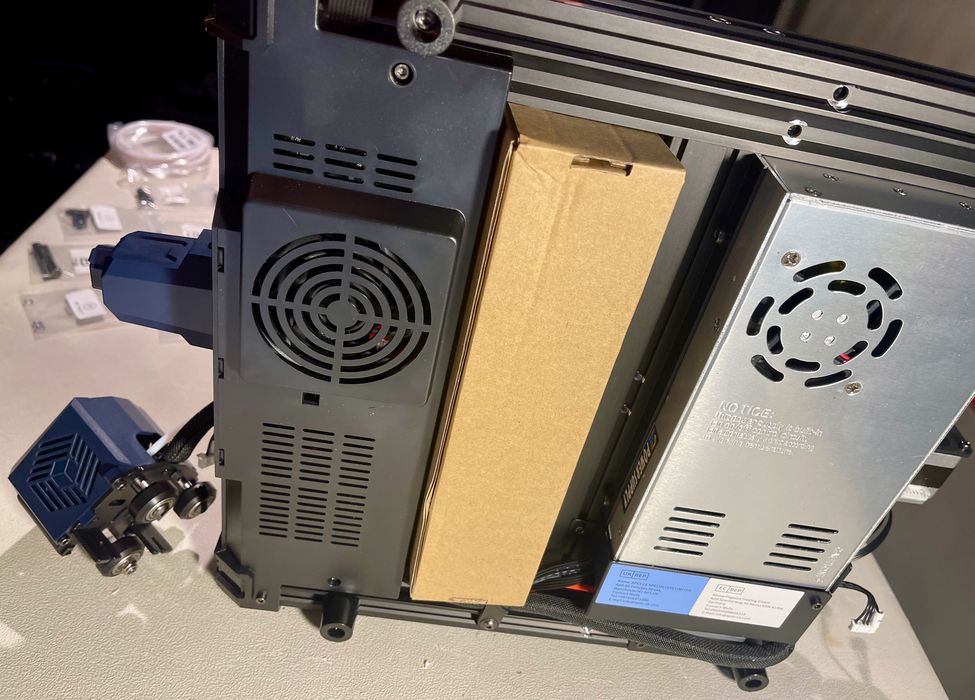
As usual, Anycubic did an outstanding job of packing the Kobra Go parts. There is little risk of broken parts with all the foam involved, and I’d be concerned only if the box was literally run over by a truck.
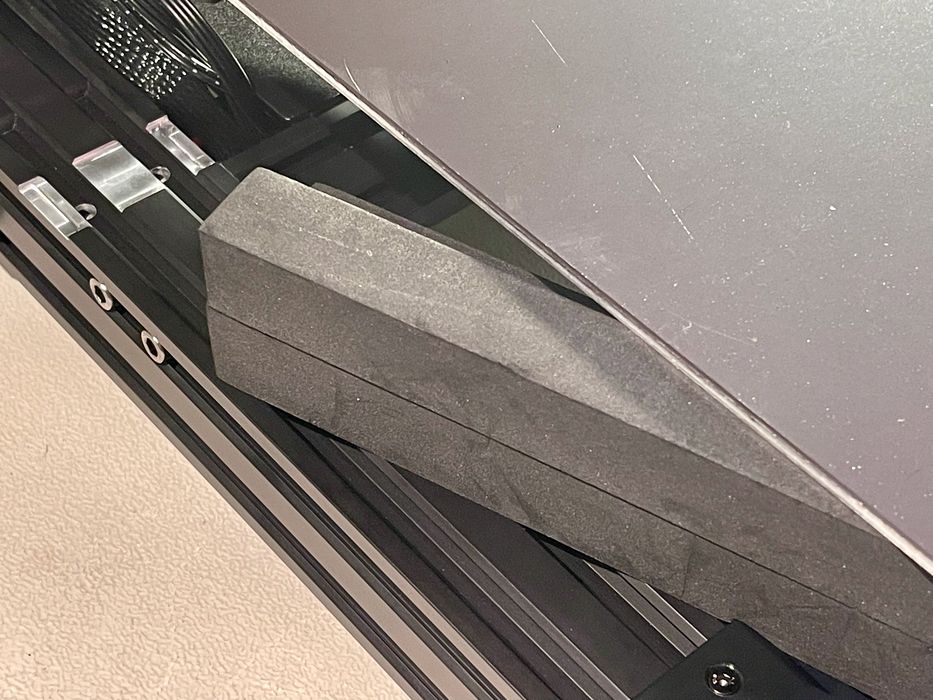
The print plate was supported by camouflaged foam inserts that had to be removed. I didn’t notice these at first because they blended into the machine really well.
However, I did notice one interesting thing: the shipping box was noticeably smaller than a typical 3D printer box, even for a machine with similar build volume. As it turned out, this was due to the assembly process: Anycubic could more efficiently pack the box when the machine was in more pieces.
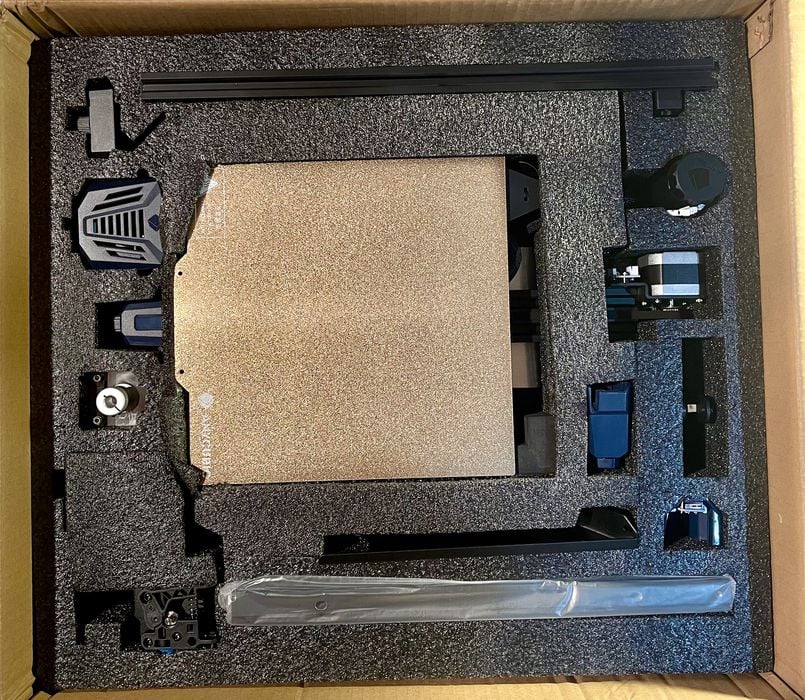
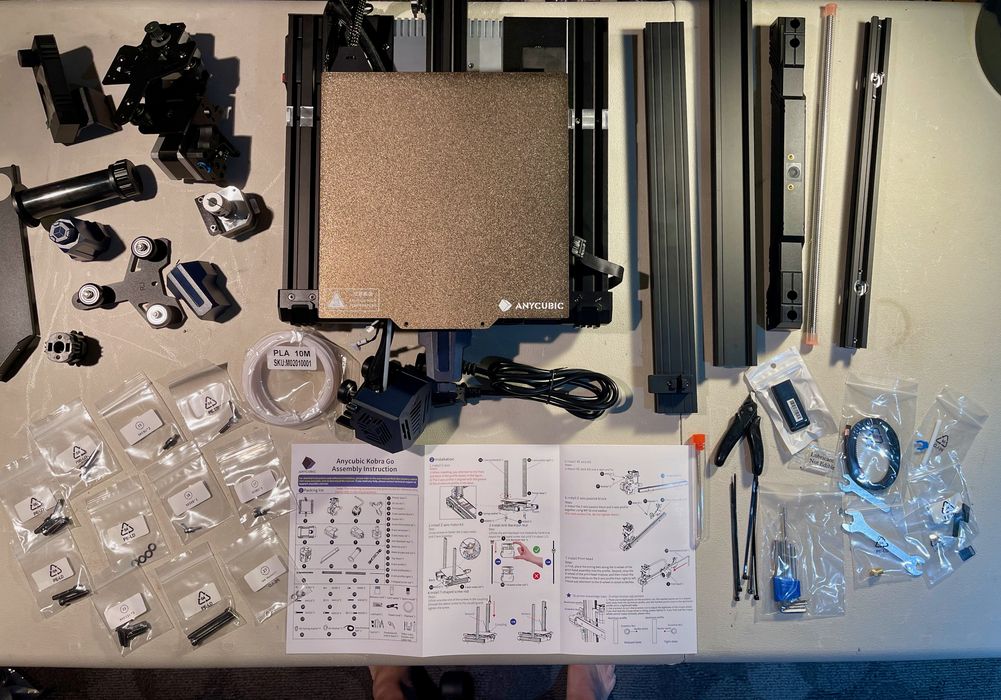
The first stage was to lay out the parts and see what I had. Above is the traditional “all laid out” pic.
But it’s wrong!
I then discovered a hidden “toolbox” of even more stuff tucked underneath the base unit. Evidently Anycubic is being really creative here in reducing the shipment volume.
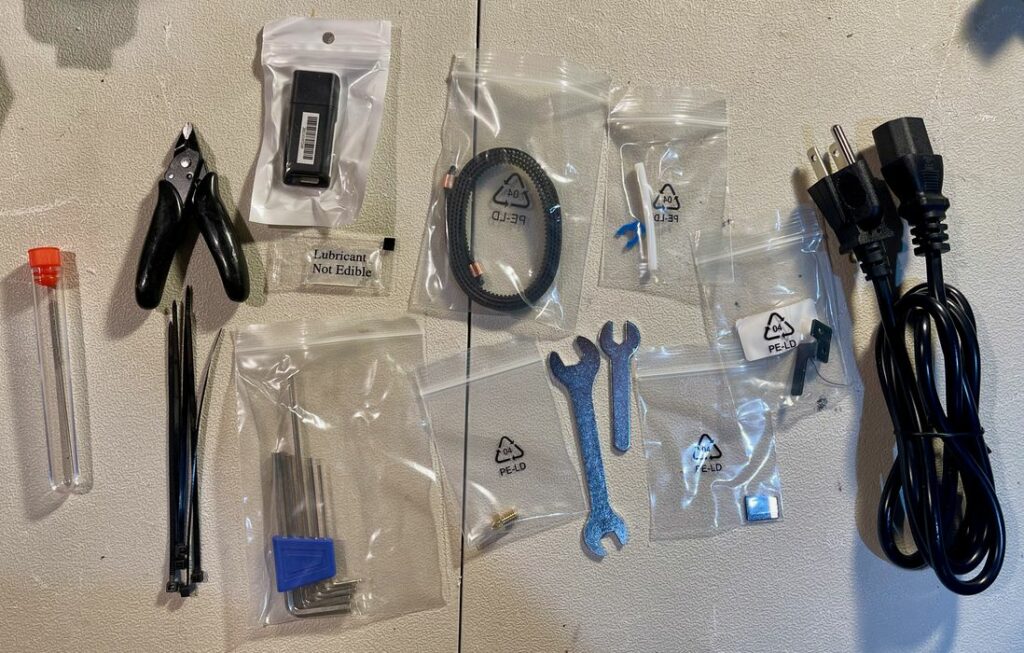
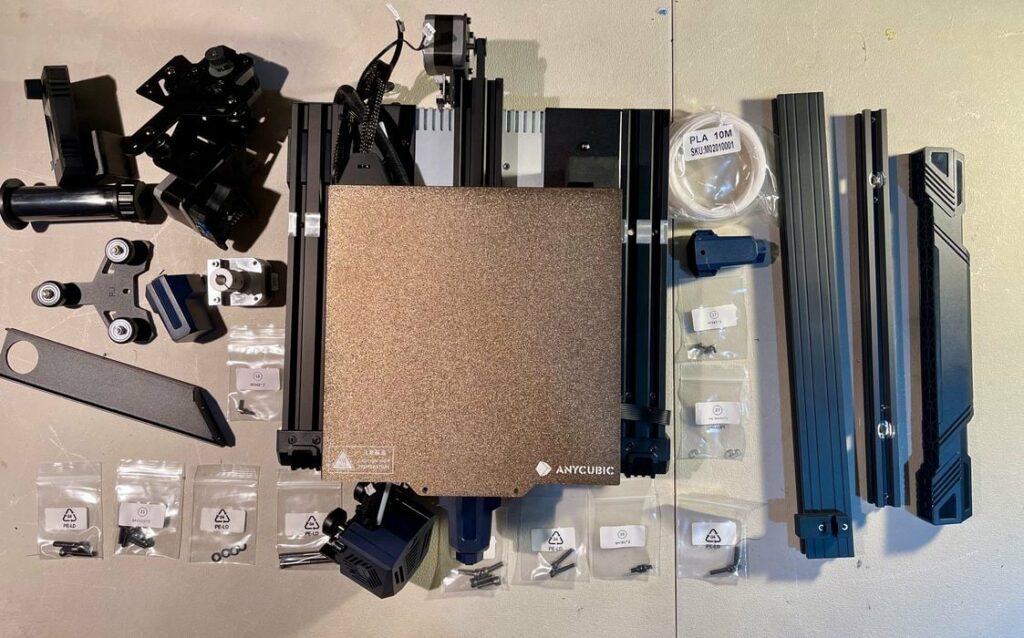
Anyhow, after liberating more parts from the toolbox, I was left with all this:
Compare this to the parts from another contemporary machine, the Mingda Magician X, which we reviewed recently:
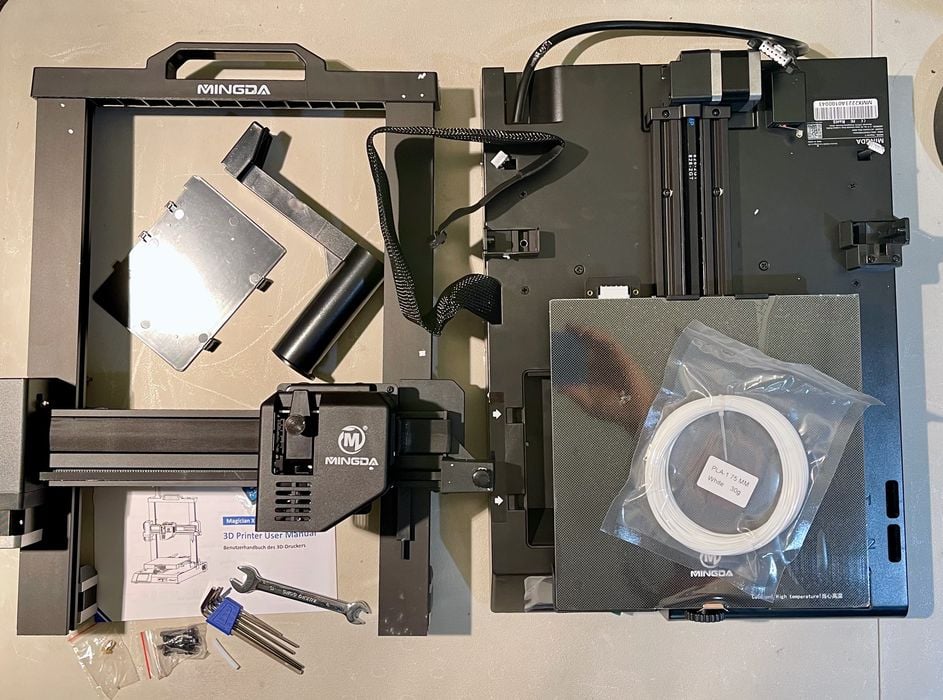
Clearly, this is a lot more items to put together than the typical desktop 3D printer these days.

The assembly instructions seemed mostly clear, and fortunately the text was large enough to read, unlike those for certain other machines.
I set about assembling the Kobra Go, and was very pleasantly surprised: in spite of the larger number of parts, it was a breeze to put together.
I won’t go through all the steps, but let me highlight some of the ways Anycubic has made this a fun and easy assembly process.
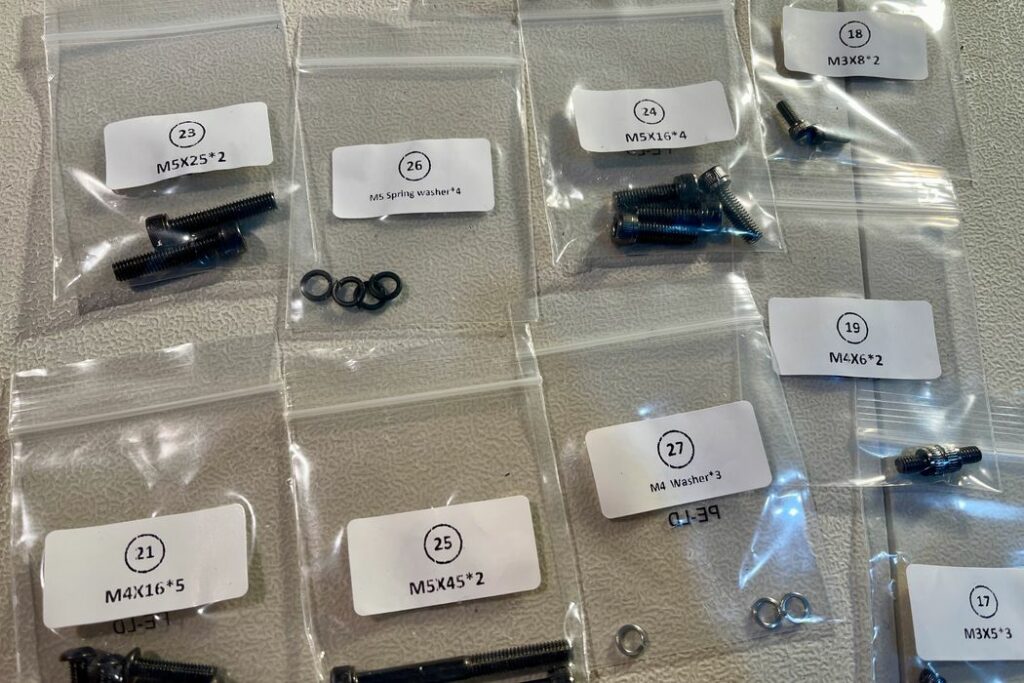
The bolts are all separately bagged and numbered.

These numbers correspond to the instructions, so there’s no need to guess whether it’s an M5-12 or an M5-15 bolt, for example. Just use ‘em and toss the bag afterwards. Easy!
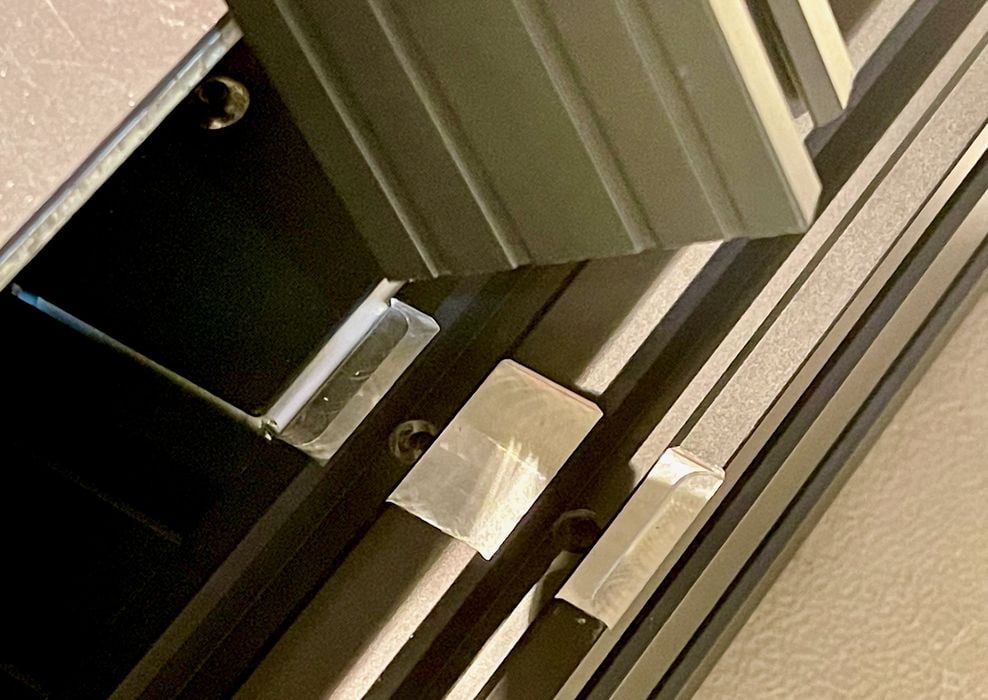
Struts are placed in very clear CNC-milled notches on the base. There is no way to install them incorrectly. I found every bolt very easy to access and tighten, and everything was aligned just perfectly.
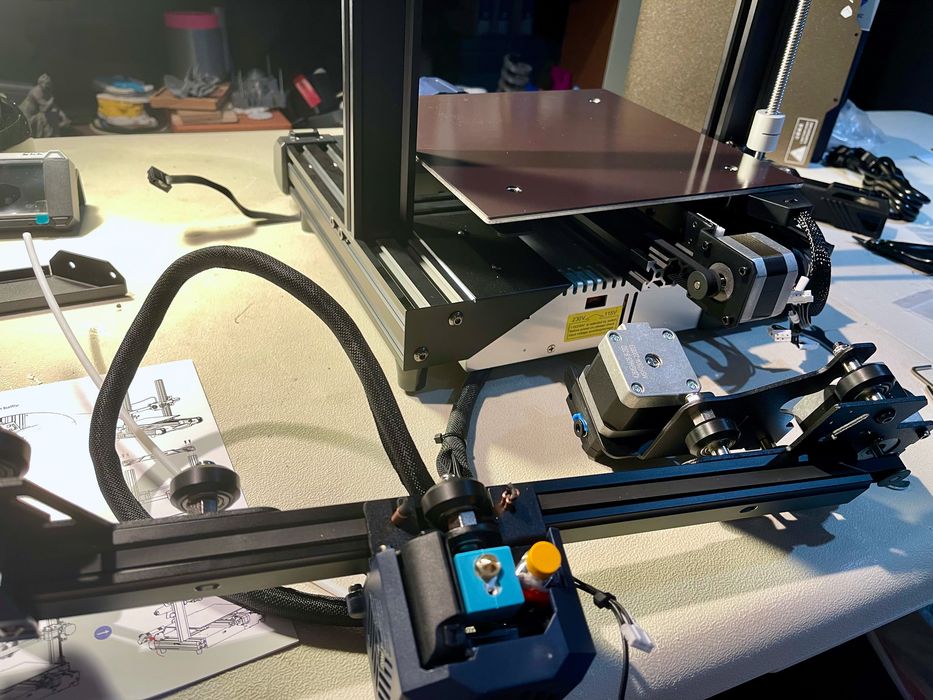
Installing belts is always trouble on a 3D printer, but here it was so easy. Just pop the loose belt ends into the toolhead as above, and then crank the handy belt tightener.
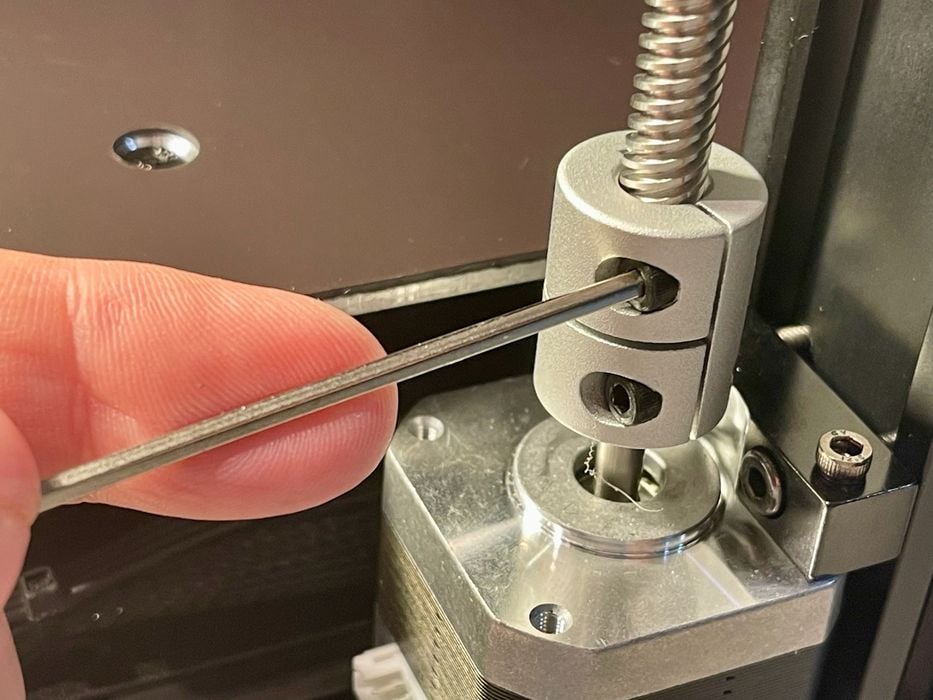
Installing the Z-axis threaded rod was a bit unusual, but again easy to do.
Anycubic went as far as to make notches for incredibly easy part alignment. This is an easy thing to do that I haven’t seen on other kit 3D printers.
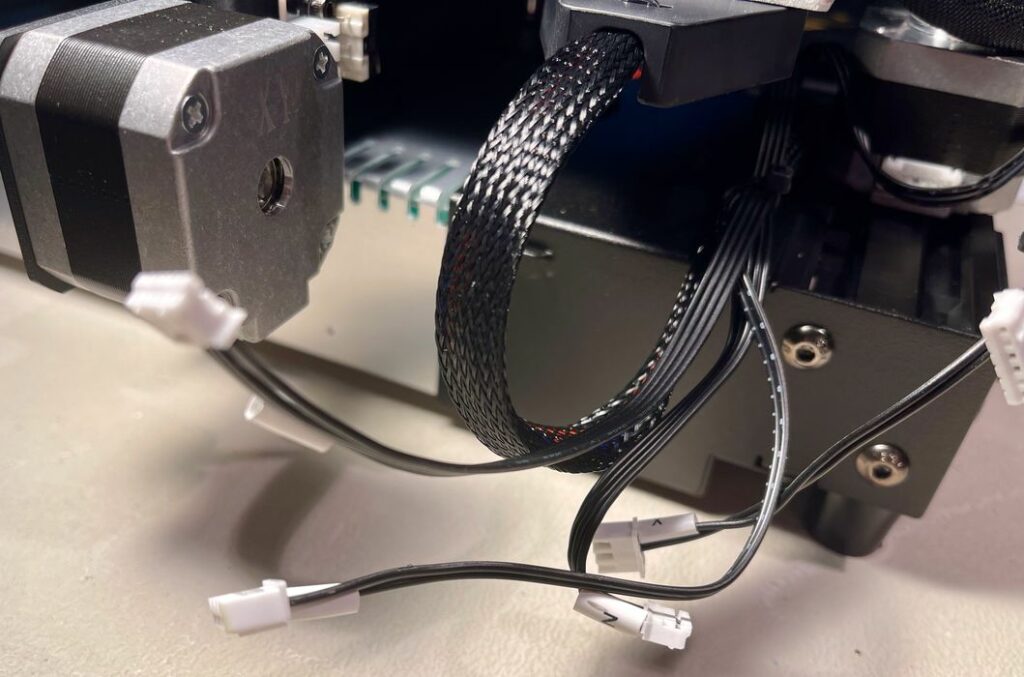
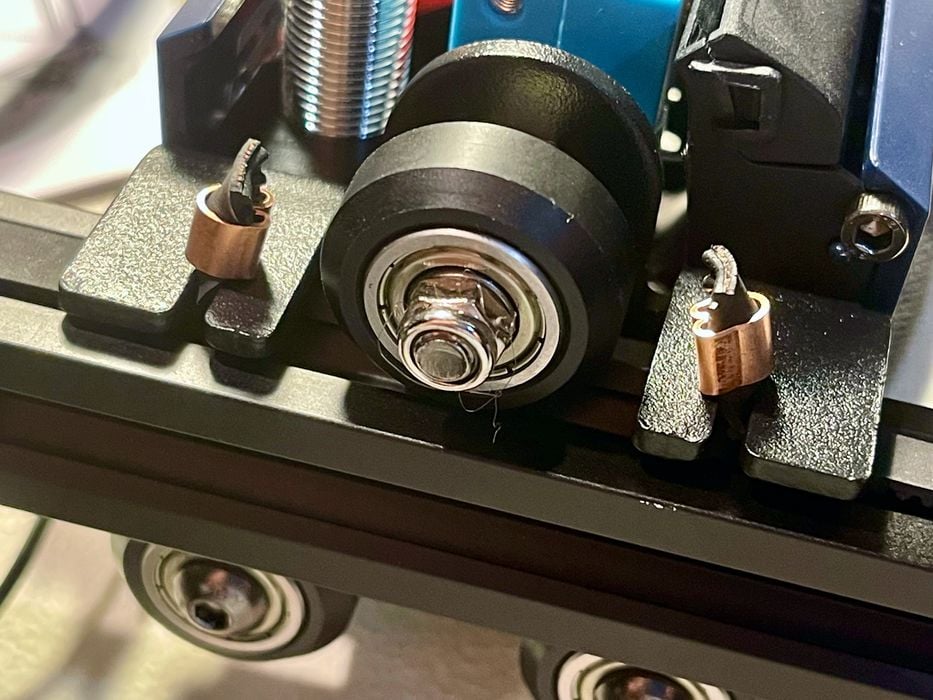
There weren’t that many cables to plug in, and the locations for each were pretty obvious.
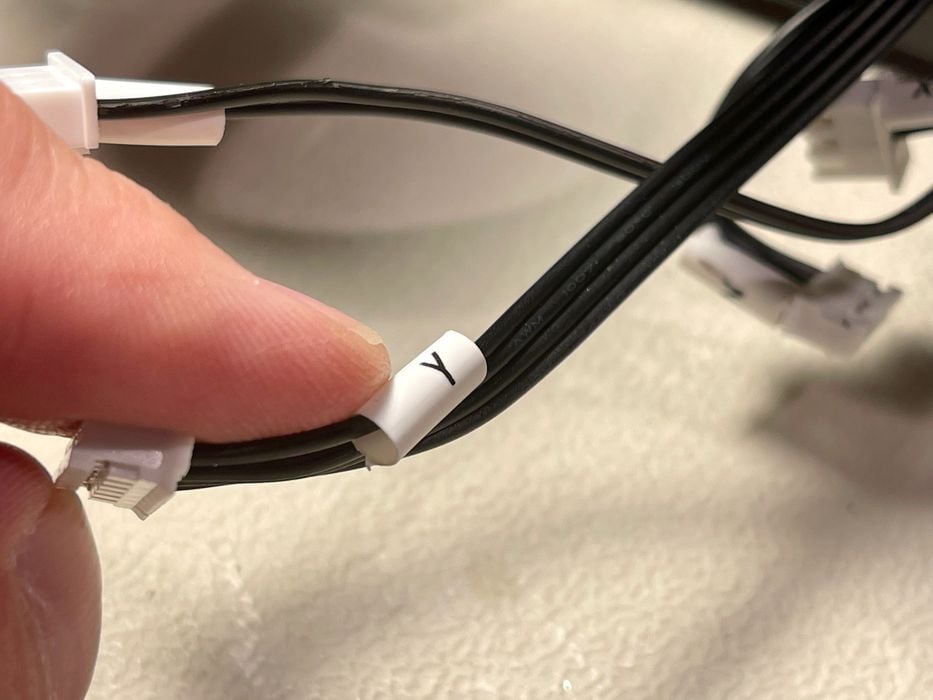
Nevertheless, Anycubic labeled every cable very clearly, so it was straightforward to determine how to plug them in.
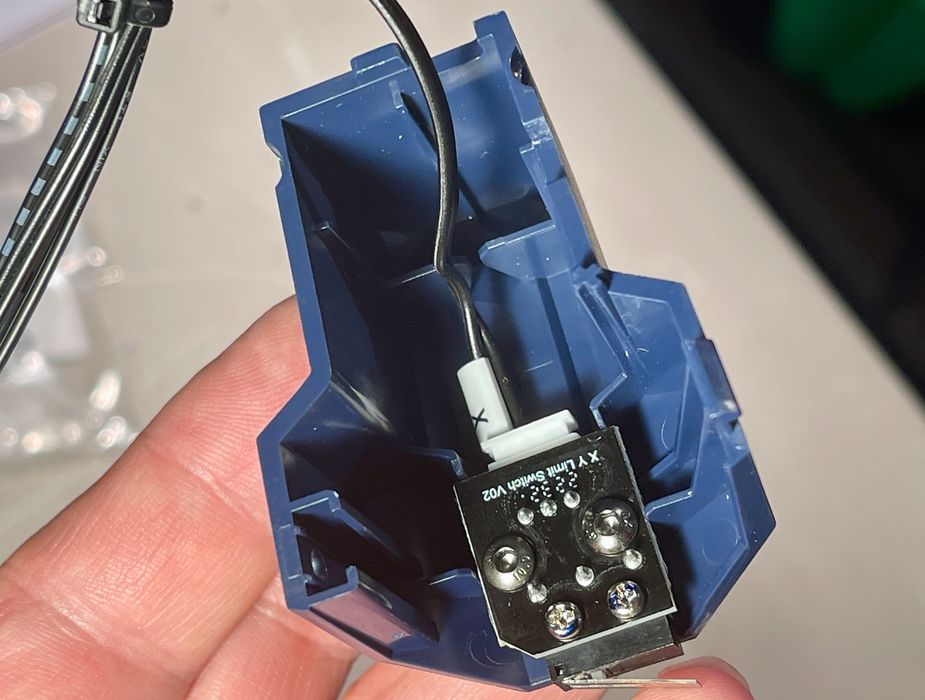
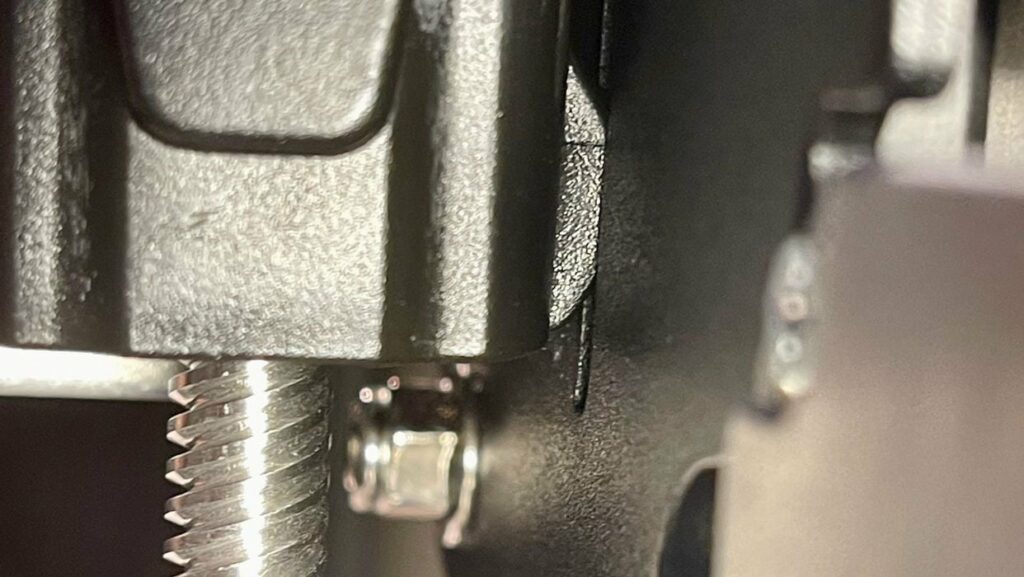
Only one cable attachment was even slightly tricky. This one had to be placed inside a housing where you couldn’t easily see it. But it turned out to be easy to do anyway.
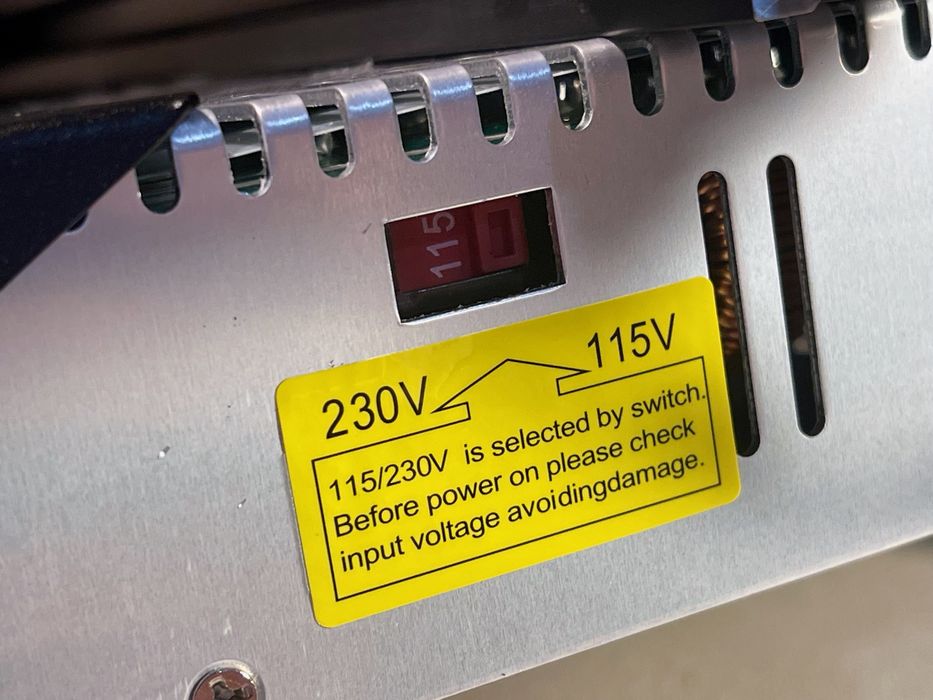
The final bit of assembly required was to set the voltage correctly. I always mention this because if you don’t set this to match your location’s voltage, you risk damaging the equipment. Fortunately, Anycubic located the voltage switch in a very easy to see location.
At this point the Kobra Go was assembled! My elapsed time to do the entire install — including stopping to take pictures for this post — was less than two hours. I think it could be done a lot faster, and if I had another to do I could probably get it done in 30 minutes.
This is part one of a three part series, please read parts two and three.
Via Anycubic