

This is part five of a series describing practical methods of capturing 3D scans of museum sculptures.
I’ve had great success 3D scanning and subsequently 3D printing sculptures from museums around the world, so I thought I’d tell you how it can be done.
There’s much to tell, so this story will be split into several parts:
Part 1: Getting Organized
Part 2: Selecting Subjects
Part 3: Performing The Scans
Part 4: Processing Your Scans
Part 5: Fixing The Models
Part 6: Printing The Scans and Beyond
In your journey to capture and print sculptures, you have now reached the stage where we have raw captures, but it’s very likely they are not printable. Actually, that’s a certainty. Your task at this point is to modify the digital captures into truly printable 3D models.
These adjustments can be made in several different 3D modeling tools and so it really depends on which tools you happen to have. However, everyone has access to many free tools, so that’s what we recommend in the case you have no other ready-to-use options. For this we recommend MeshMixer, although some tasks can also be done by the free NetFabb and MeshLab, too.
Your prime objectives at this point are to:
- Remove any extraneous items accidentally captured (e.g. the floor, nearby items, etc)
- Produce a flat base on the model to facilitate printing
- Close any holes in the skin of the capture
- Adjust any mis-scanned portions
The first two goals are easily accomplished by using MeshMixer’s “plane cut” feature. Essentially you perform a series of perpendicular plane cuts to both remove extraneous stuff and at the same time slice off the bottom to produce a flat base. Several other tools also offer a Plane Cut feature.
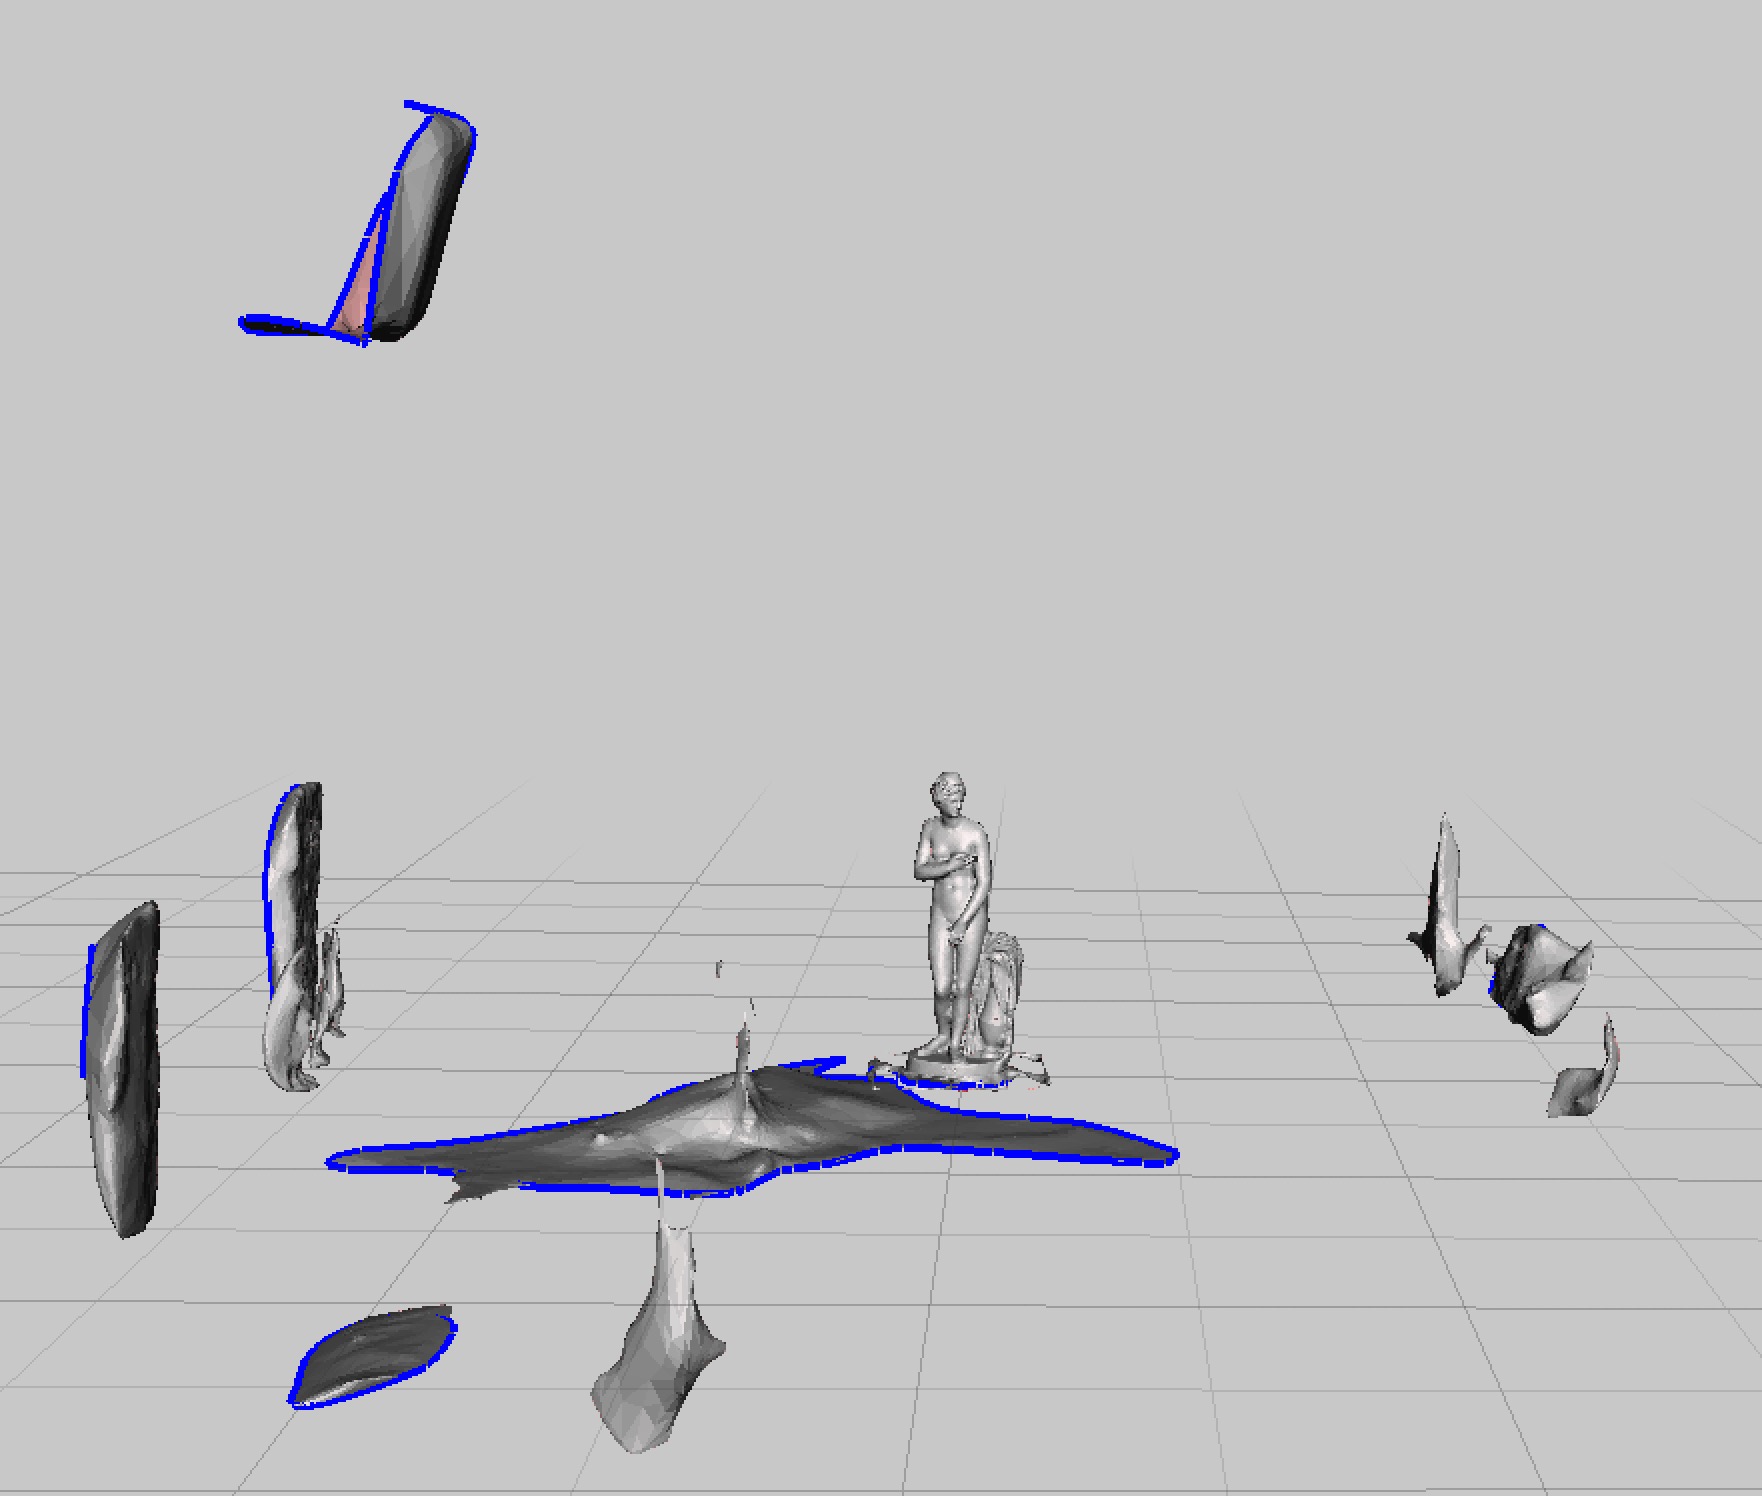
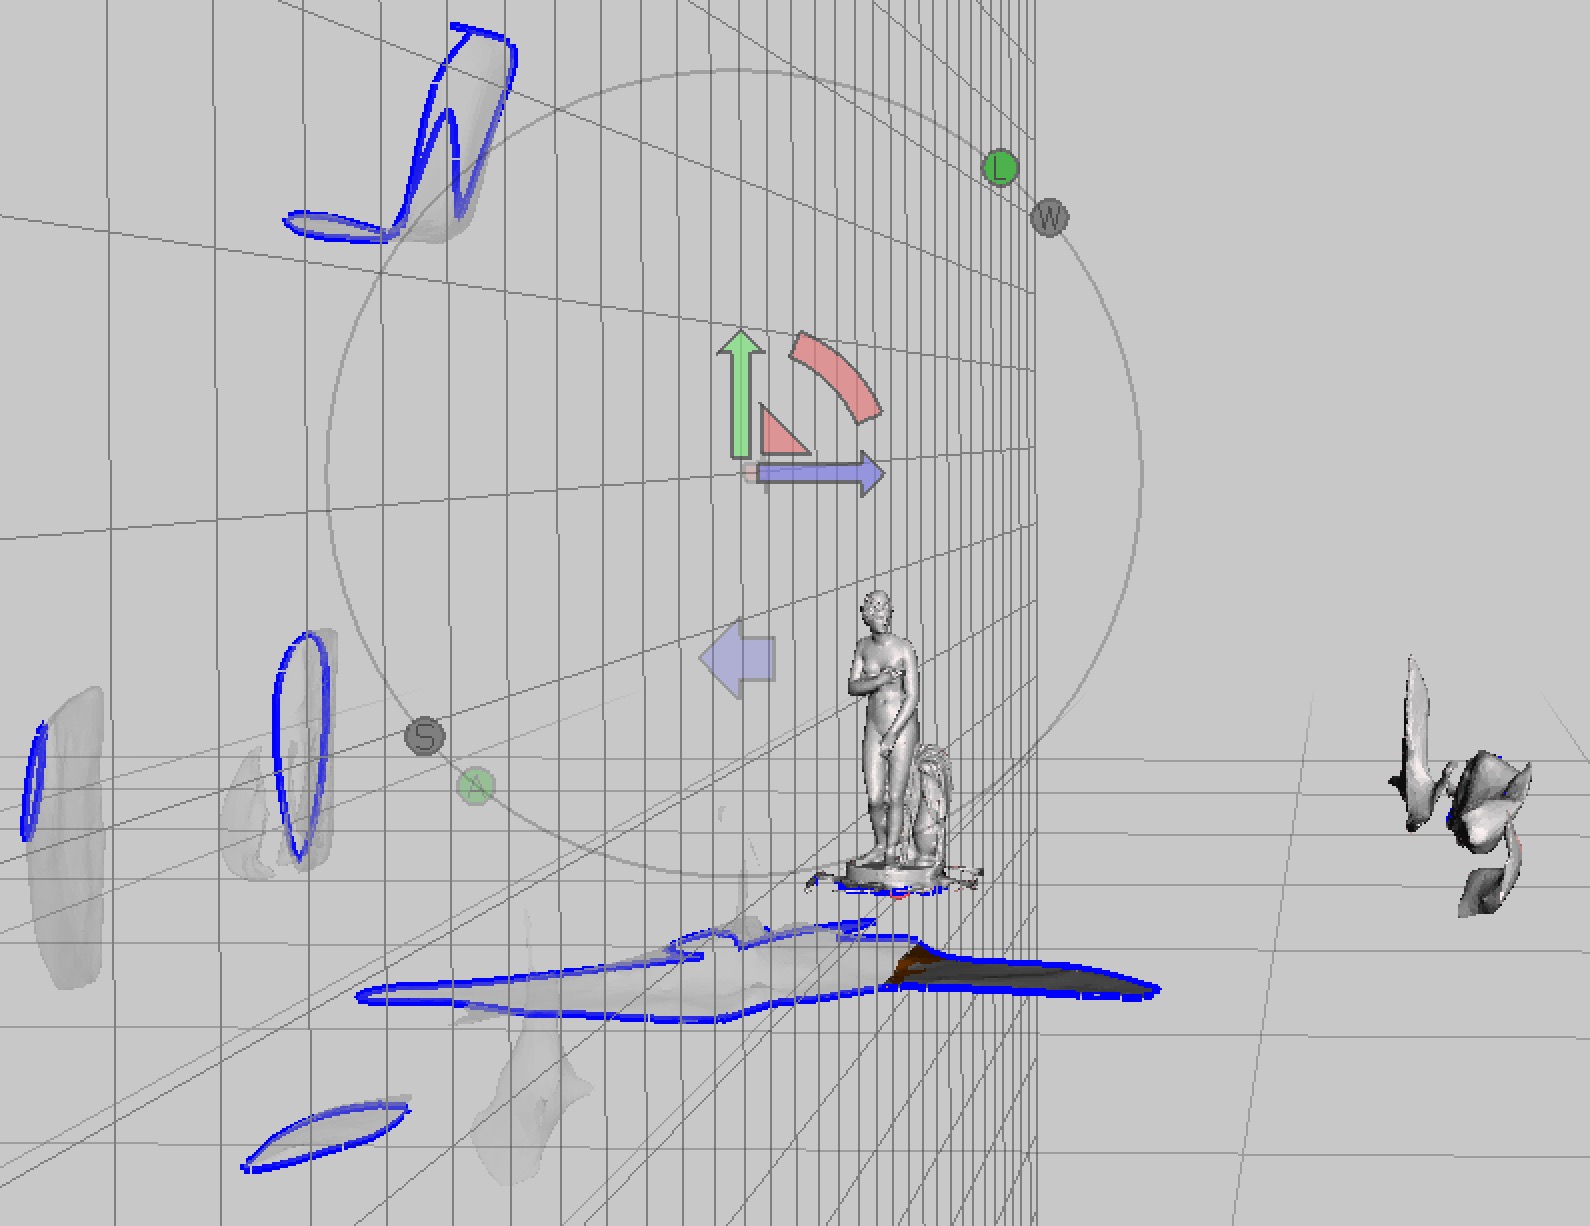
Here you can see a large amount of unnecessary junk with the tiny, desirable sculpture almost hidden in the middle. This is a typical scenario: the scanning software has no idea what the intention of your capture might have been; it simply converts the images into a whole 3D scene.
With only a few plane cuts, you can very quickly cut away this stuff to reveal the target object.
At this point, you may notice that the scan is not completely vertical, for various reasons. If necessary, you should use MeshMixer or similar tools to slightly rotate the model to ensure the figure is completely vertical.
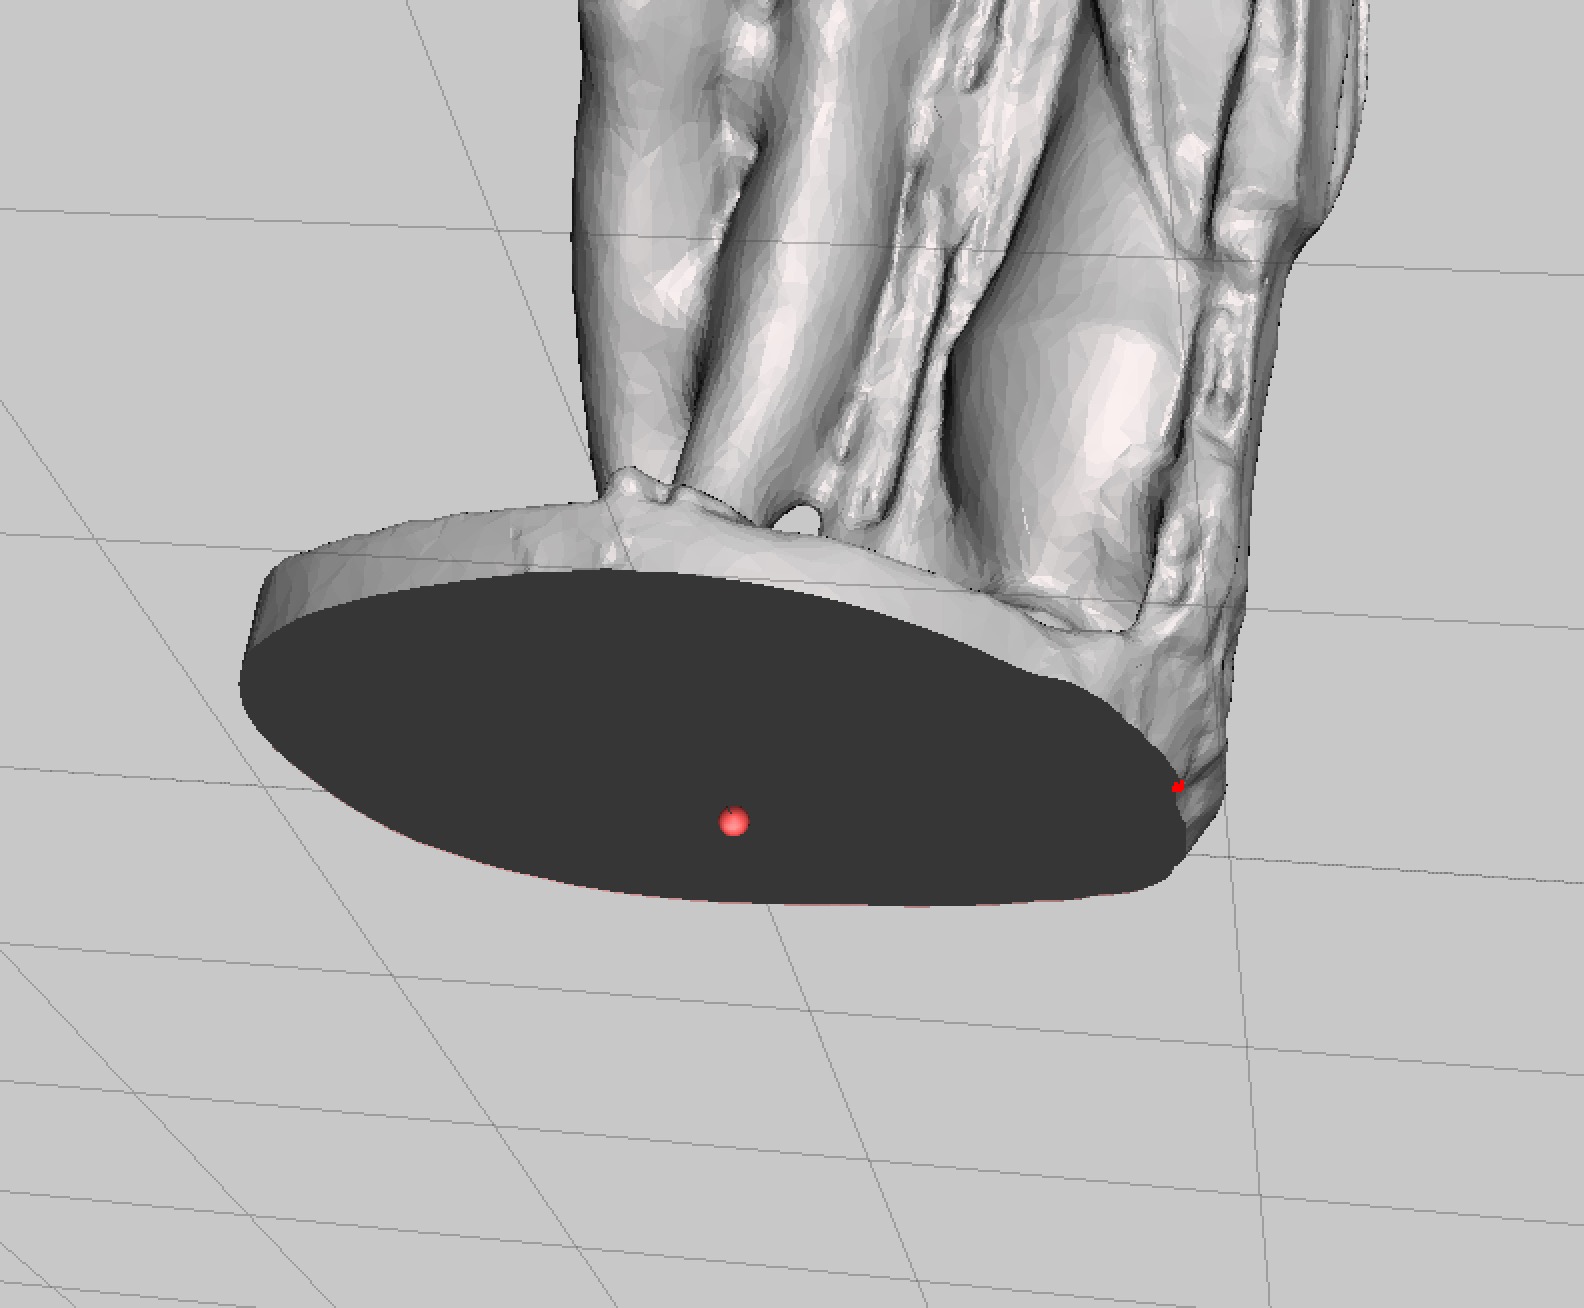
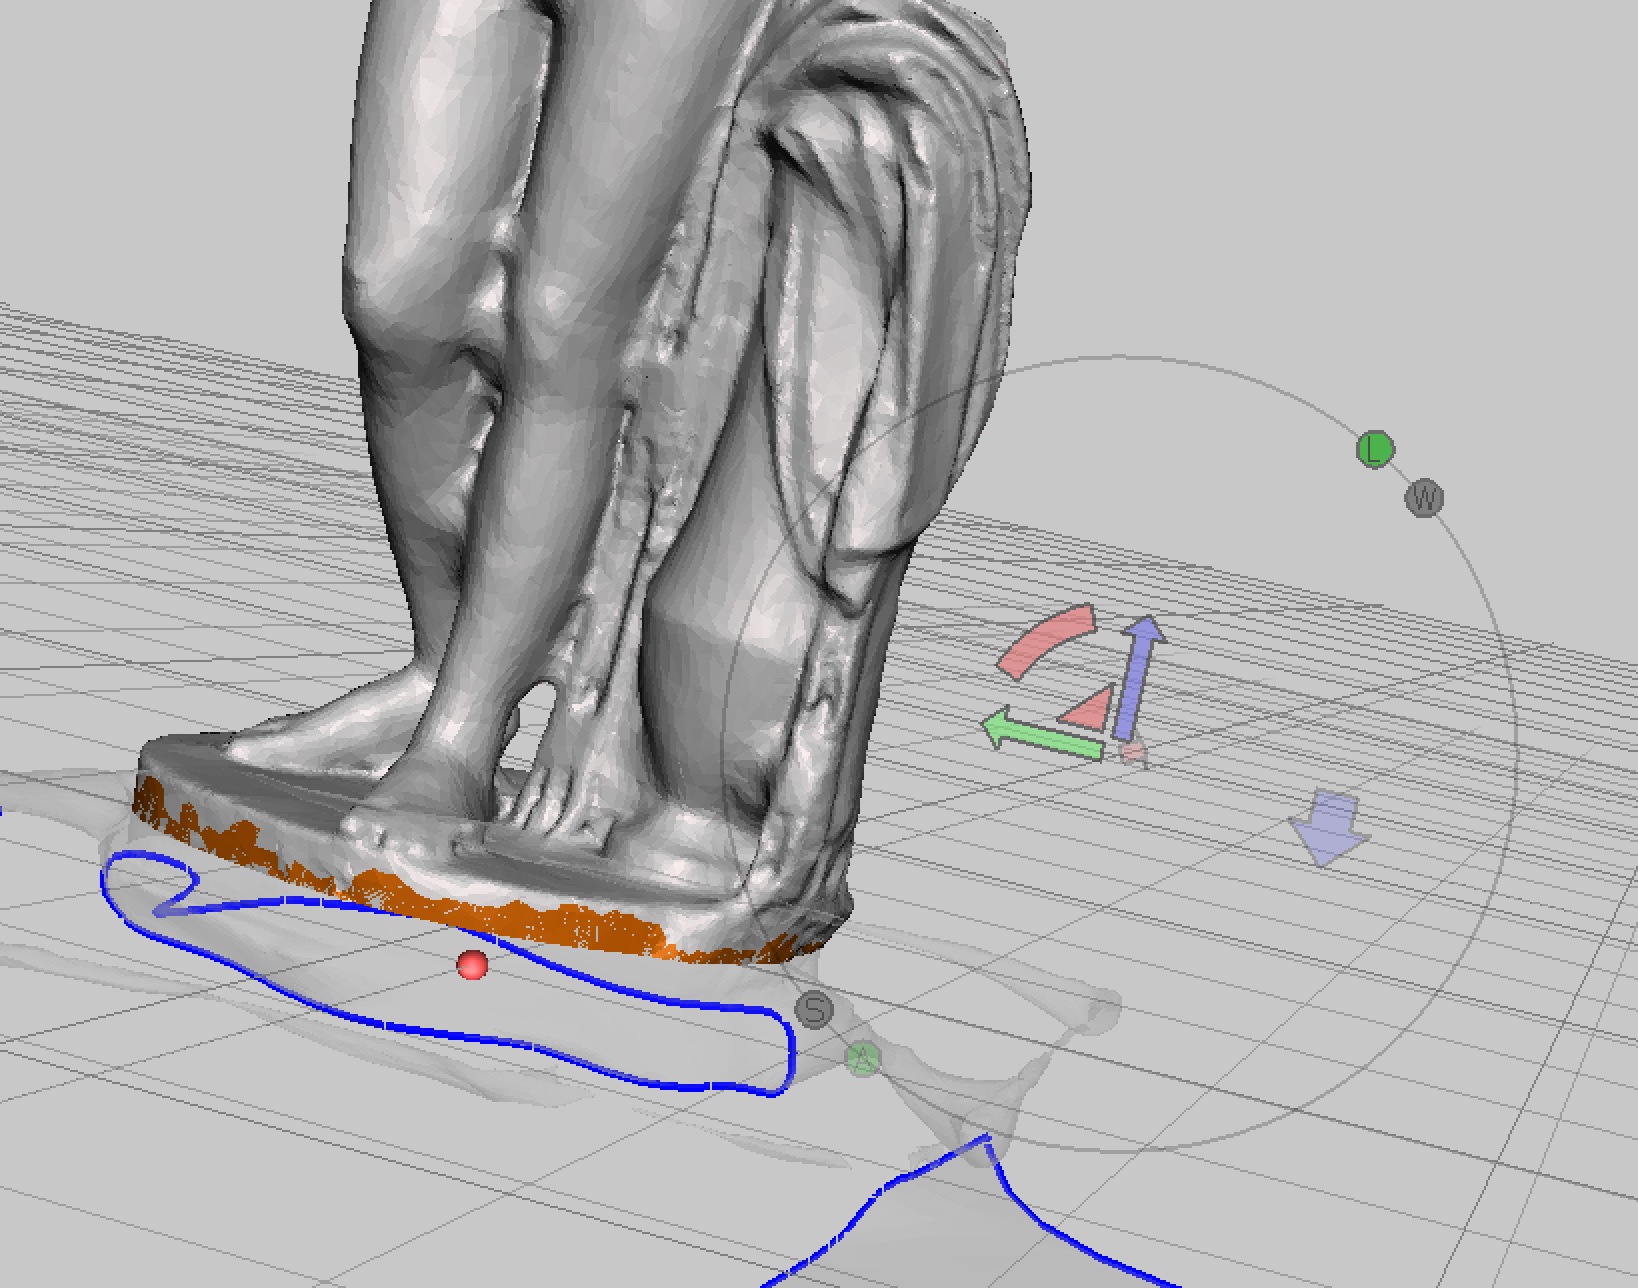
The final cut could be at the bottom, where you can zoom in and ensure you have a nice flat bottom. You might lose a small portion of the bottom of the statue, but you must do so to obtain a flat base.
MeshMixer also conveniently fills in the bottom, so it is almost ready for 3D printing at this point.
However, the model may (well probably does) still have smaller holes within it, some of which you’ll not be able to notice with your eyes. The simplest approach is to use MeshMixer’s “close cracks” function. We also recommend running it through NetFabb’s automated 3D model repair procedure for good measure, or any of several similar services.
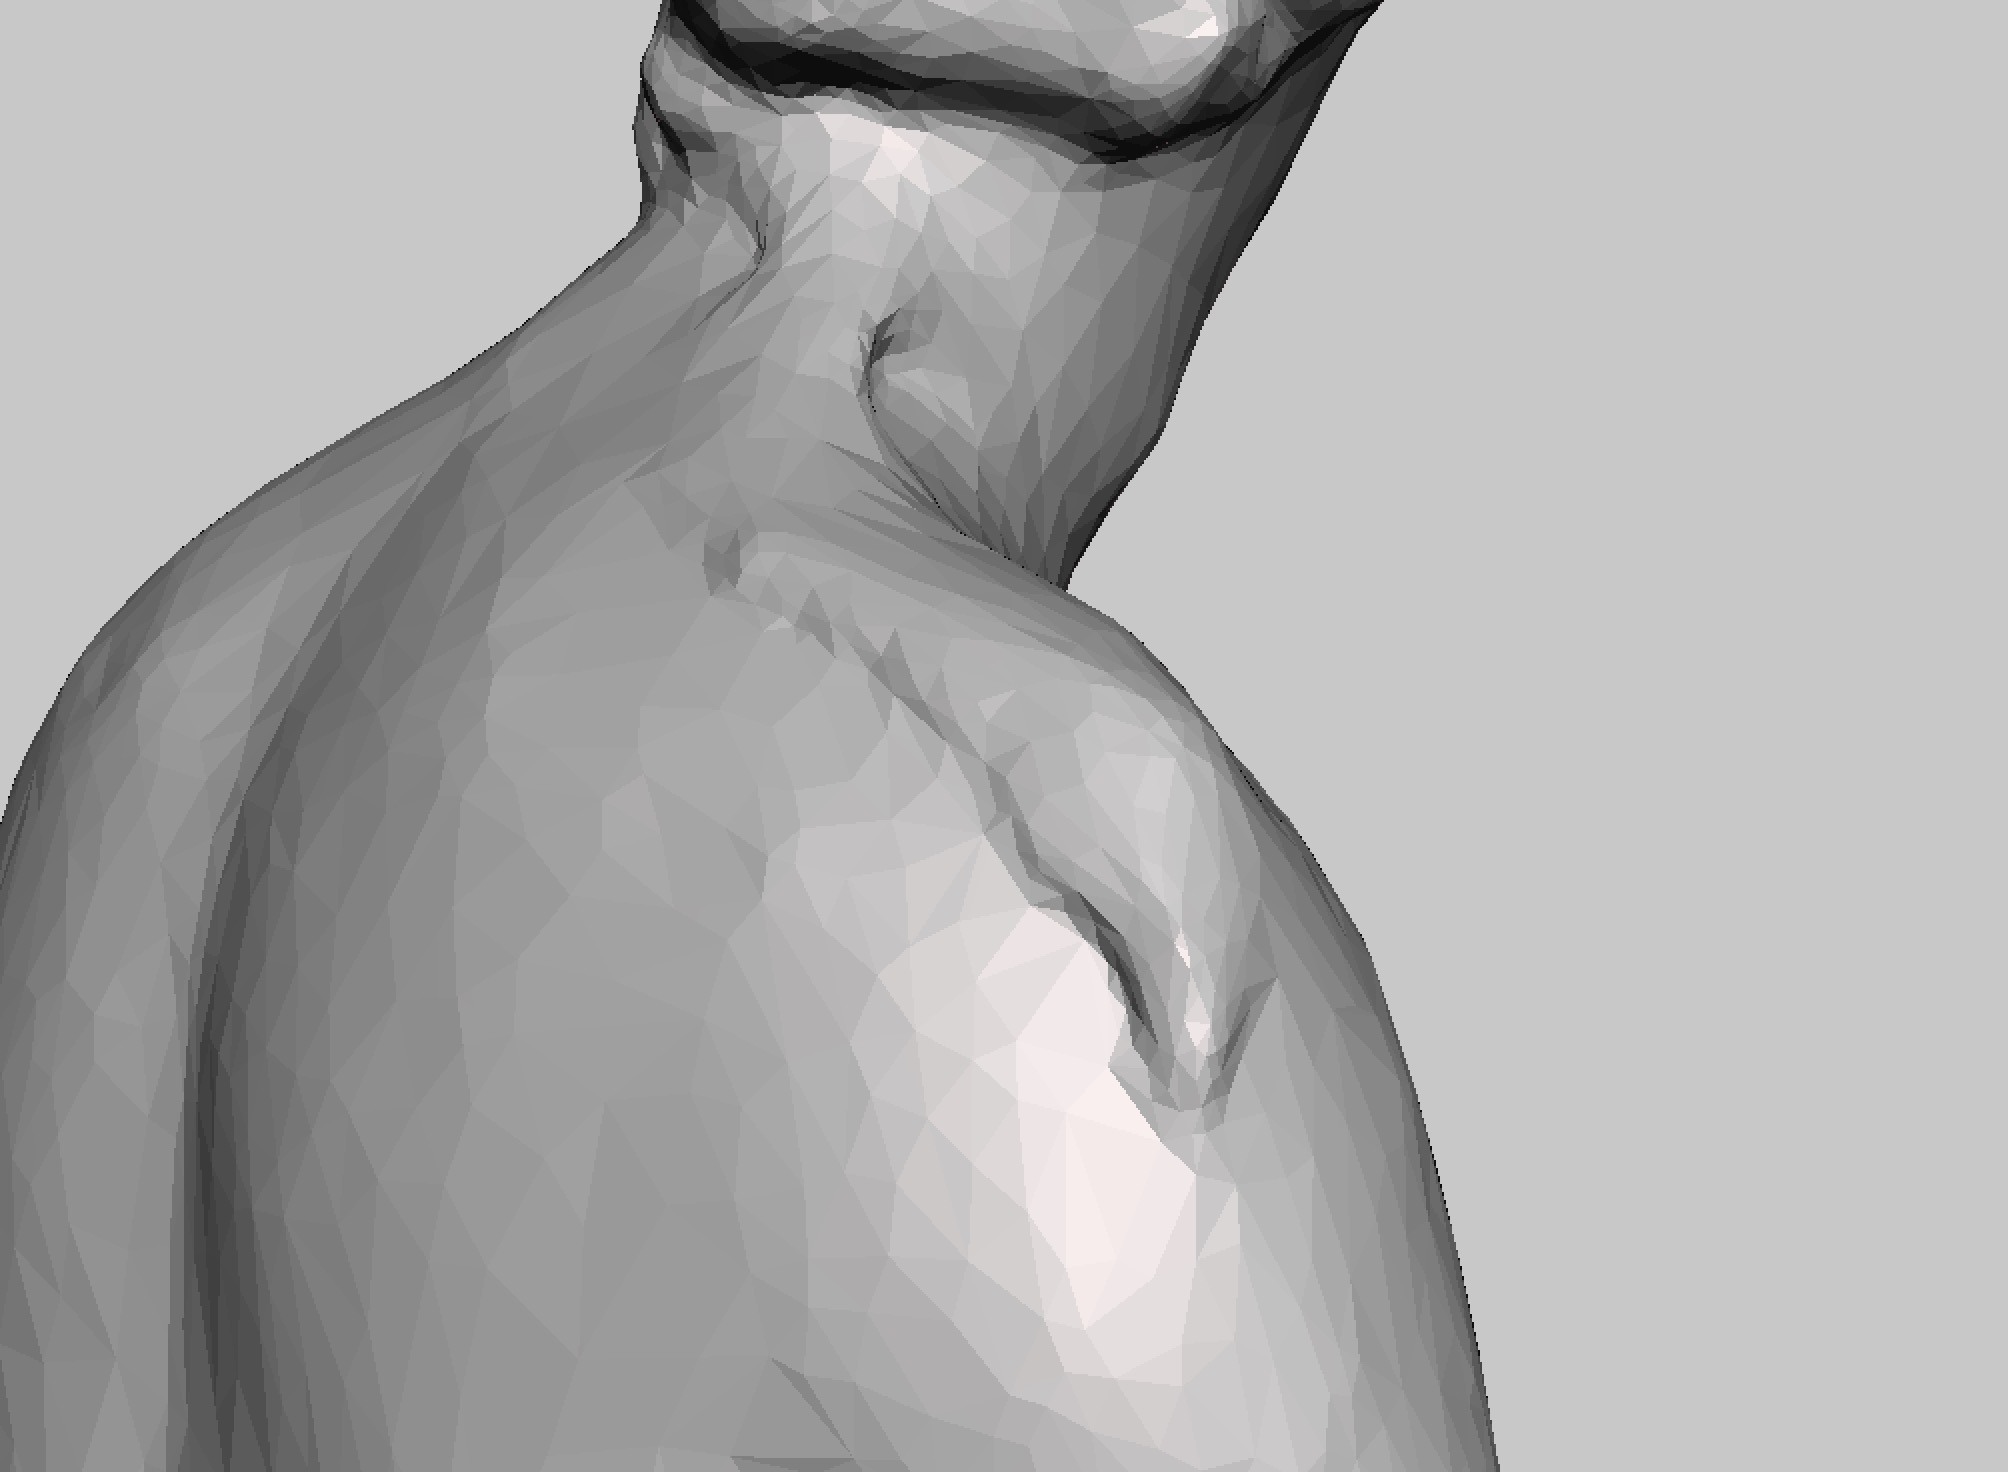
There’s another thing to do yet: check the entire model to ensure the surface is good. A typical photogrammetry problem is an overlap when the images wrap around in sequence, as shown here. The result is an unsightly, but printable bump.
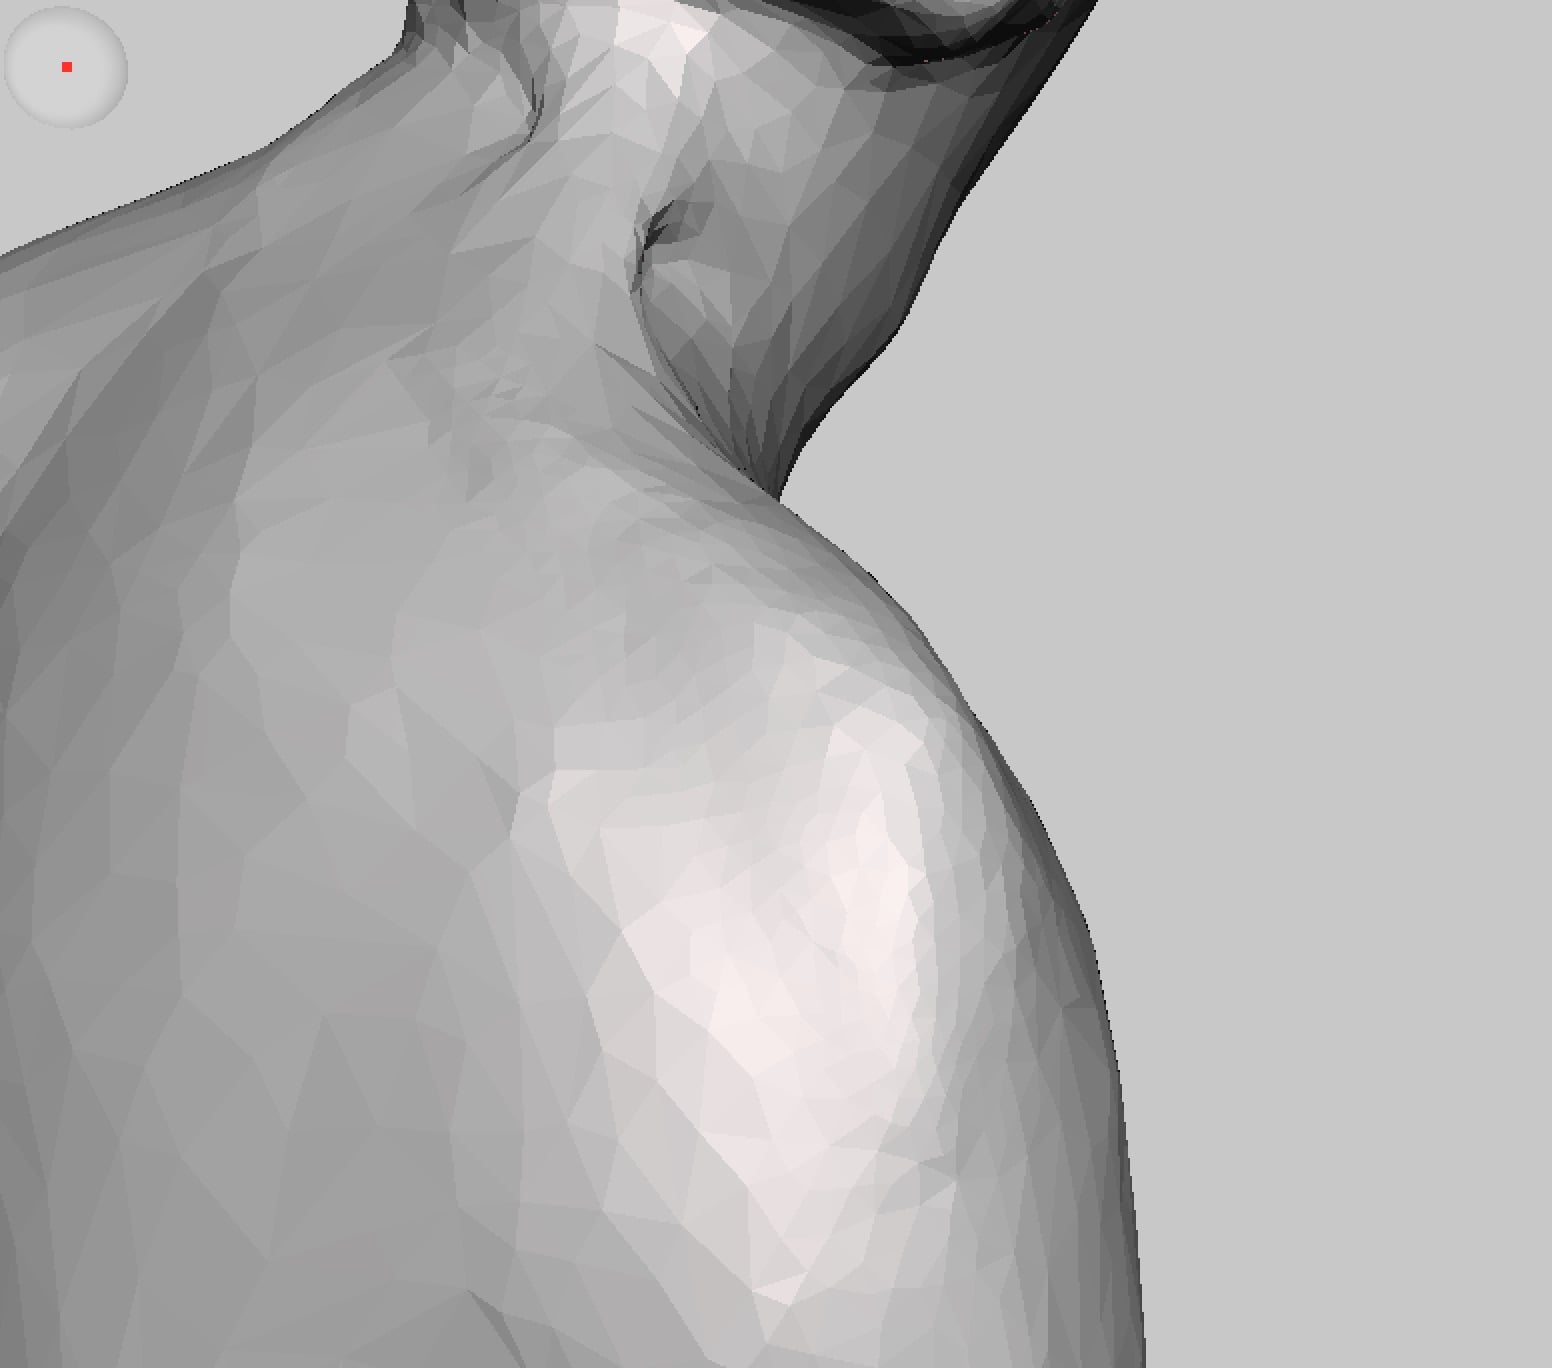
MeshMixer is entirely capable of repairing such defects. Simply select an appropriate sculpting tool and wash away the bumps as shown here. Start with small brushes and work your way up to larger ones, lest you mess up the model in a terrible way.
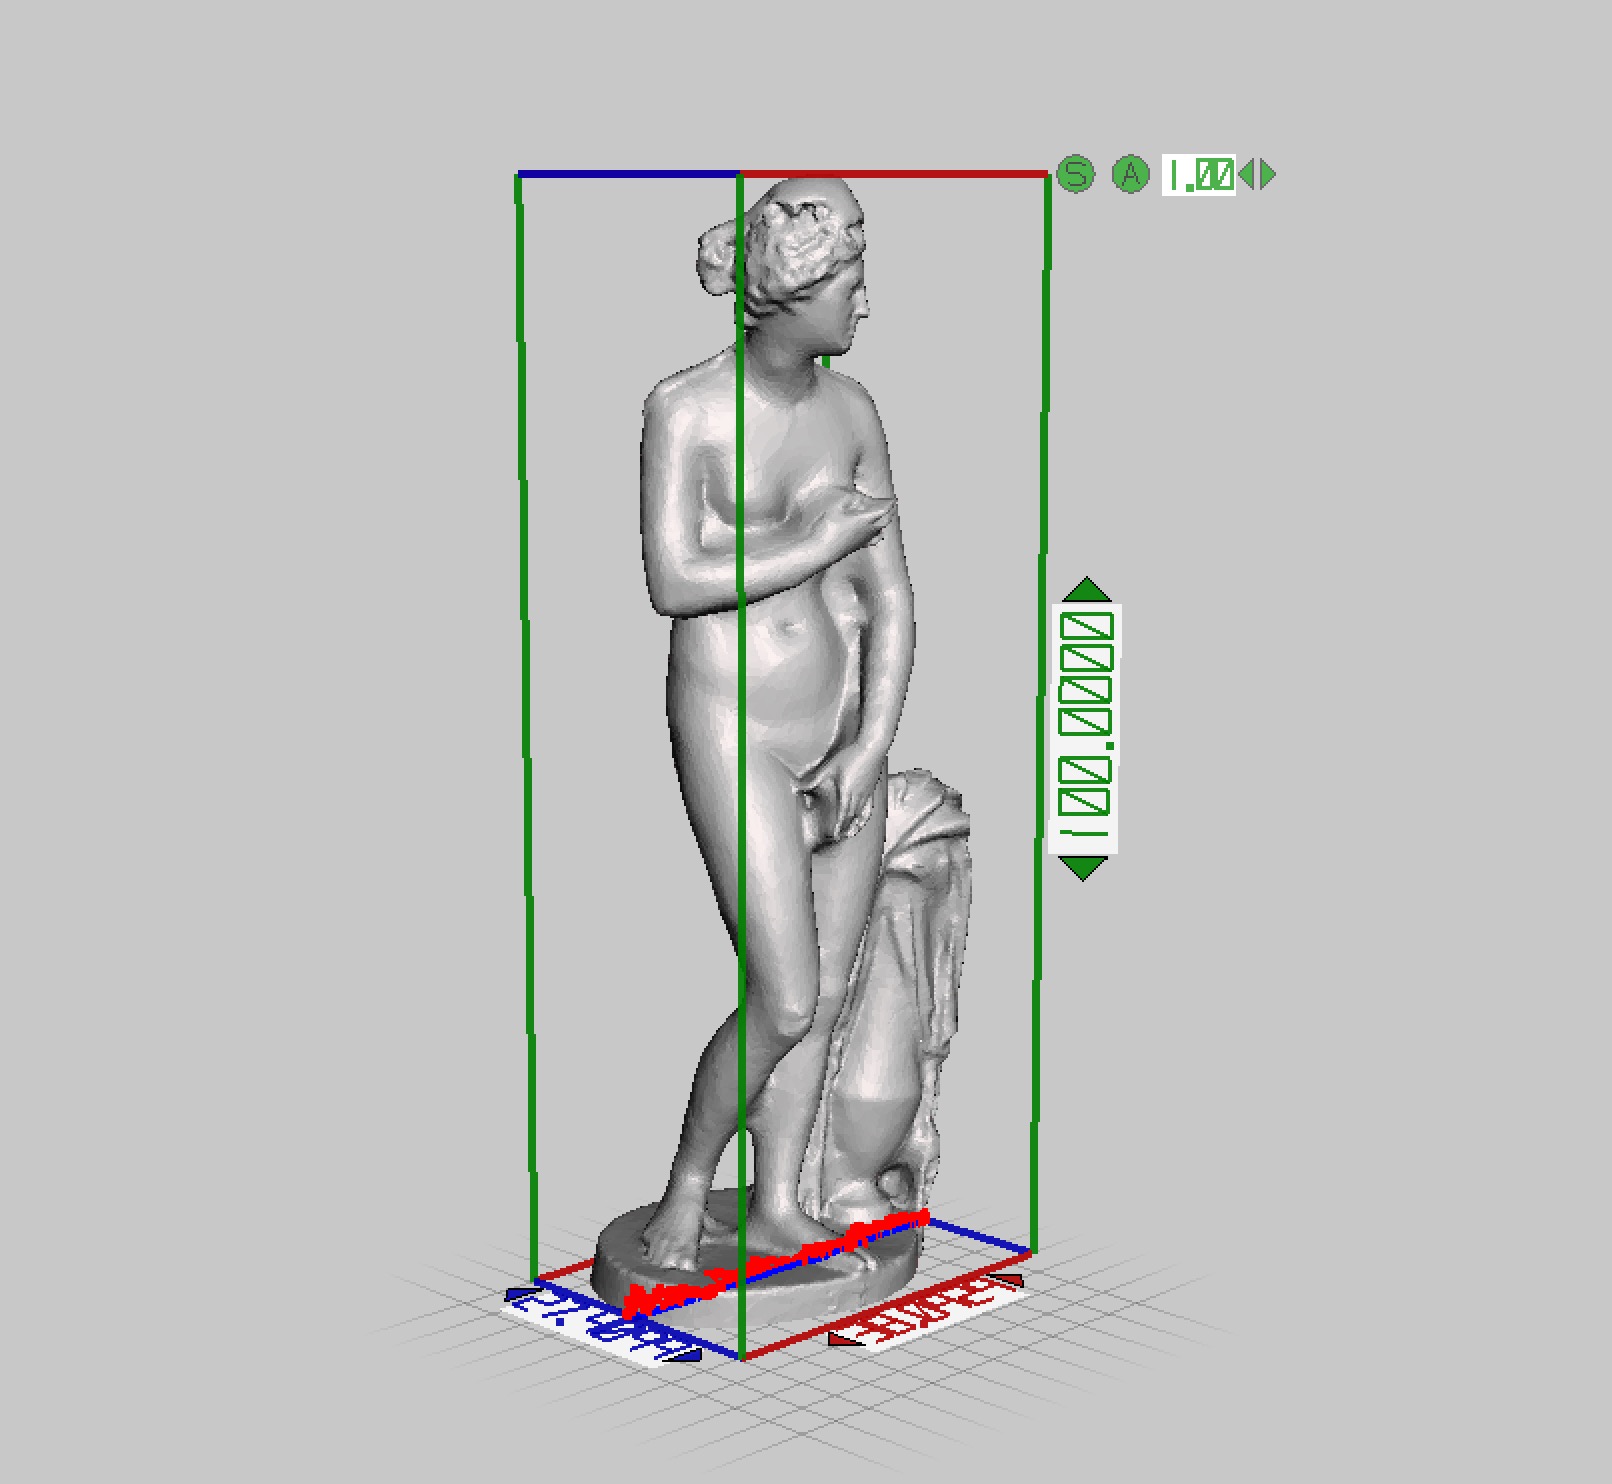
Before you export the final model, do check the size of the model to ensure it is appropriate for your printer. You’ll find that the unit size computed by the scanning service are invariably way off your requirements. I’ve found a scanned sculpture to apparently be only 0.76mm tall! Again, you can do this in MeshMixer quite easily. After sizing, export the model and you’re ready for printing in our next step.