

This is part two of a series describing practical methods of capturing 3D scans of museum sculptures.
I’ve had great success 3D scanning and subsequently 3D printing sculptures from museums around the world, so I thought I’d tell you how it can be done.
There’s much to tell, so this story will be split into several parts:
Part 1: Getting Organized
Part 2: Selecting Subjects
Part 3: Performing The Scans
Part 4: Processing Your Scans
Part 5: Fixing The Models
Part 6: Printing The Scans and Beyond
Part 2 of this series describes what might be the most critical step of 3D scanning and printing sculptures: selecting the subjects. I’m not kidding, this is literally the most important step; if you don’t do this part properly, you will not succeed.
It turns out that it is usually quite impractical to attempt to scan anything you run into, as there are numerous constraints that will inevitably be encountered. The true secret to success is simply to select subjects that are practical to scan and print, while ignoring the rest, no matter how attractive they might be.
First, let’s discuss the “scanability” of subjects. This relates to the practical matter of optical 3D scanning techniques, also known as photogrammetry. In this method, a series of images of the subject are taken from all directions, and your job in selecting a subject is to ensure that this can actually be done.
>on the wall
In a museum you will very often find subjects are pasted up against a wall. Unless the museum somehow agrees to slide the sculpture forward for you, these are typically bad subjects to scan because you won’t be able to capture the rear. By the way, sculptures are very delicate objects; it is inconceivable that a museum would move one for you after it’s been placed on the gallery floor.
The best subjects are located with plenty of walking space around them. And I mean COMPLETELY around them, all 360 degrees. A good approach is to undertake a scouting expedition before you attempt the actual 3D scans so that you can determine an optimum path through the museum.
During your scouting expedition, use your camera to determine how far back you must stand to capture a complete view of the subject. Then ensure that entire radius is clear around the sculpture.
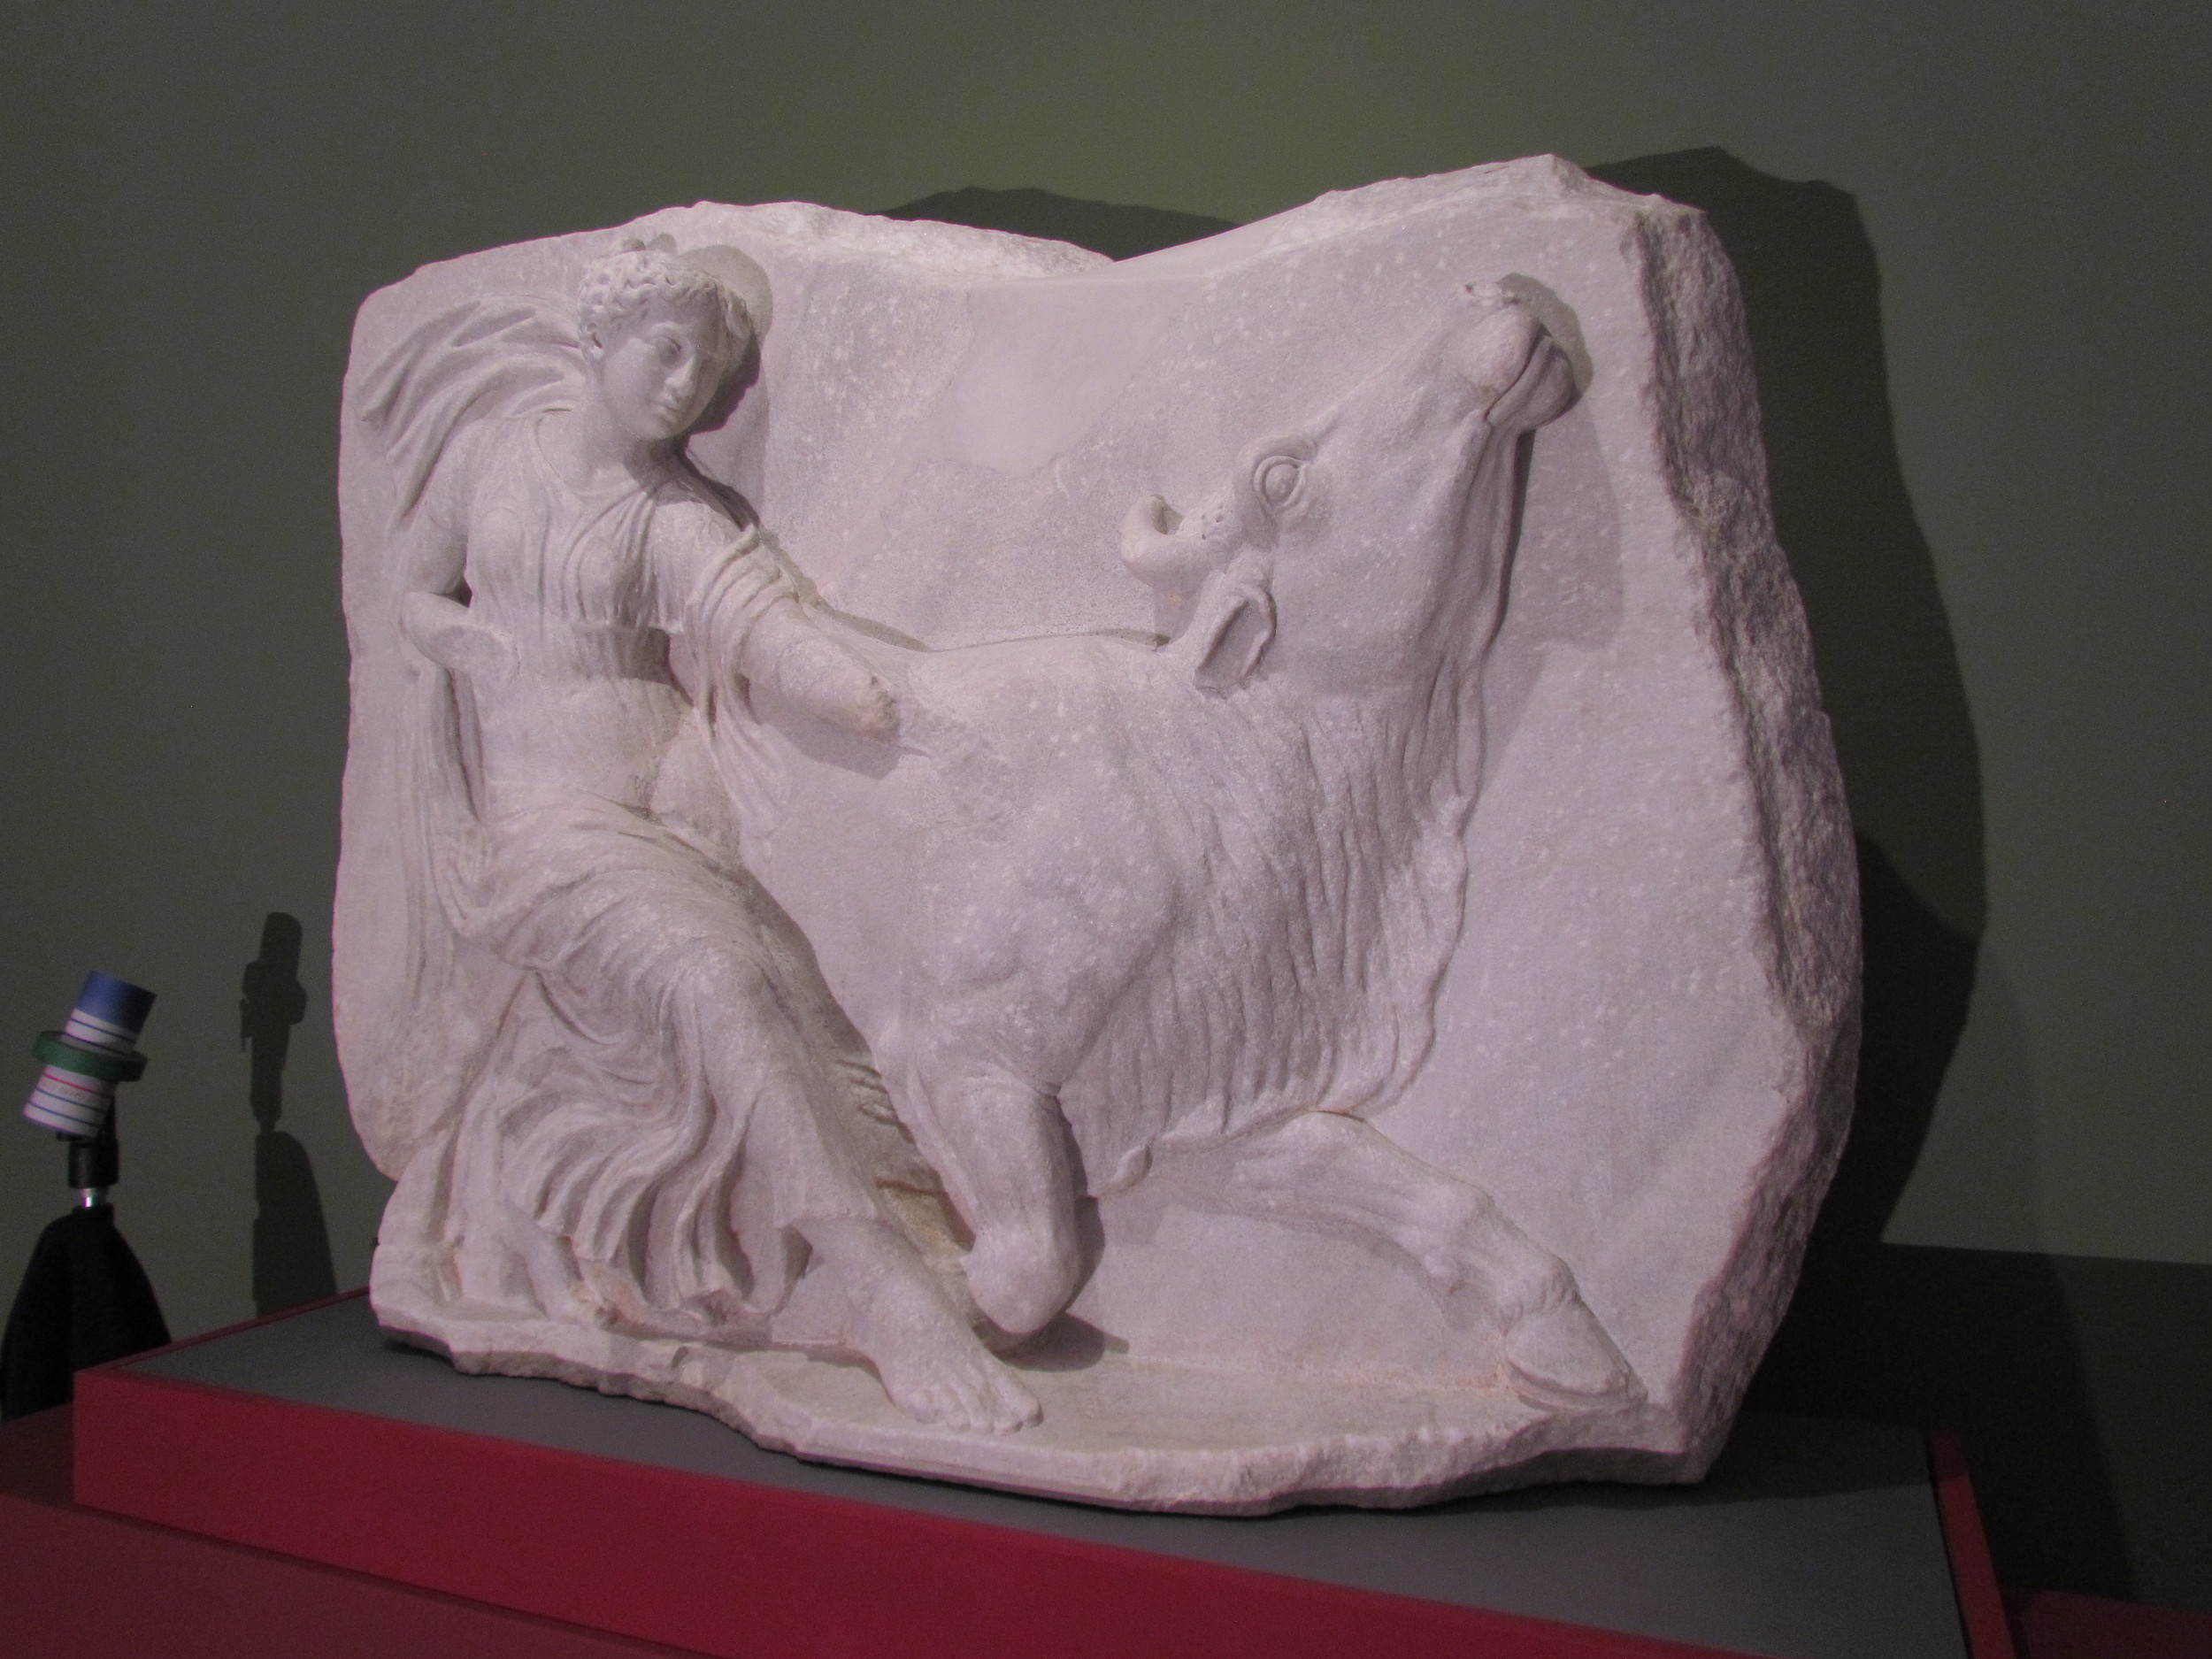
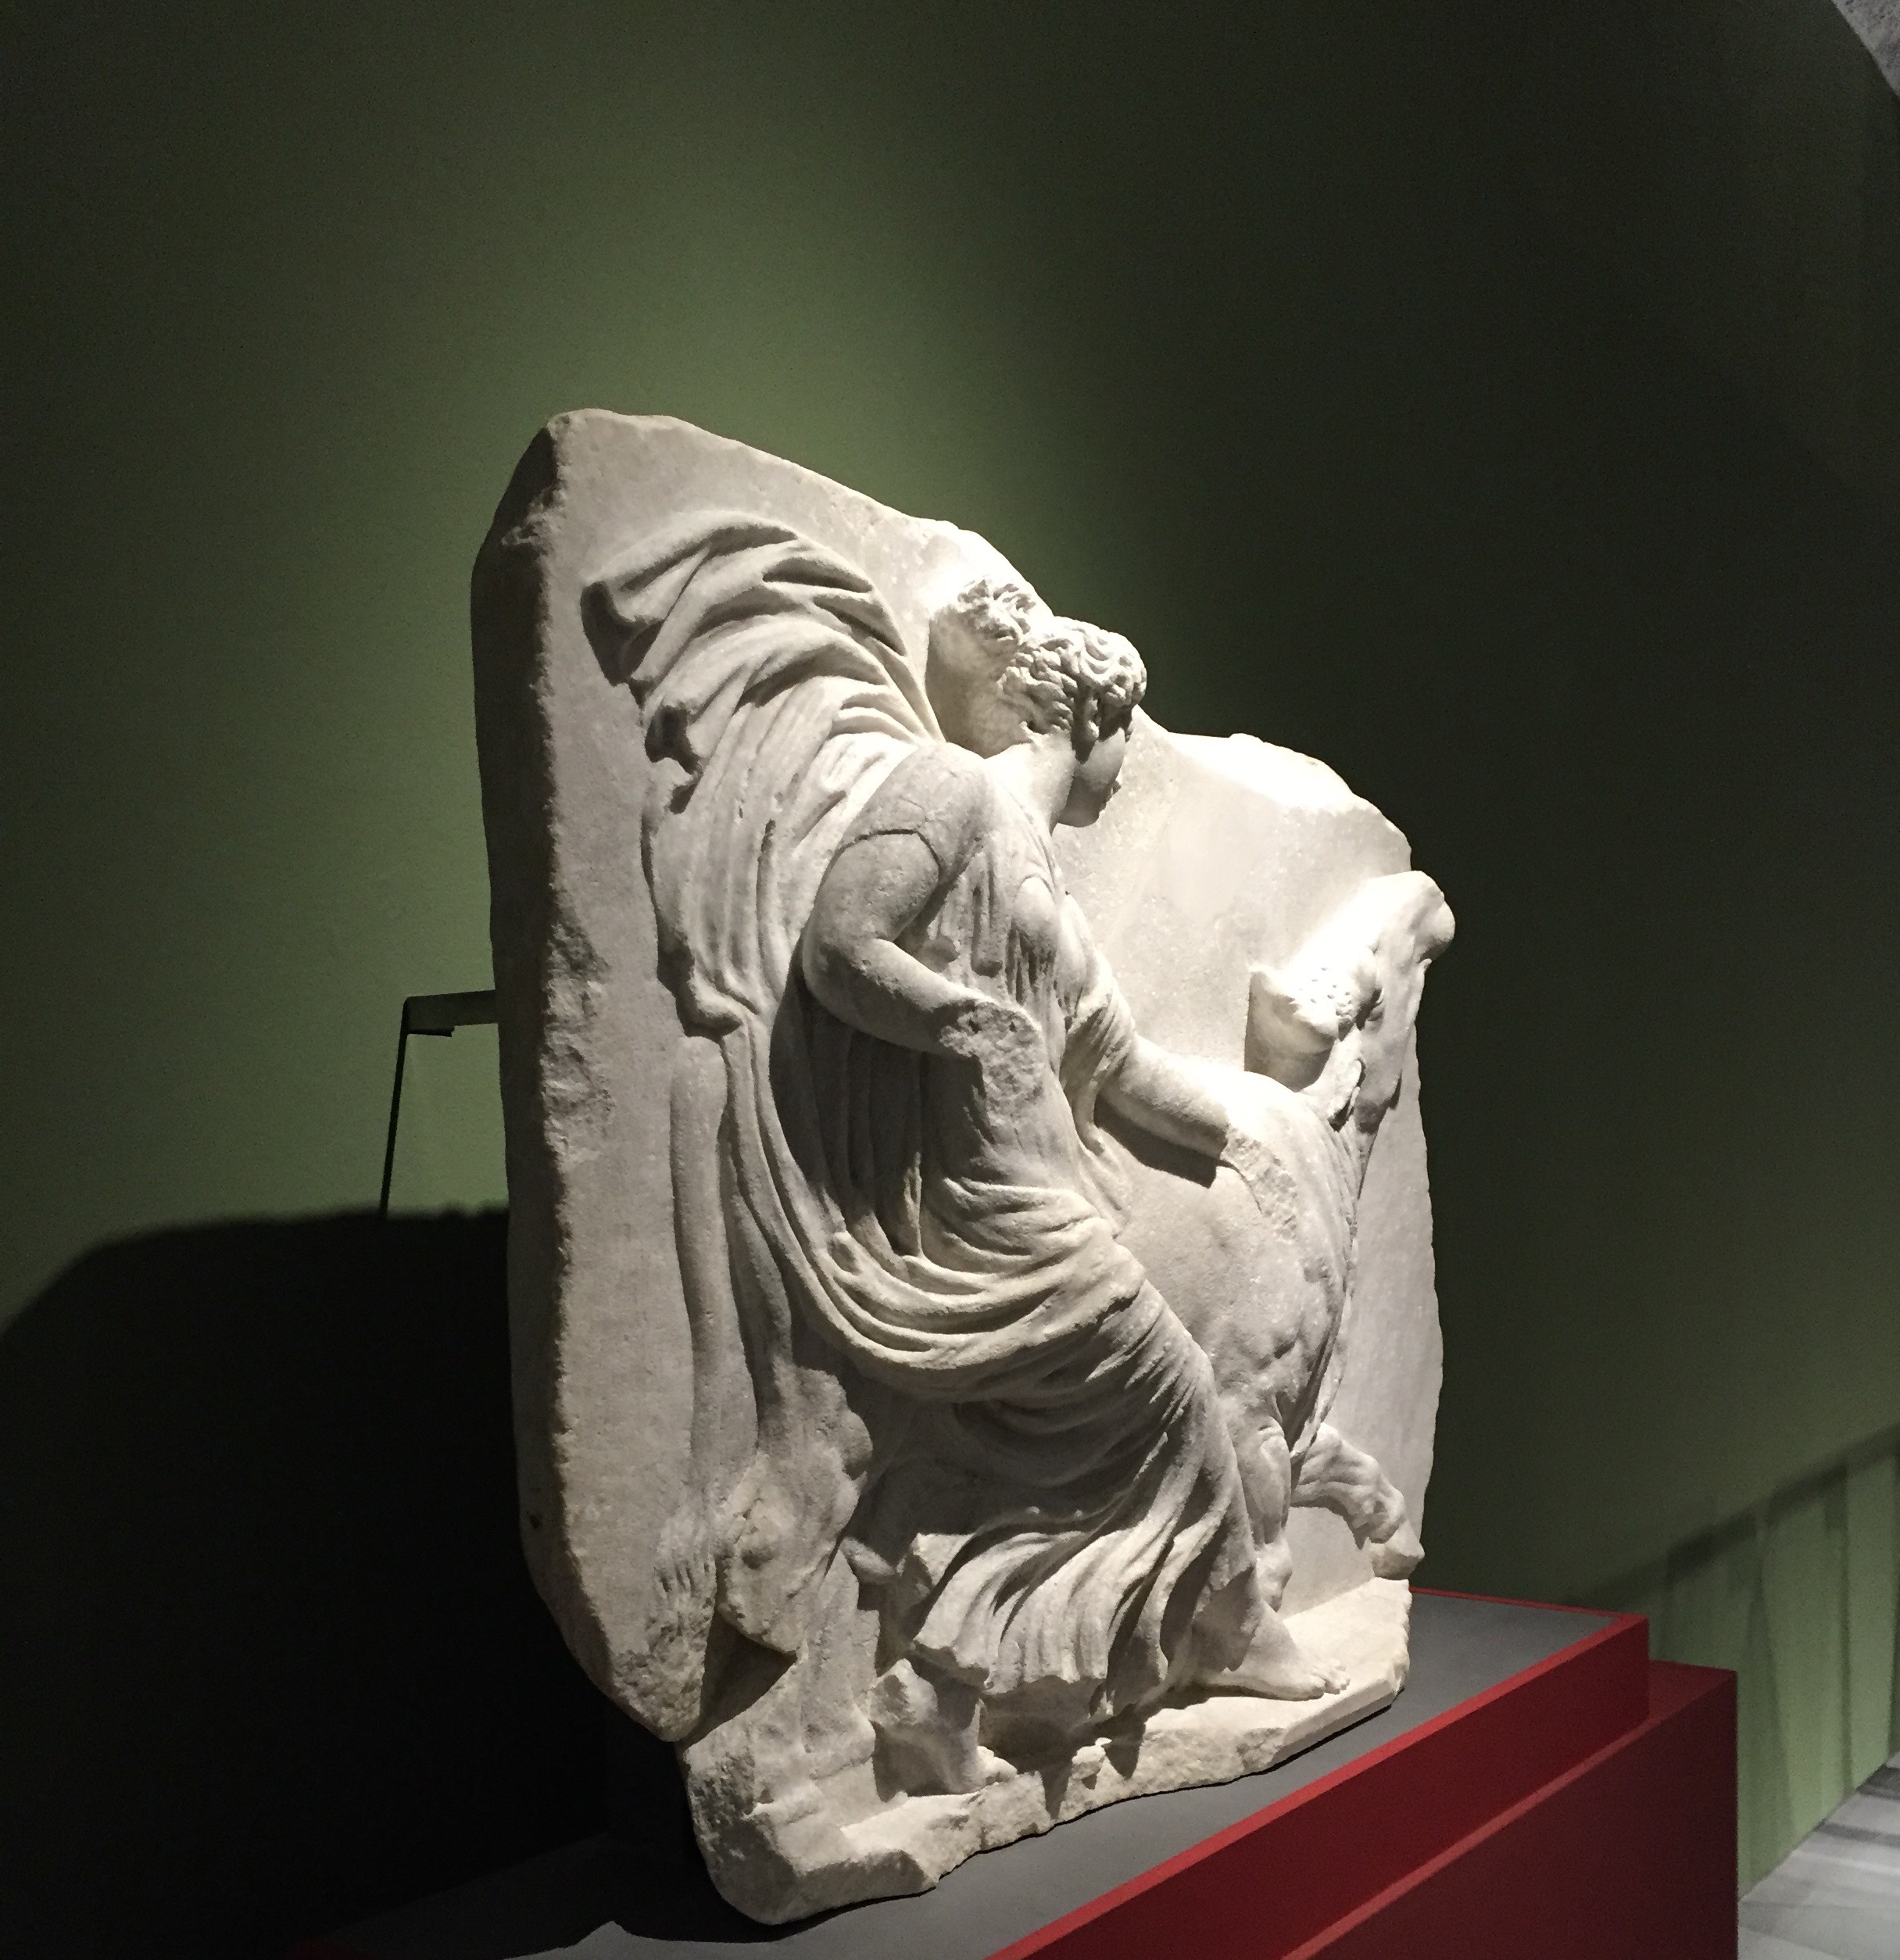
There are exceptions to this rule. Sometimes a sculpture has only one side, like this Ancient Greek relief. In this case, it is suitable to 3D scan, although you’ll have to do some 3D modelling to fix up the missing rear side after the scan.

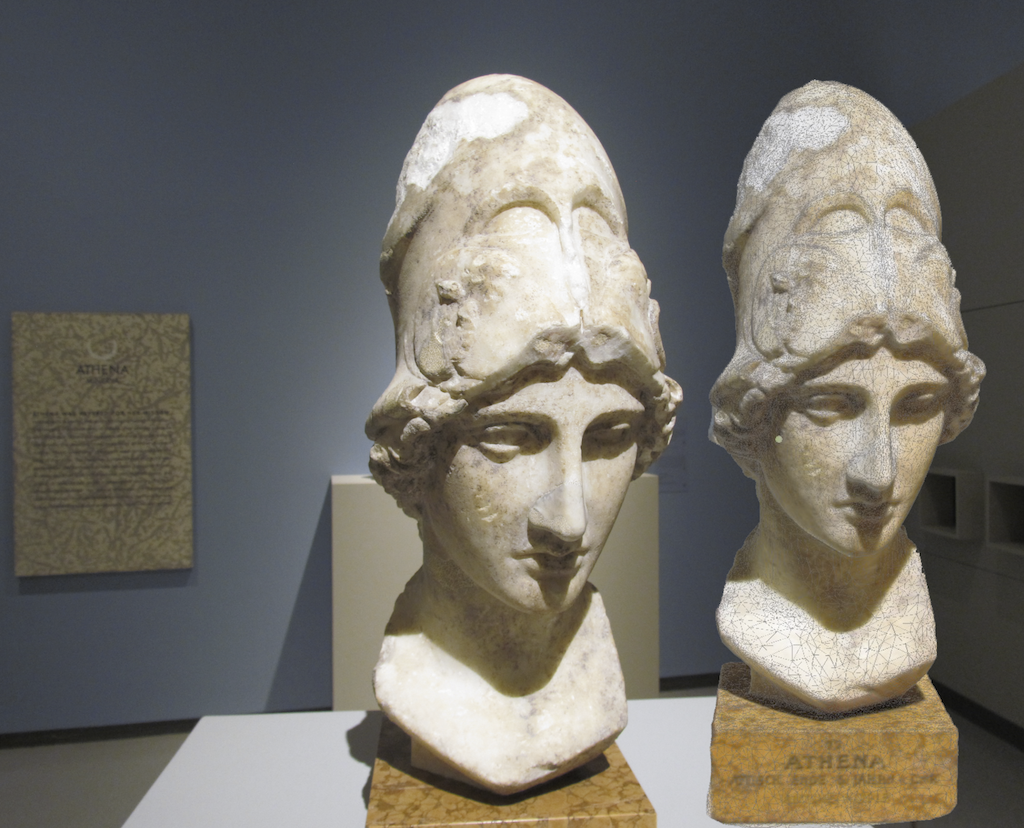
You should select subjects that are lighter in color, as details will be more easily identified by the photogrammetry service. Dark objects tend to lose details when scanning. Also don’t even think of scanning any objects that include mirror, glass or shiny surfaces, as these will also confuse the photogrammetry process. No shiny!
Take into consideration the printability of the subject. Ask these questions with respect to your 3D printing capabilities:
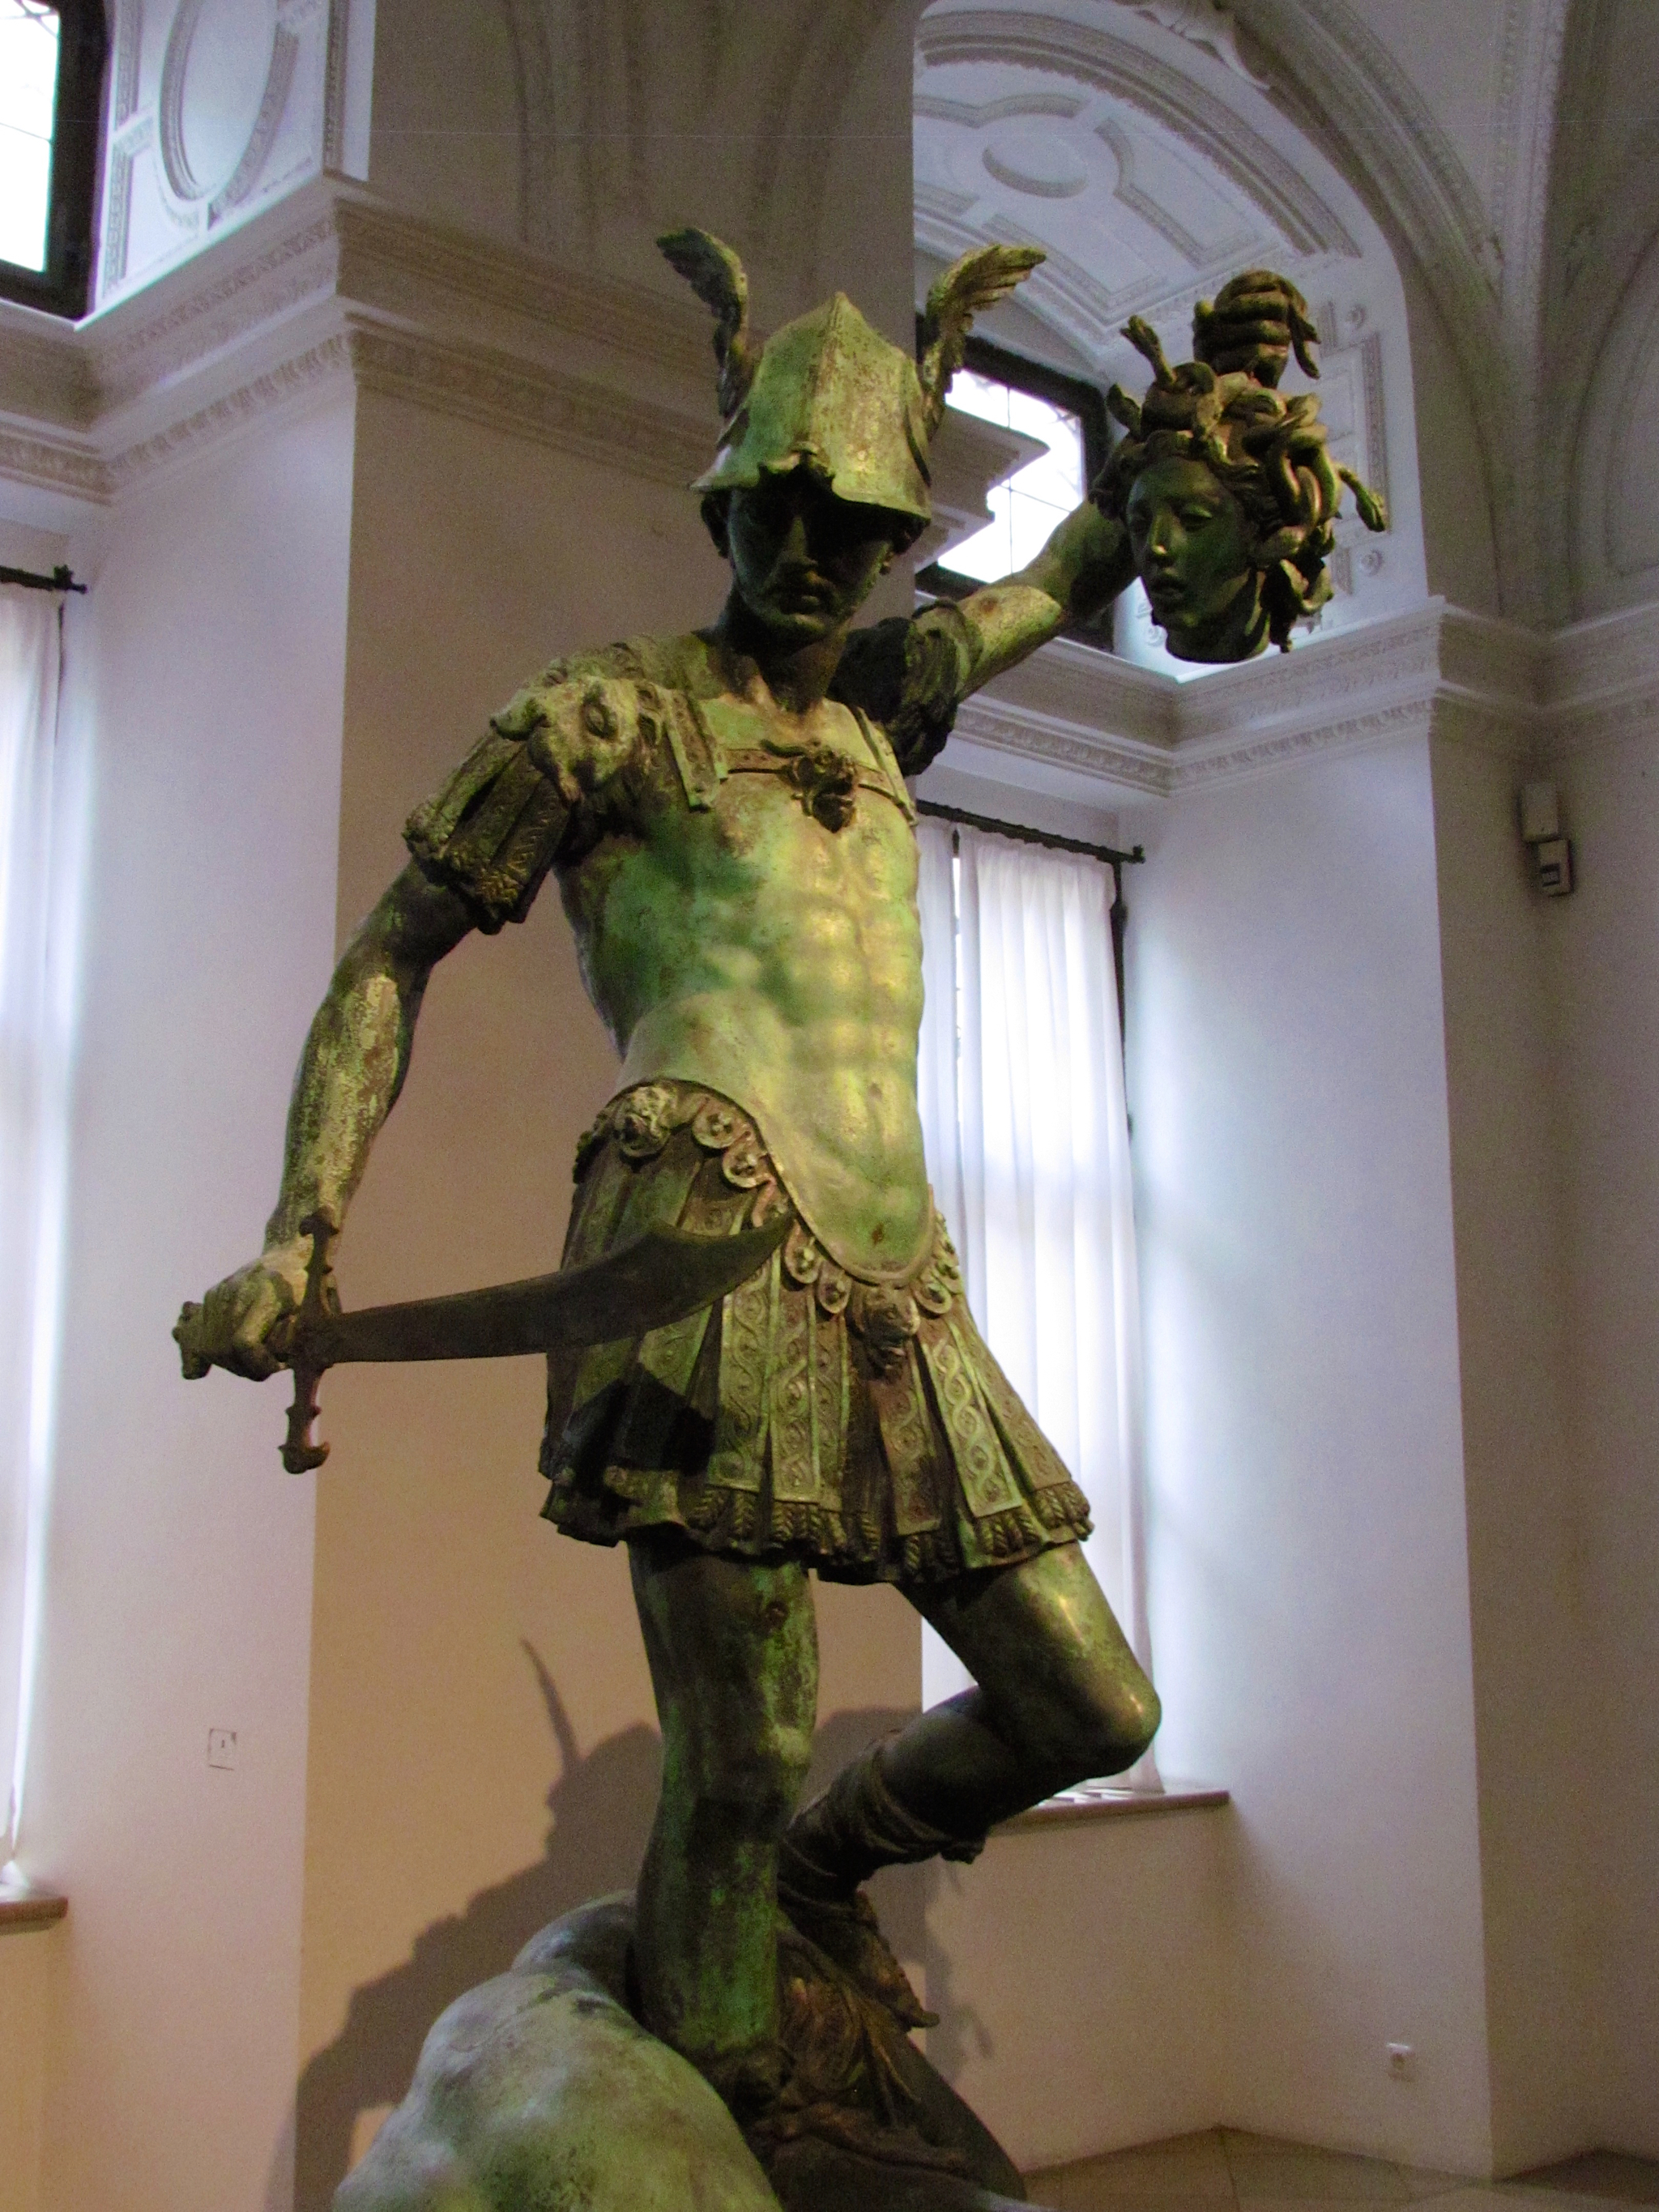
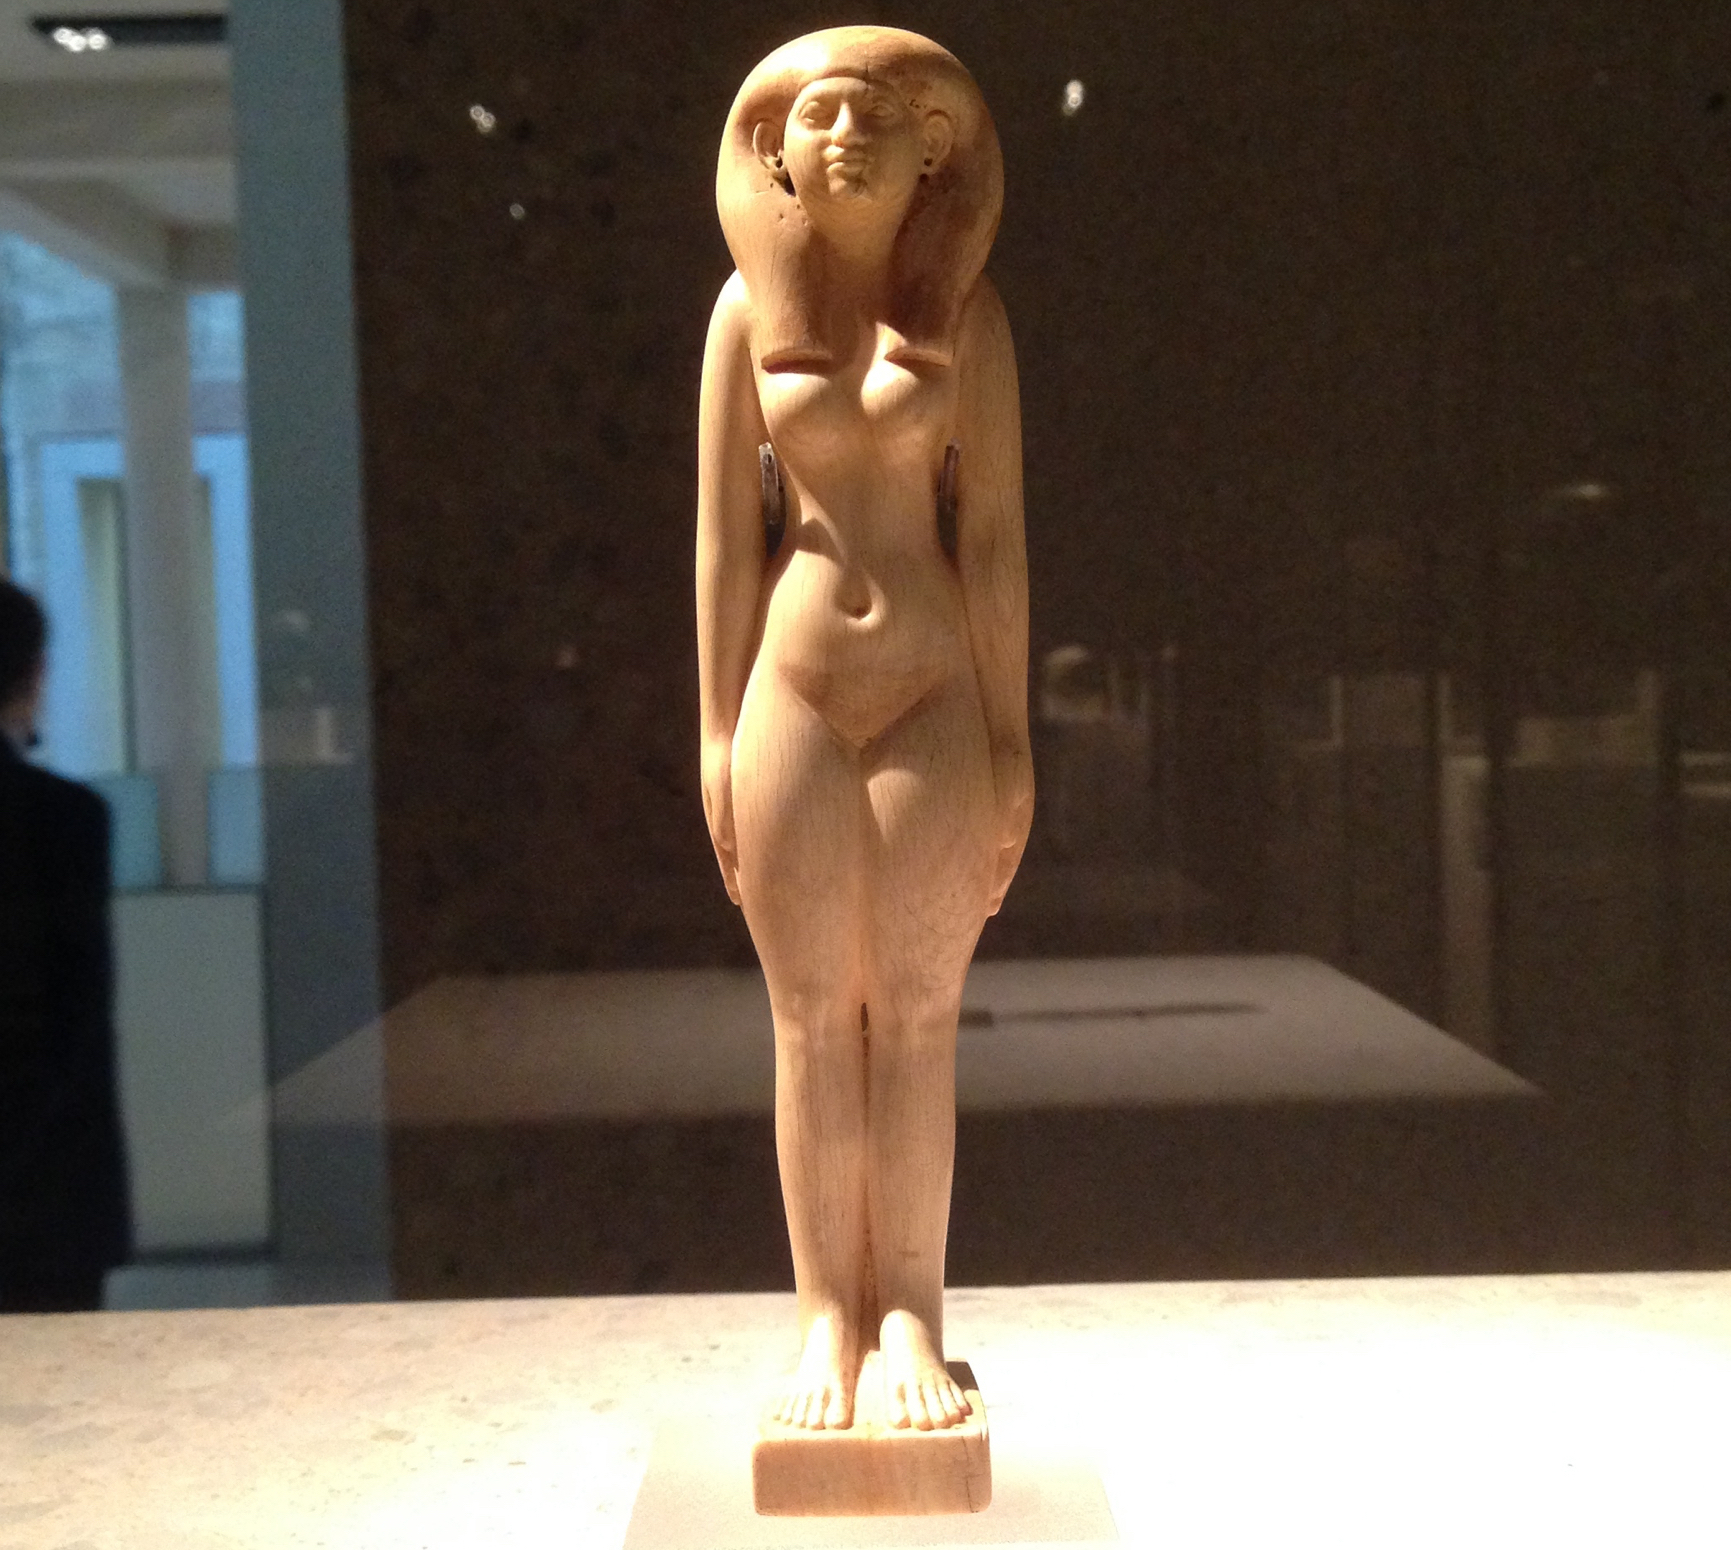
Does the subject include any very thin geometry that are not likely printable? (e.g. a spear?)
How much support material must be used? What geometric overhangs are present? If there are many, the sculpture may be more difficult to 3D print. The image above illustrates a very poor choice, as it has plenty of thin geometry AND overhangs.
Does the sculpture have sufficient strength to hold itself up when printed? In some cases the legs of a sculpture may be too spindly to print at small sizes. They may support the upper portion when made of marble, but perhaps not when made from hollow plastic.
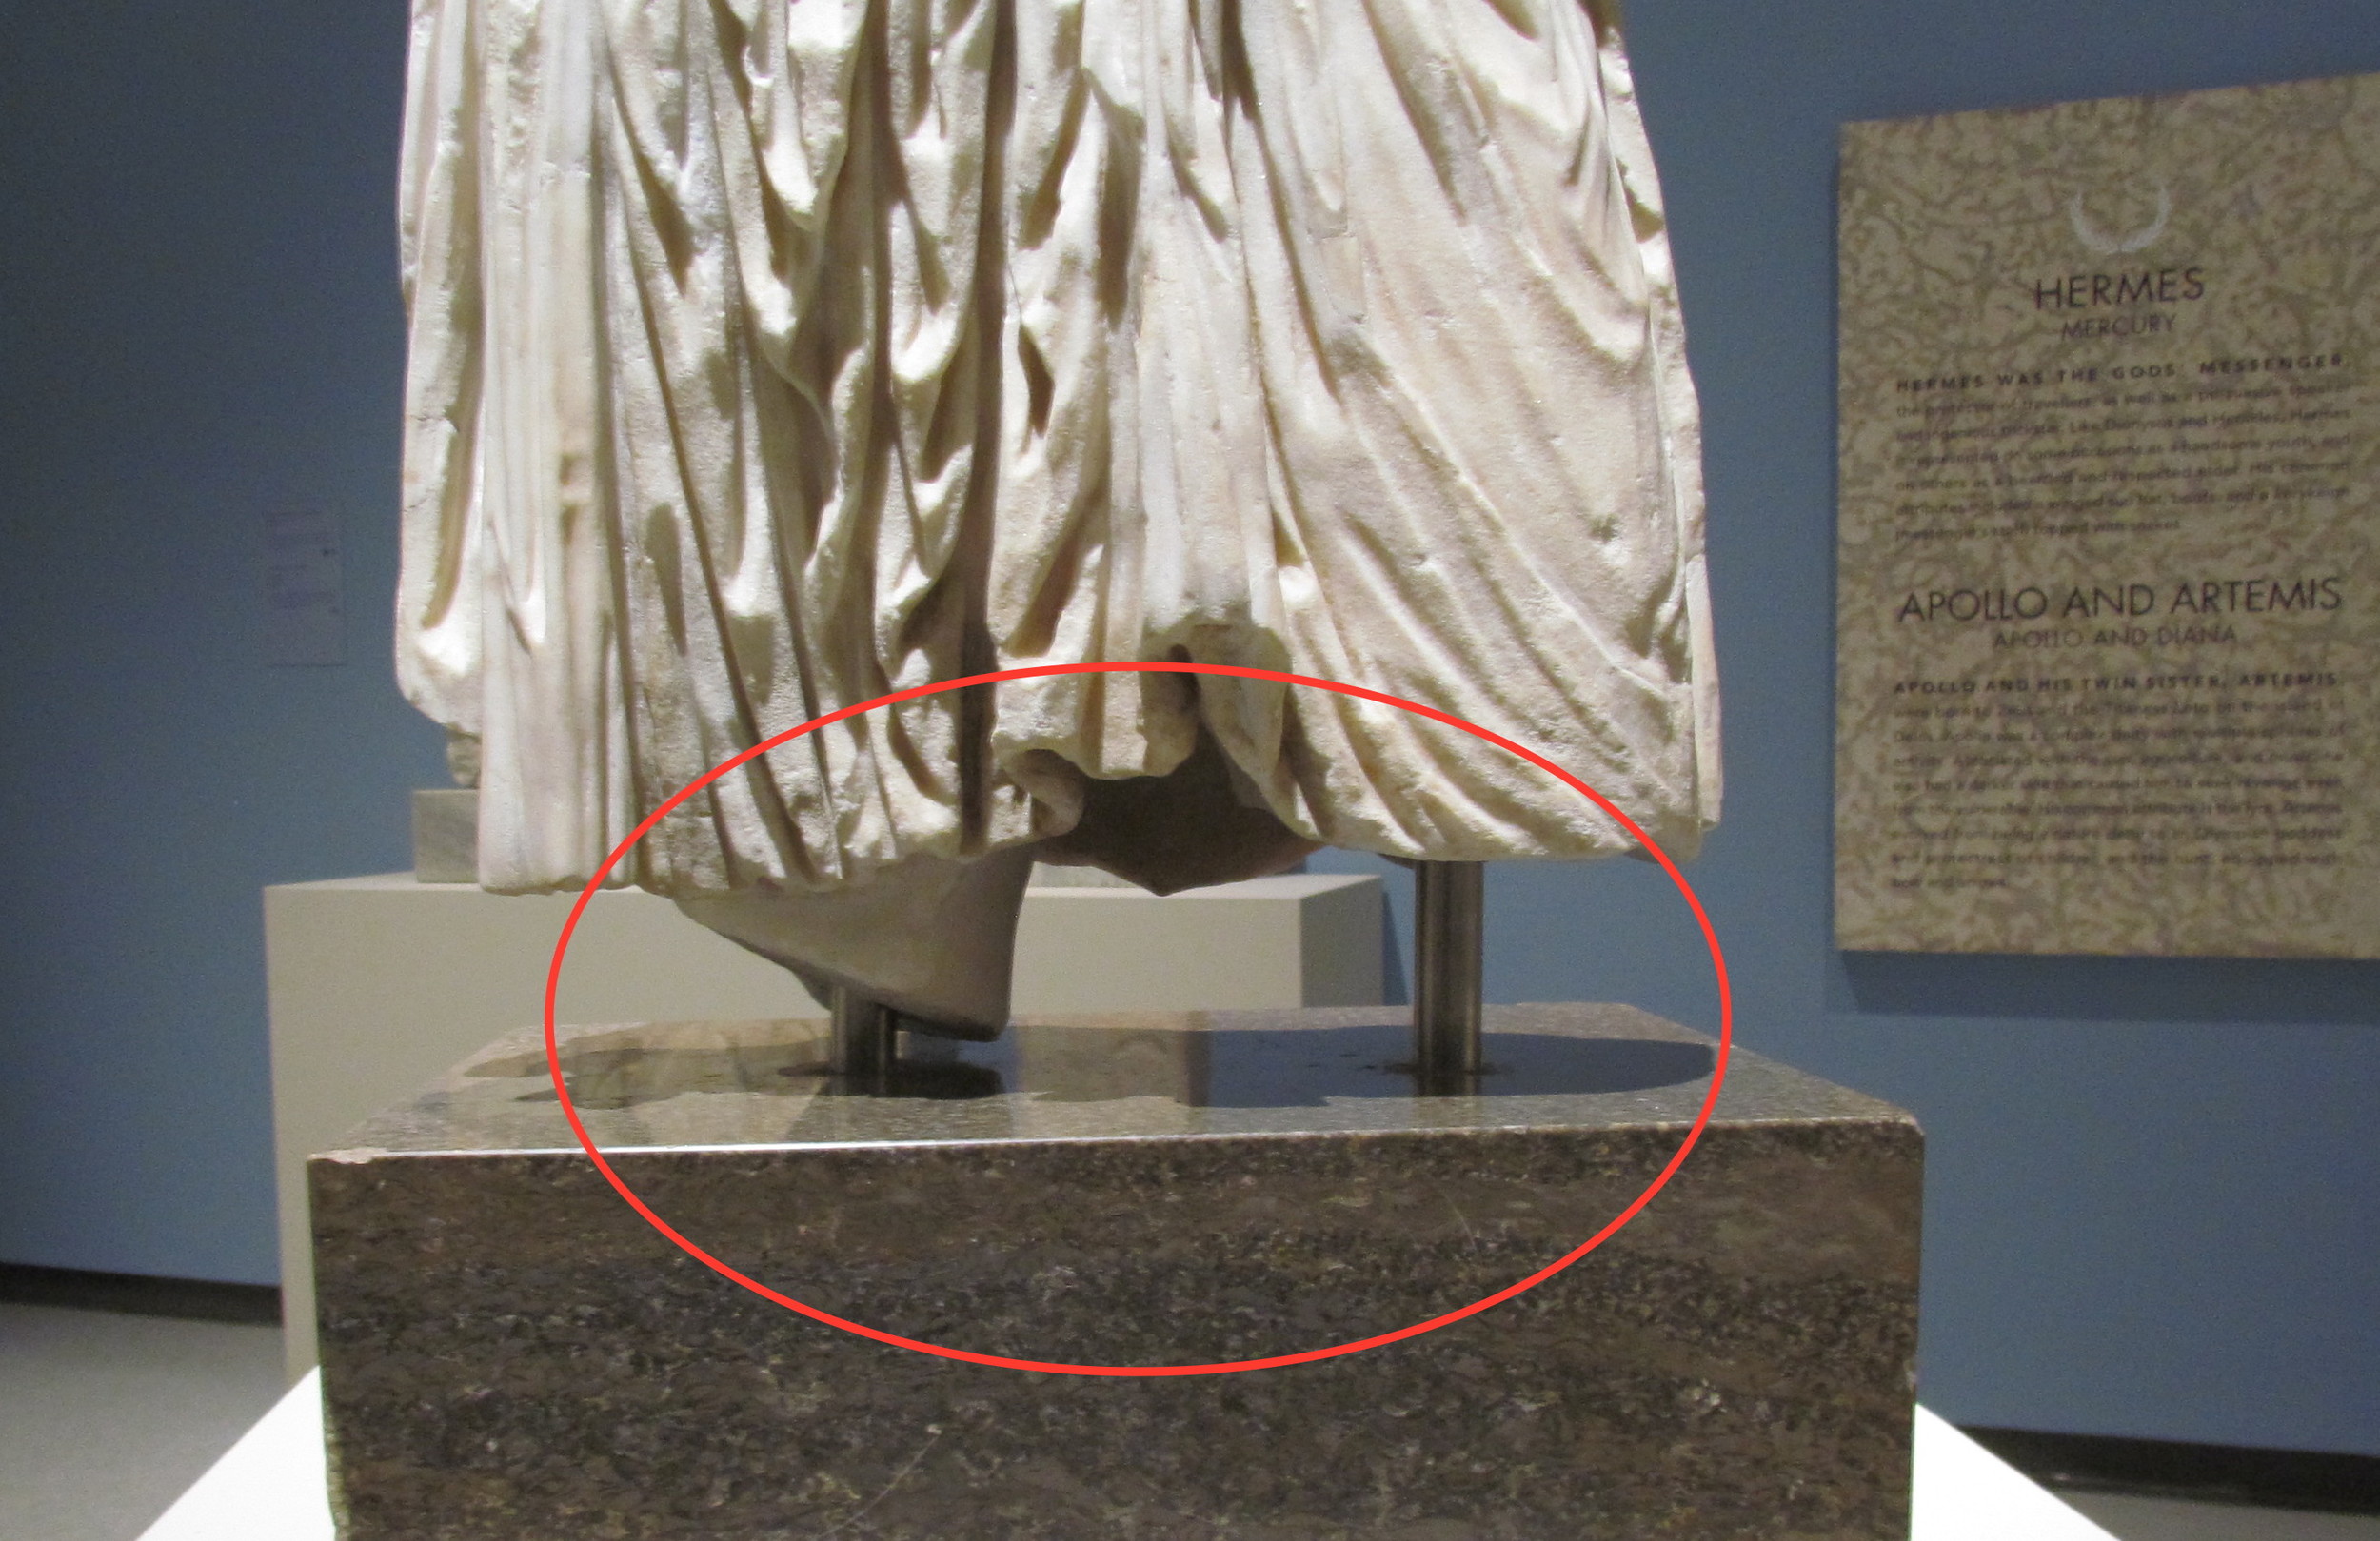
Does the sculpture include added thin metal supports at the bottom that could be challenging to scan, let alone 3D print? The presence of such supports indicates the sculpture itself cannot support itself.
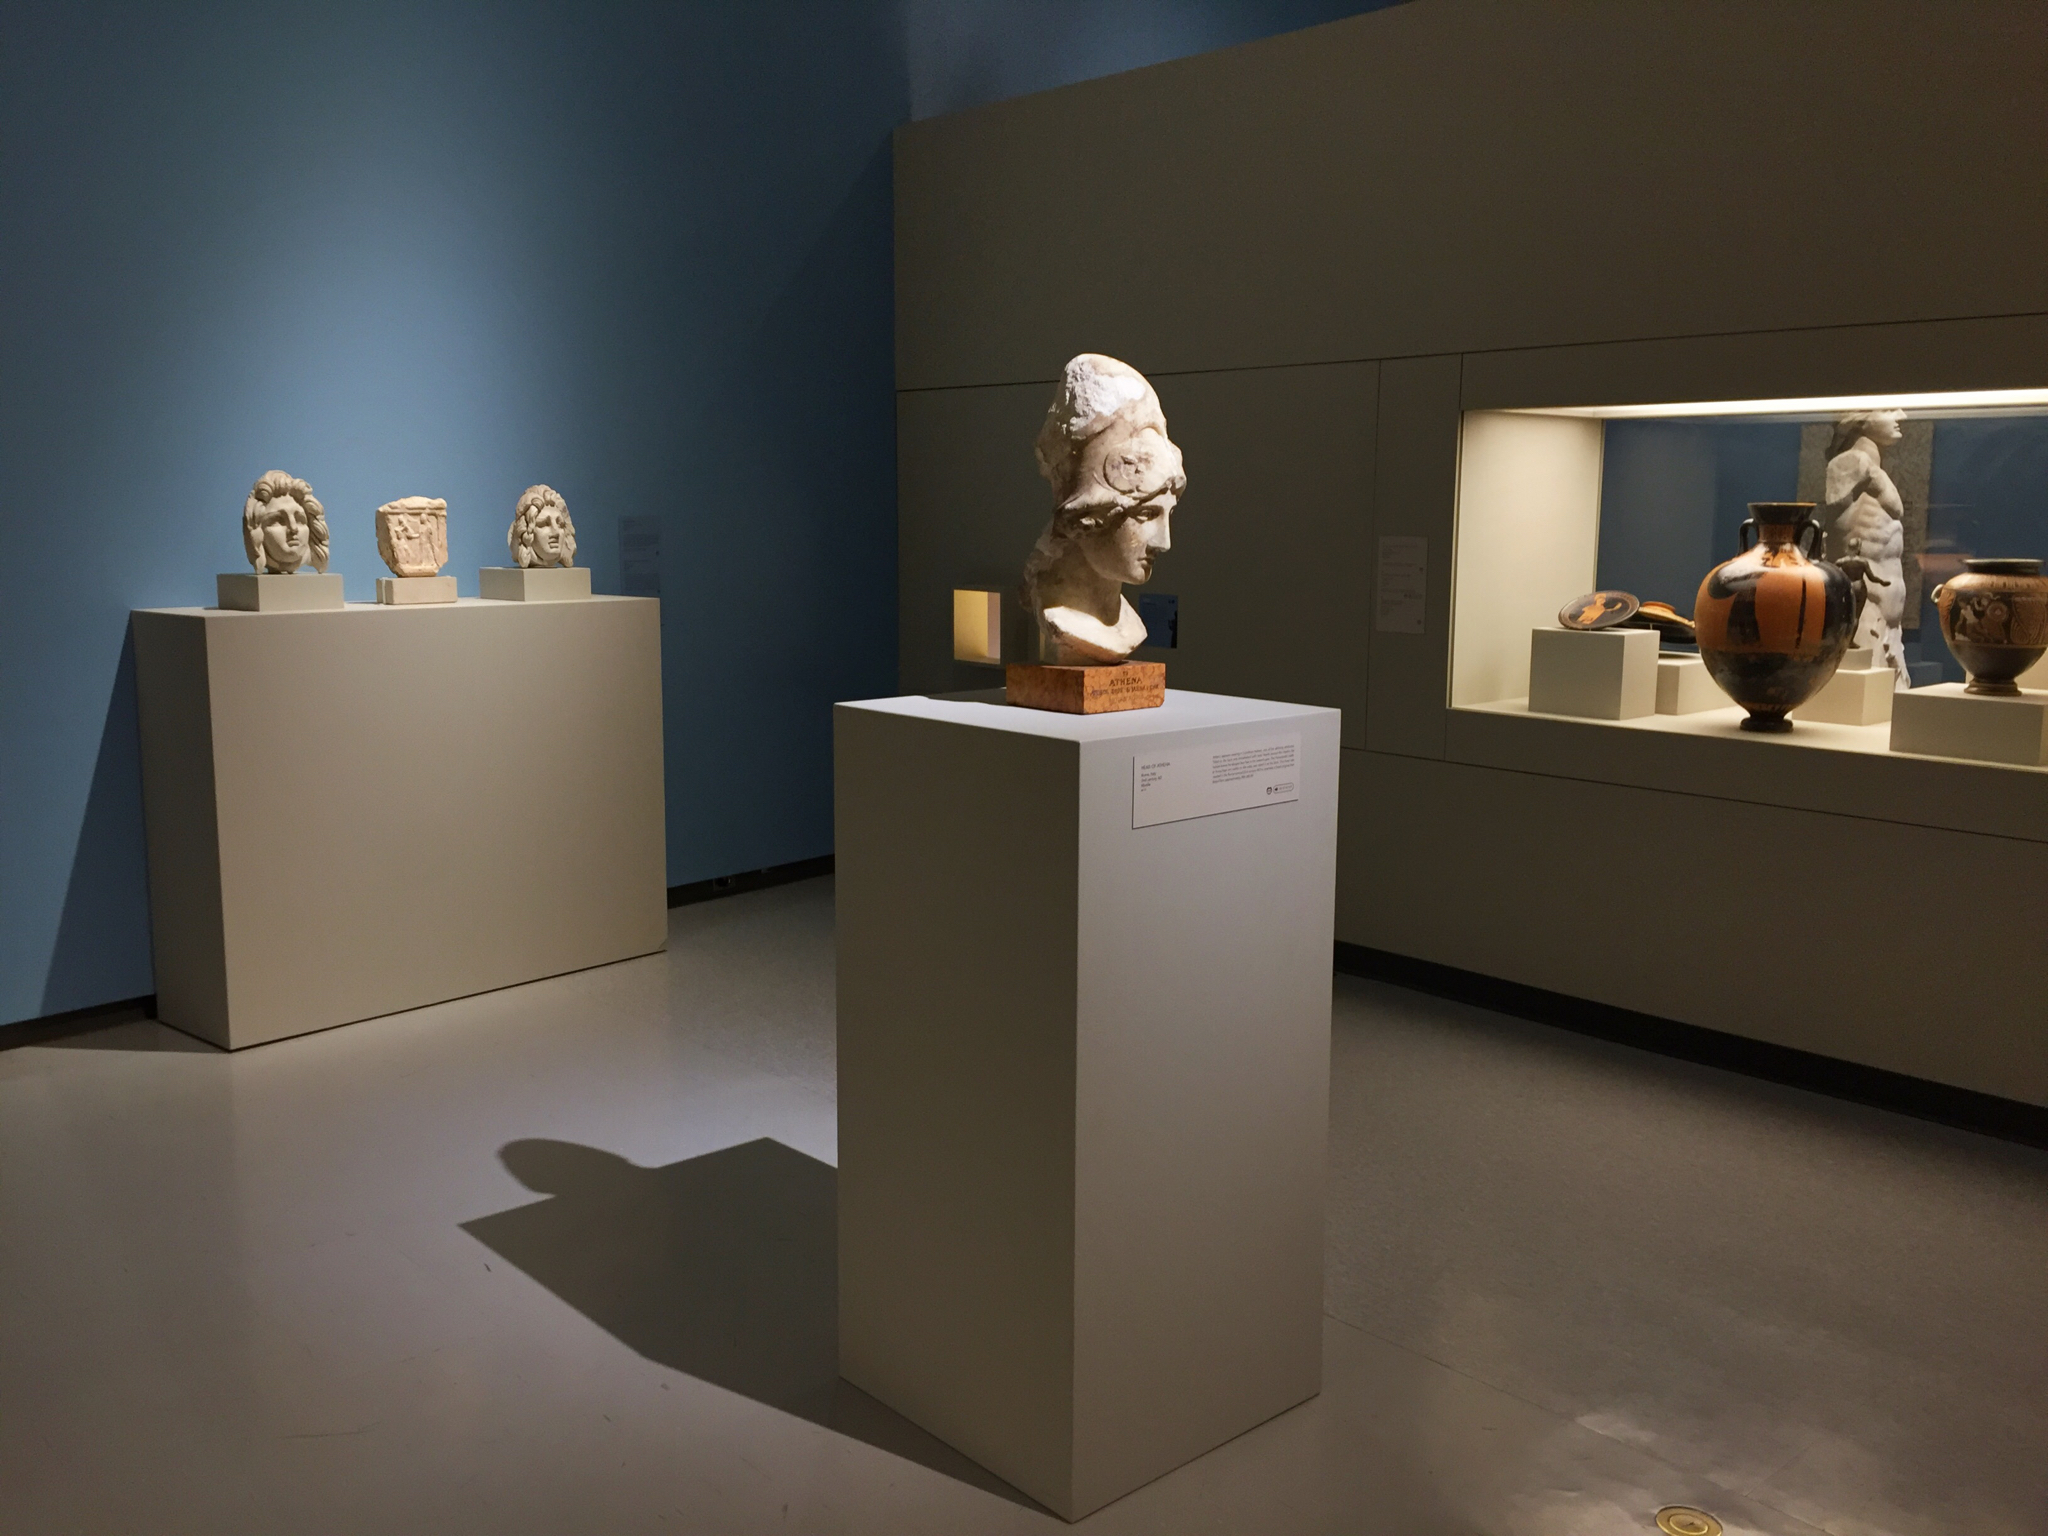
One key thing to watch for beyond the sculpture itself is the background. It turns out that the photogrammetry process leverages slight changes in background images to compute the camera’s position in 3D space. Here we see a terrific work of art, but with a completely monotone background.
A bad background would be one that is entirely uniform, say a blank white wall, or one with monotonous unchanging stripes. Photogrammetry requires differences in backgrounds, so look for anything that’s uniquely identifiable. It might be a doorway, a wall sign, contrasting paint colors or similar. Most times there are sufficient items in the background, but it’s always a good idea to check. Ensure that none of the background visual elements are moving. If they move during the scan, things will get very messed up; you want colorful, variegated static backgrounds.
You may find that lighting is irregular in the museum. Sometimes curators put annoying spotlights on the subject, making some portions bright, while others are quite dark. If this is the case, you may have trouble scanning.
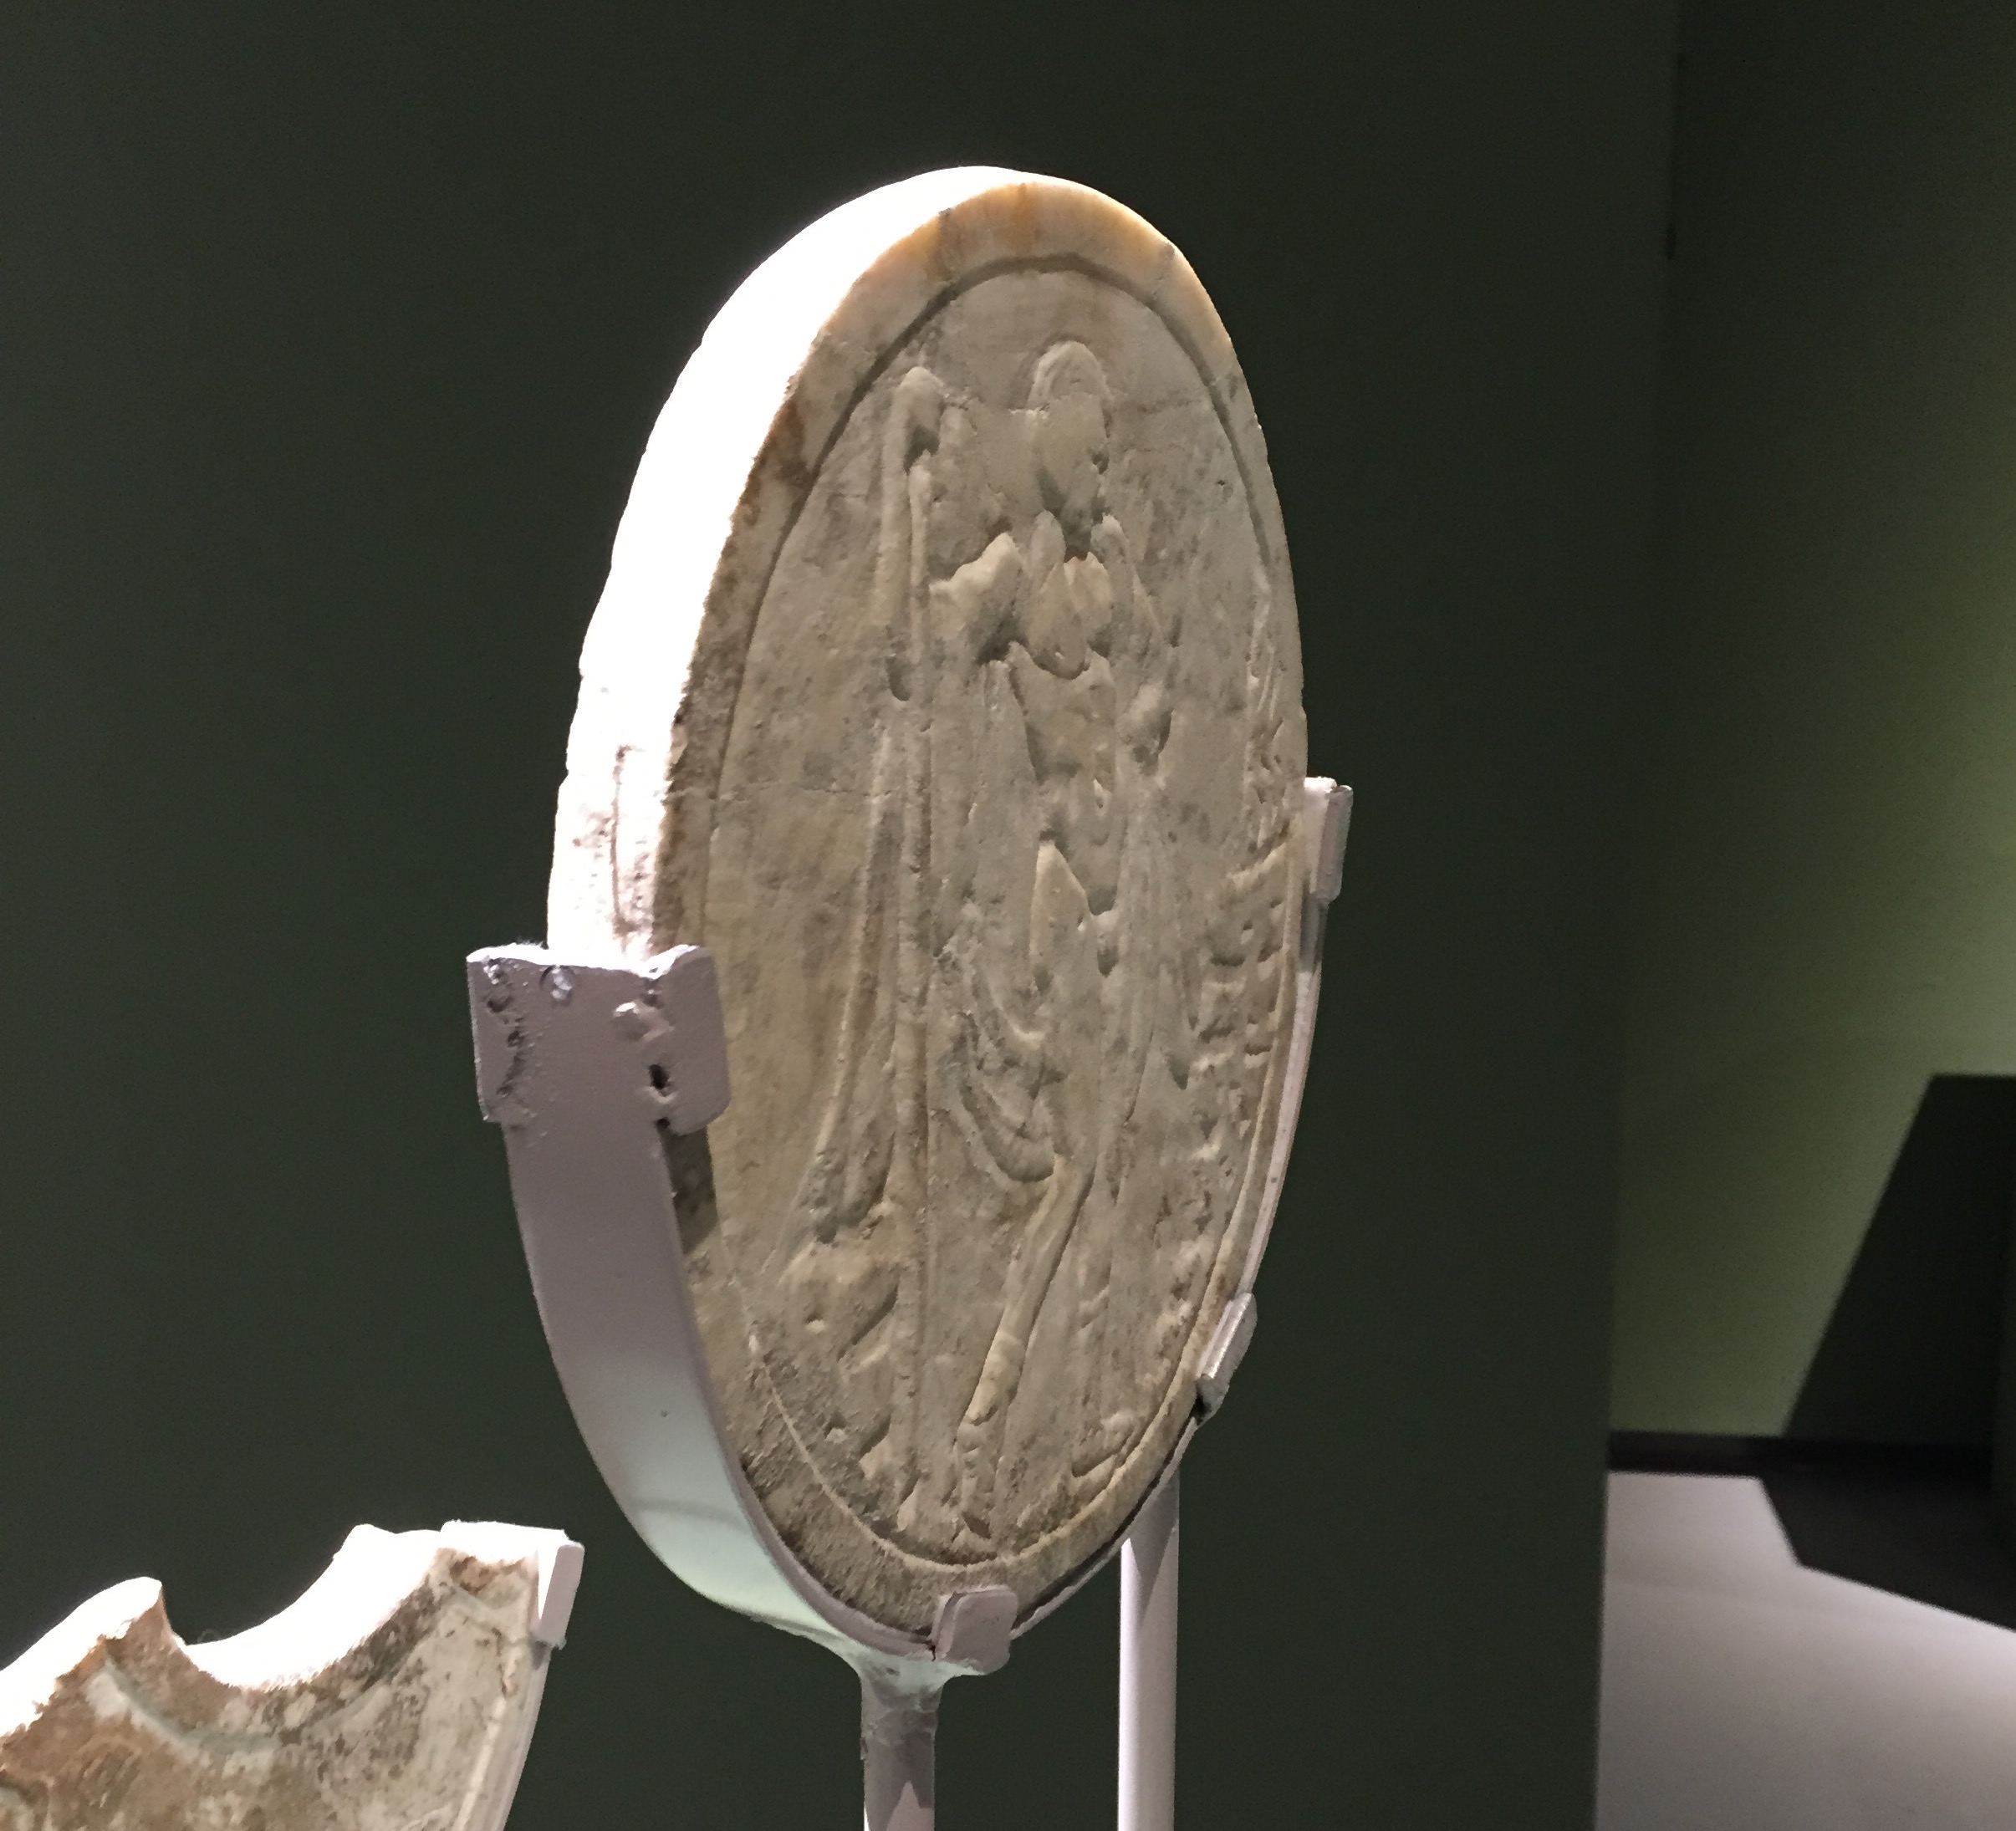
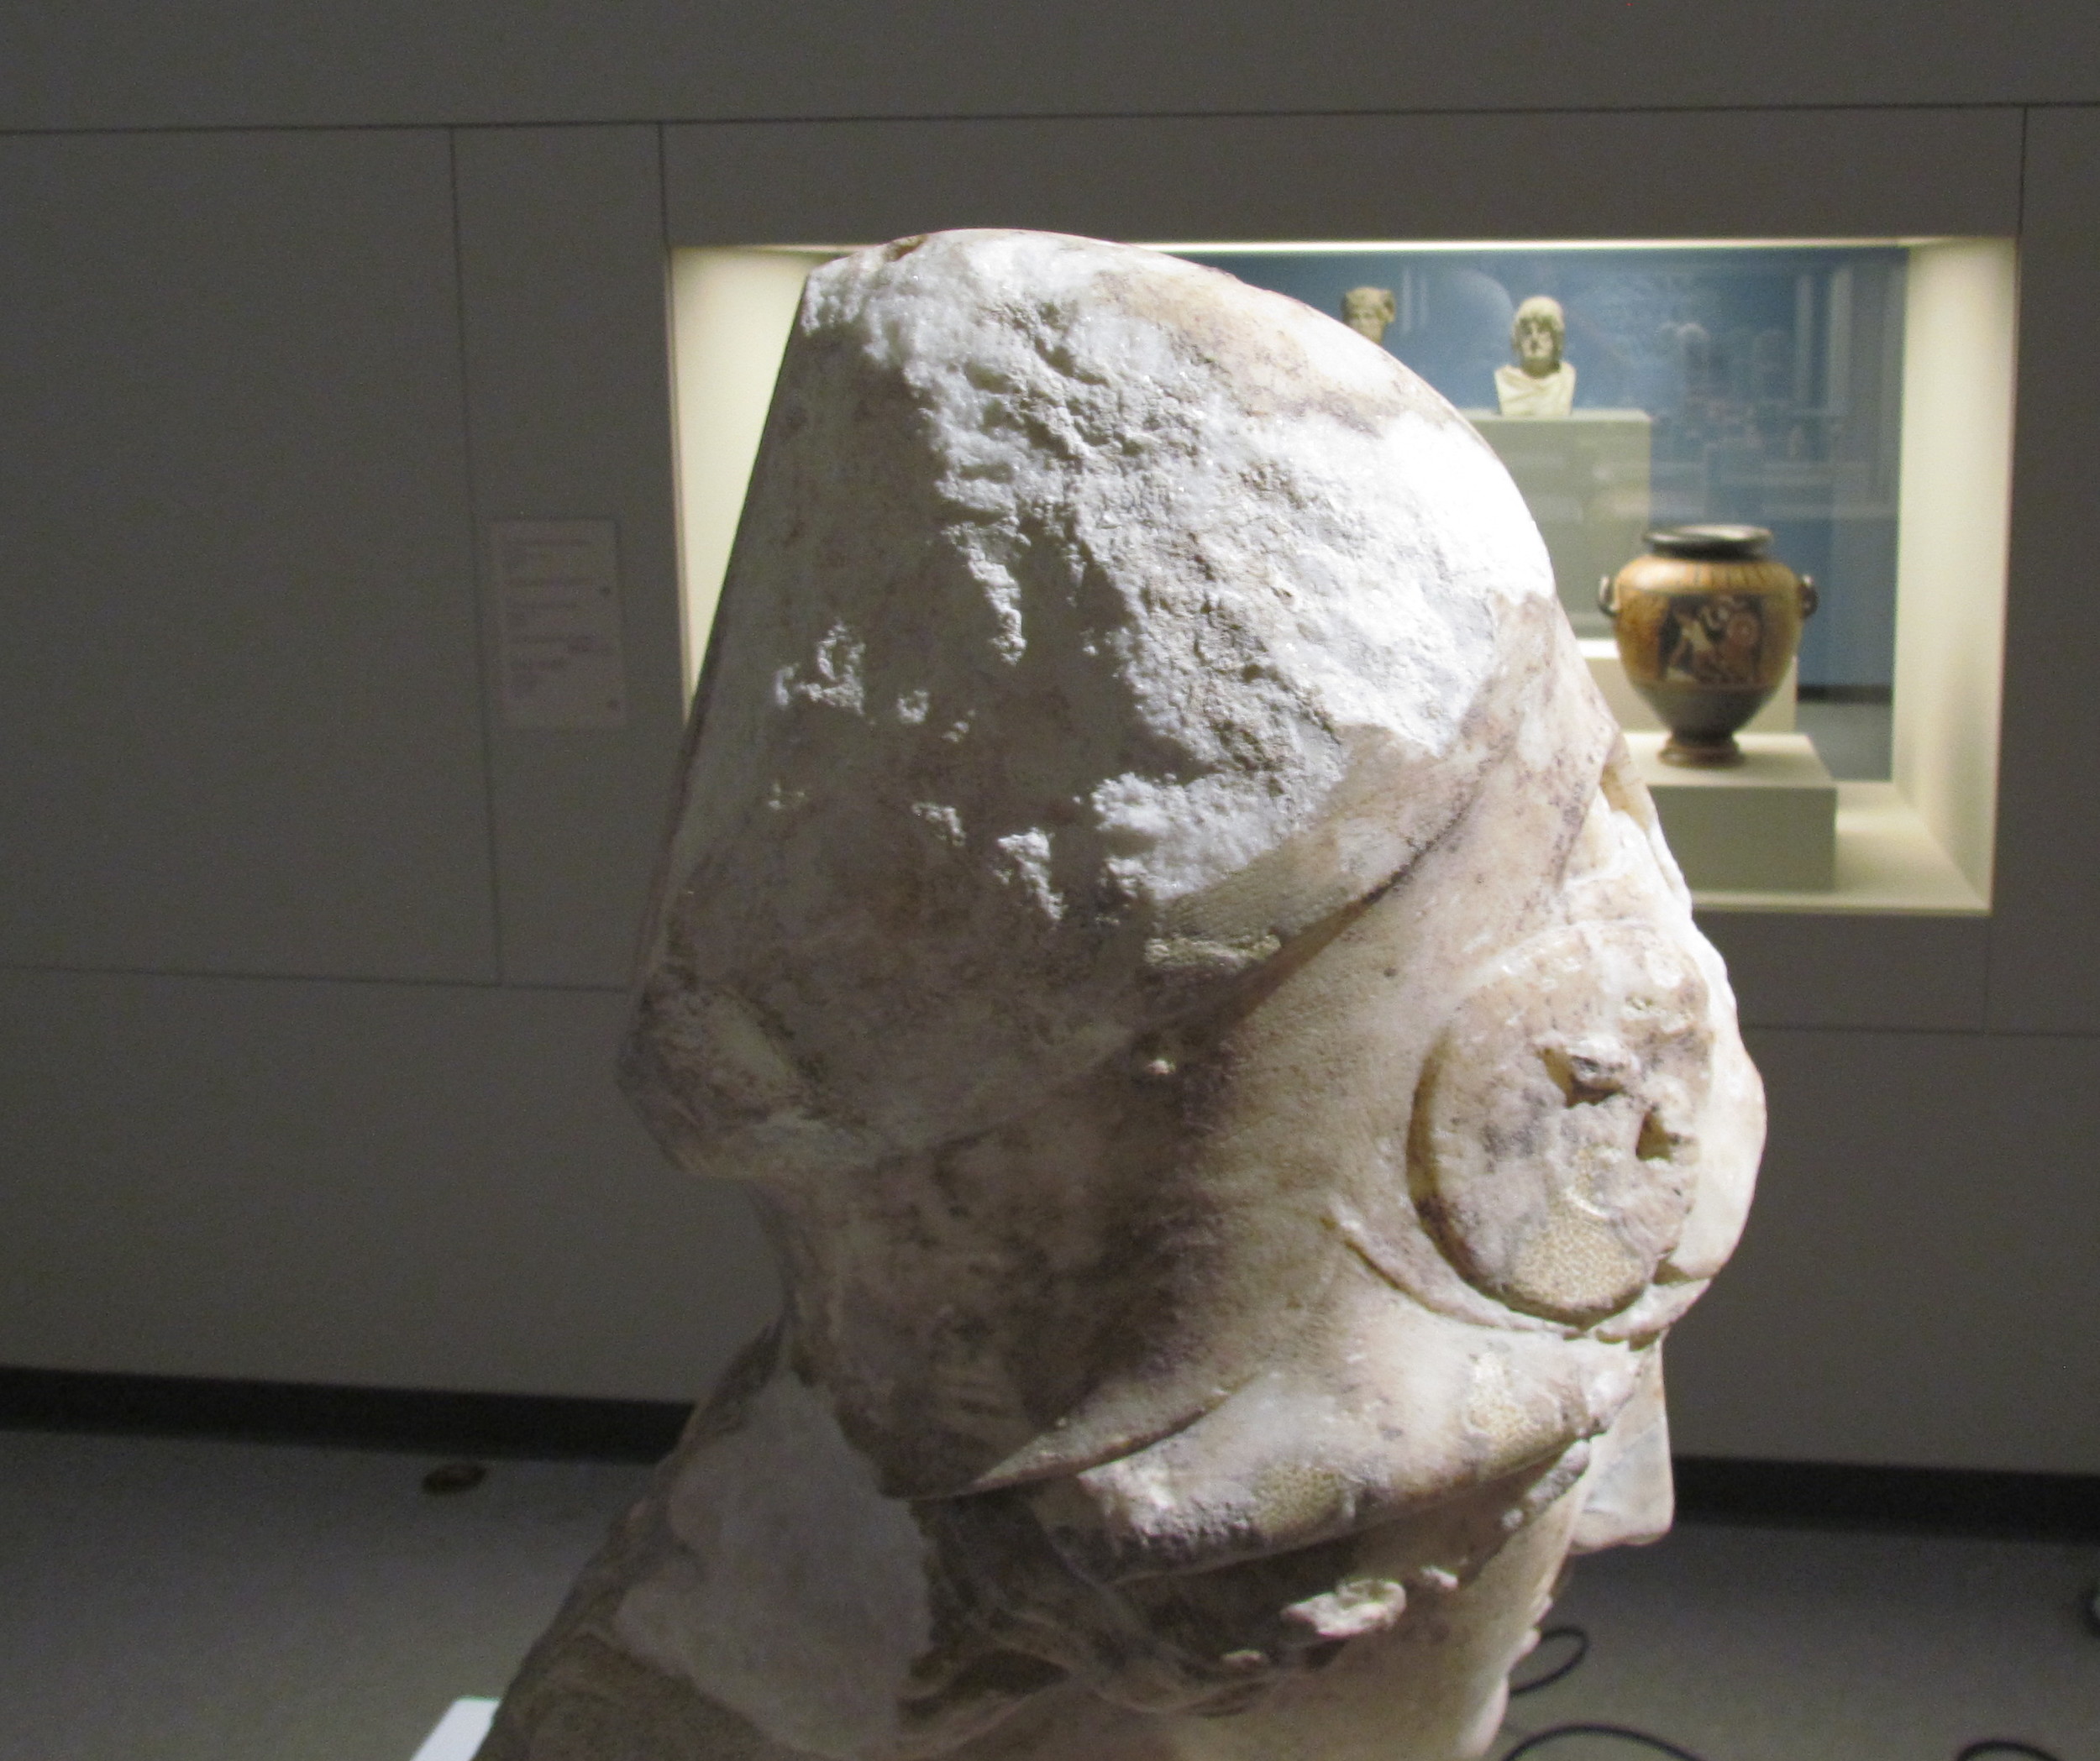
Make certain your subject has sufficient detail. This item is very interesting, but has very little detail. Imagine 3D printing it at 100mm size, and you’ll realize you’re simply printing a flat coin. Not interesting!
If your subject can meet all these conditions, you likely have a good candidate for 3D scanning.
One more thing to remember: you may have begun your scanning project with intentions of capturing a specific work, only to find that it is not a good scanning candidate upon inspection in the museum. If this is the case, don’t be disappointed; there are probably many other terrific unique items to be scanned.

Alternate scanning subjects are sometimes found in surprising ways. Remember that a 3D scan can be done of large objects as well as small. There are often very good works that are only 200mm tall, and frequently in proper scanning state. If you capture the small object, you can print it at any size.
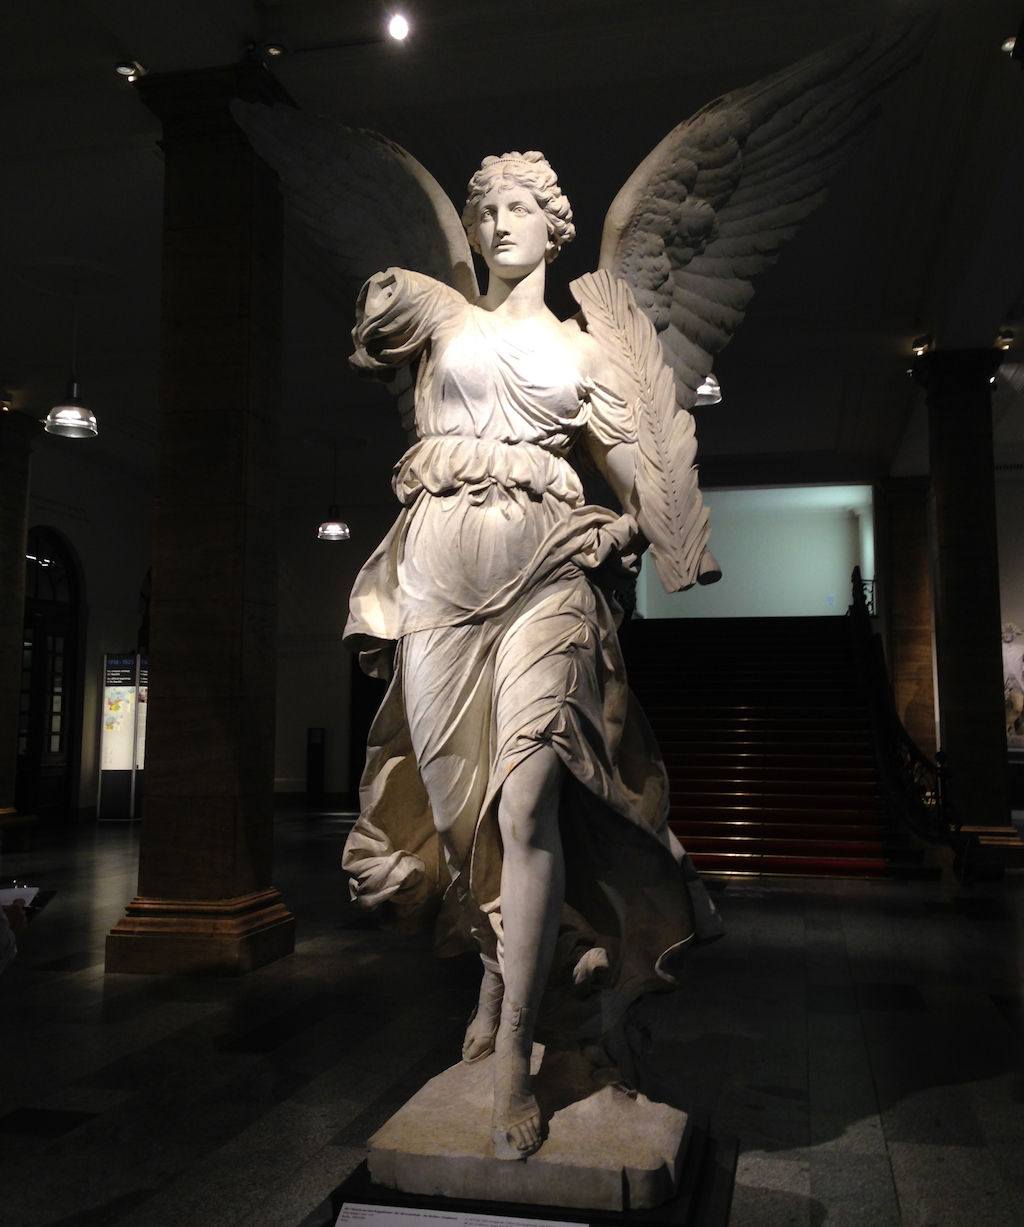
Similarly, it’s also possible to capture large objects. I’ve used photogrammetry to capture this 5m tall sculpture quite successfully. Of course, you’re going to print them quite small later.
If your subject happens to be outdoors, the same constraints apply. You must be able to perform a 360 degree movement to take images. Backgrounds are more interesting in outdoor scenes, however, as there may be no walls present.
In some cases, a sculpture may be raised on a pedestal meaning your background might be only blue sky! Unfortunately, these are not good candidates for scanning, unless you can ensure your images all have varied and static backgrounds. Buildings in the background would be excellent, but trees are not because they may move in the wind and do not offer the same visual profile from different directions. Clouds are also very problematic; the best clouds are a flat, uniform sheet of cloud overhead.
At this point you should have made appropriate arrangements with your museum and have selected a number of excellent scanning candidates. You are ready to do the scanning!