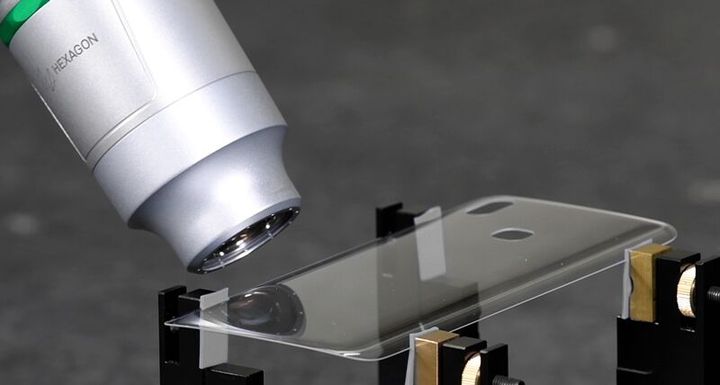
Hexagon announced a new 3D sensor that could have implications on the future use of additive manufacturing technology.
The company’s Manufacturing Intelligence Division announced the HP-OW sensor, which uses chromoatic white-light spectroscopy. They say the device can produce “highly accurate” measurements of a wide variety of surface types.
Hexagon said:
“Manufacturers of components with vulnerable surface finishes struggle to achieve optimal efficiency because traditional tactile inspection can be time consuming, and parts are often damaged during measurement. In cases where 100 percent of components must be inspected, the deformation of delicate surfaces impairs productivity and, ultimately, the bottom line. The new HP-OW chromatic white light sensor provides increased measurement speed and flexibility for OEMs and offers contract manufacturers the opportunity to employ new technologies and materials in production.”
The idea here is to ensure the parts produced meet the required specifications. In today’s precision world there are an increasing number of parts that will require 100% inspection.
But how does this relate to 3D printing?
In recent years there has been a push towards additive manufacturing, where the design of 3D printers has slowly shifted from “standalone” machines requiring human operators to more automated solutions that digitally integrate with factory control systems.
But the act of “manufacturing additively” does not start and end with the 3D printer. The printer is only the core of the activity, and is part of a chain of events beginning with 3D design, through post-processing steps, and ending with finishing of the part.
And finally, a declaration that the part is indeed suitable.
For some applications, it may be that a mere glance from an operator with their standard Mark 1 Eyeballs may be sufficient, but most applications will require something more robust — and automated.
There are automated quality control devices available, but many use a touch-probe technique that will frequently be unusable on the complex geometries produced through additive design and manufacturing. Instead there are quality control systems that use 3D scanning. These capture a scan of a completed part and then compare it to a database of 3D models. If the part’s scanned geometry is off by more than the tolerance levels, then the part can be rejected.
One system I saw using this approach was designed by Oqton, where the part did not require a specific orientation before scanning. You simply tossed the freshly printed part into the chamber and got a green or red light depending on the part’s quality match.
But these systems are really quite slow when facing higher-volume production, which is the target area for additive manufacturing in the future. What we need are automated quality systems that can very quickly inspect a stream of parts emerging from high-speed 3D printers set up for mass manufacturing.
This is where Hexagon’s new sensor may be useful. The device can apparently operate at high speed. They explain:
“Additive manufacturing processes pose unique challenges because parts must often be measured throughout production to ensure quality, but the cycle time to perform precision inspection of rough unfinished parts can be prohibitive. As a new option in a line of specialized sensors extending the range of measurement technologies that can be used with a single CMM, the chromatic white-light scanning sensor offers an efficient method to scan parts with high accuracy throughout production.”
The other very interesting property of the HP-OW sensor is its ability to reliably capture previously tricky surface, such as reflective items. They say:
“The sensor’s ability to measure components with transparent, polished, rough, and matte finishes makes it easy to quickly and accurately measure parts made with delicate materials – including electronics components such as LED vehicle lights and solar panels. Non-contact capabilities also offer high throughput inspection of medical devices, such as surgical implants, where every part must be inspected with high accuracy.”
Of course, this device is merely a component of a future automated system that doesn’t yet exist. But the fact that the sensor exists means that some enterprising company might build such a device around the scanning technology.
Via Hexagon
