

Our look at Pantheon Design’s incredible HS3 continues with operations, materials, software and our final thoughts.
This is part two of a two part series, please read part one.
Pantheon HS3 Operations
Operating the HS3, or at least our pre-production unit, was identical to operating any Duet-equipped 3D printer. The web interface was quite detailed, and could be accessed remotely, if you have set up your network properly. However, I’d advise against doing so because of the possibility of unauthorized access to the HS3 from external parties.
We set up a dedicated PC beside the HS3 to act as the “control panel”. In fact, there are no physical or digital controls whatsoever on the HS3 — you must use the web interface. There is only the power on switch at the back of the machine.
Starting a print job is a matter of uploading a GCODE file and confirming to start a job. In practice this means you must have the GCODE file pre-sliced and ready to go on your PC when you’re using the Duet web page.
The Duet board stores all prior jobs executed on the machine, so it’s really easy to re-run a successful print by looking through the “Jobs” menu and picking a file. This proved quite handy to our operators.
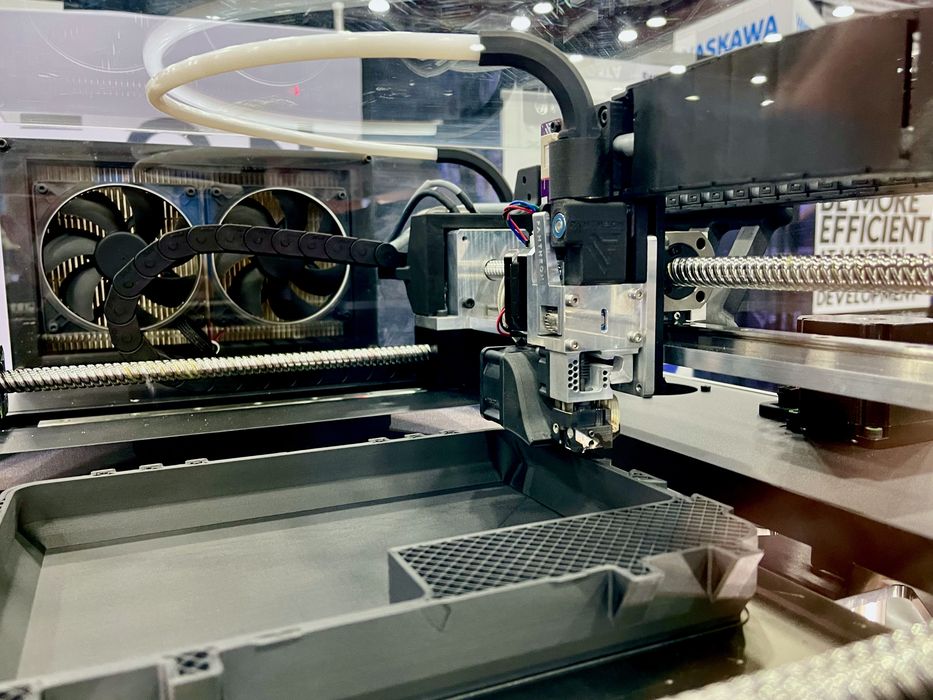
The main feature of the HS3 is its high speeds, and this is accomplished by Pantheon’s High Speed Deposition (HSD) system. It’s a very unusual combination of hardware, software and materials.
Printing at high speed is quite challenging. There are momentum issues, extrusion issues and thermal issues.
Pantheon Design has overcome the mechanical factors by building an incredibly robust servo motor-powered motion system. Here’s a short video showing the speed and accuracy of the system:
Just watching this system makes you feel how fast this machine could be. It’s incredibly smooth, quiet and precise. But there’s more to the HS3 than just the motion system.
Materials have to be just right to print at high speed. Higher speed printing means the filament flows through the hot end faster, leaving less time for the material to heat up and soften. Pantheon Design has figured out a unique way to ensure proper heating by leveraging the thermal properties of the chopped carbon fiber in the filament.

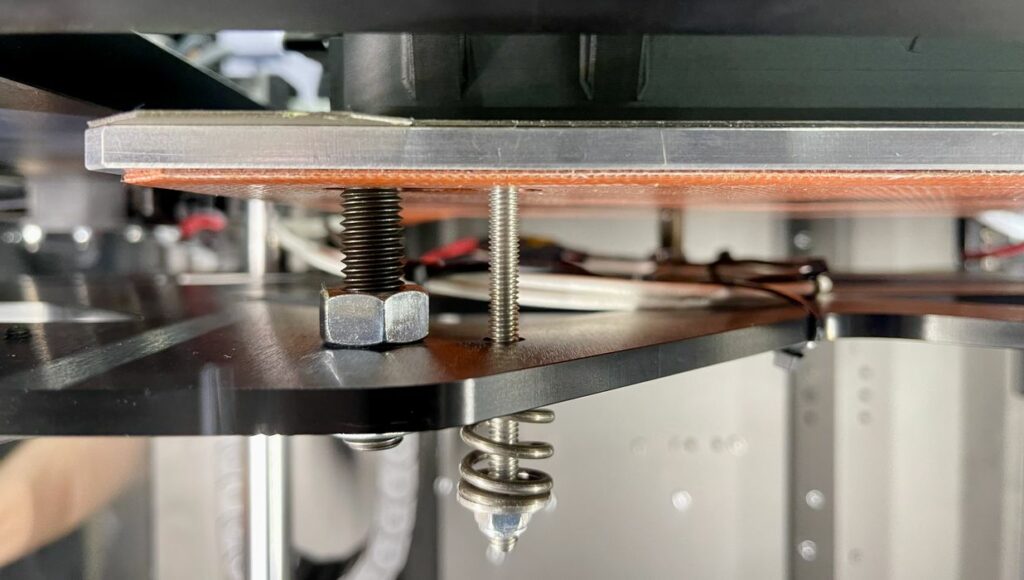
We did have an occasional challenge with the magnetically attached spring steel bed. Once in a while we would find first layer adhesion to fail, as seen here. Pantheon Design suggested that a) this could have been a bad batch of filament, or b) the print plates were defective and they plan to replace them with something better. However, most times our prints would adhere properly and were easily removed when done. This issue was fixed by washing the plate clean.
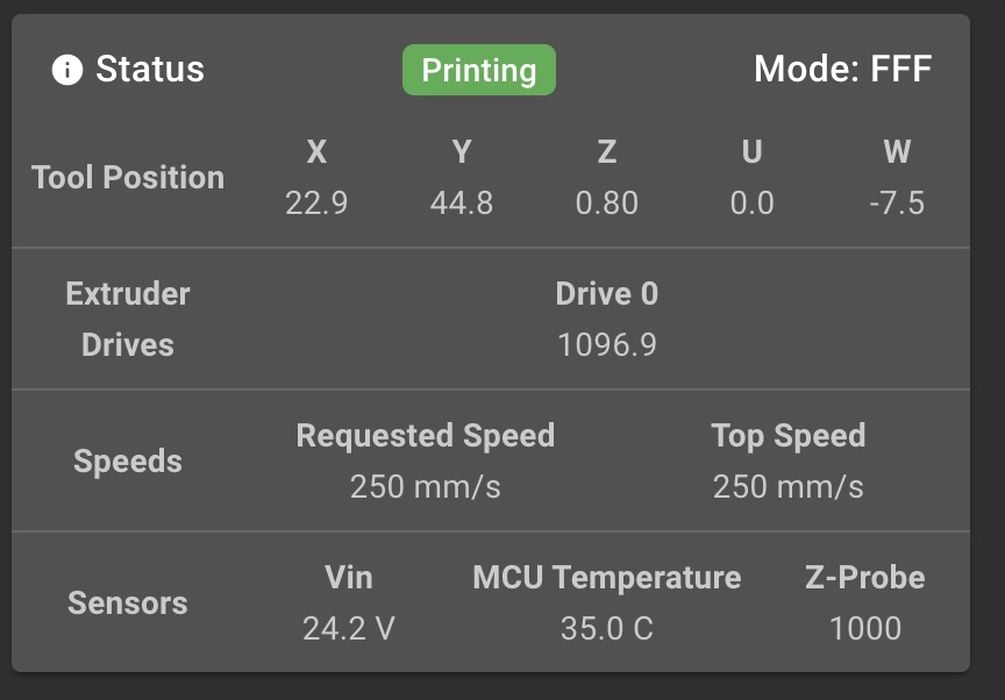
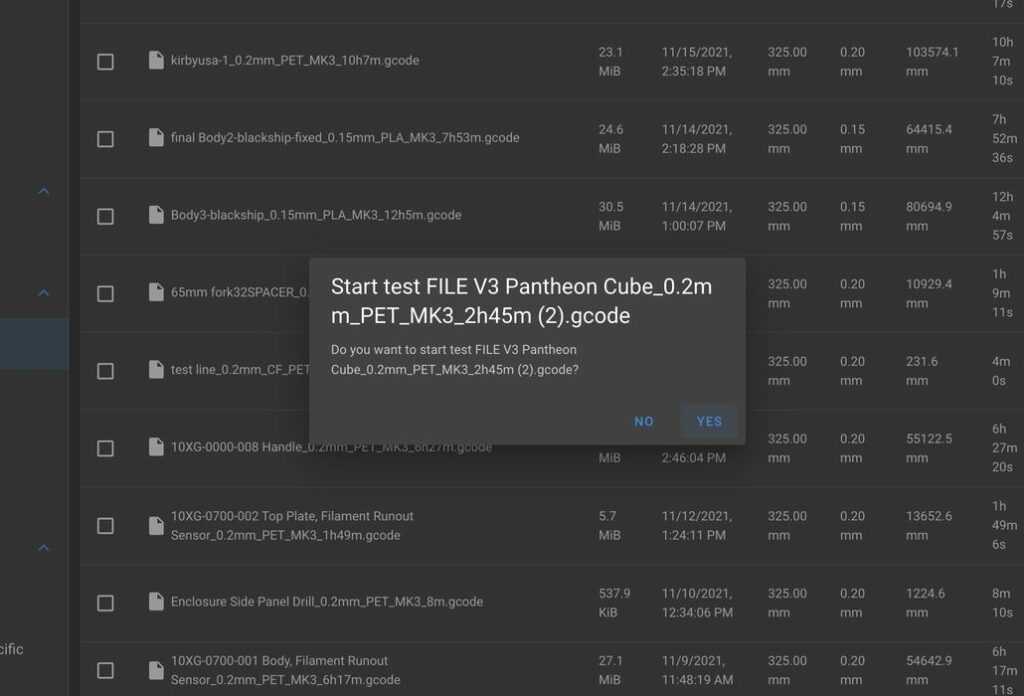
Monitoring a print job is done from the web interface, as we can see in the above image the status of a job. Note the “requested print speed” is a whopping 250mm/s.
One interesting feature on the Duet was the print time estimate, which was of considerable interest due to the rapid print speed. Exactly how fast could a print take?
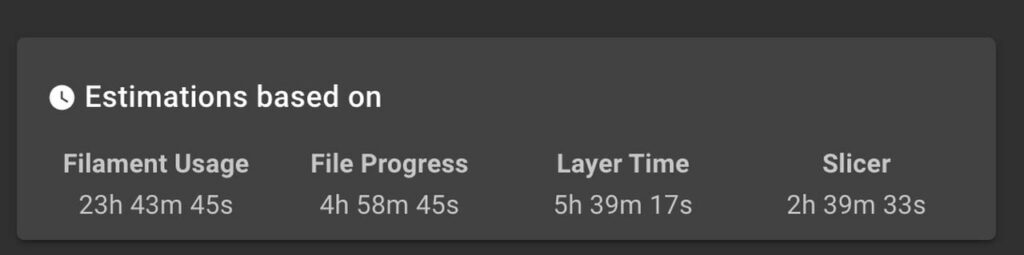
The display shown here has several different types of estimates, using filament consumed, GCODE instructions executed, layers completed and the original slicer time estimate. As you can see in this example, they are all wildly off at any given moment. However, we found the filament usage tended to be the most accurate — but only after the print had put down several layers. In general the slicing time tended to be about 30% longer than prints actually too. So, for example, a one hour test print, according to PrusaSlicer, might take only 45 minutes in real life.
As this was a pre-production unit, there were a few obvious features absent. One was a camera system to see what’s happening in the build chamber. While the Duet web interface was easily accessed from anywhere, unless you can see the print plate you can’t really start a new print job.
Similarly, the HS3 was missing a “filament out” sensor. This was a bit frustrating as we had to ensure there was enough material on the spool to complete the job. With the machine’s very high speed you had to be extra careful in this regard.
However, both of those features will be very easily added into production versions to come. For us, the sheer speed of the machine greatly outweighed any convenience concerns.
Pantheon HS3 Materials
The HS3 is VERY picky about what materials you can print with. The only material we could print was PETG-CF, and then only certain batches from the same manufacturer. This is the price of high speed 3D printing: greatly restricted material choice.
Pantheon supplied us with materials to print, as we simply couldn’t know which would be the right materials for the high speed machine. At times we did run out, but Pantheon Design was able to supply us with more filament as our testing continued.
I’ve heard from other makers of high speed 3D printers that material is really important, but in the case of Pantheon Design, they seem to be right at the edge of the envelope. The material must be precisely produced in order to enable high speed operations.
Pantheon HS3 Software
The software required to prepare jobs for the HS3 turned out to be very familiar: PrusaSlicer. Pantheon Design supplied us with a custom profile that we imported into PrusaSlicer and that allowed us to easily prepare print jobs.
Using PrusaSlicer made it extremely easy to get going on the HS3 because we were already very familiar with that software tool. This is probably a good choice for Pantheon Design, although Ultimaker Cura could likely also be used if an appropriate profile was created.
Pantheon HS3 Print Results
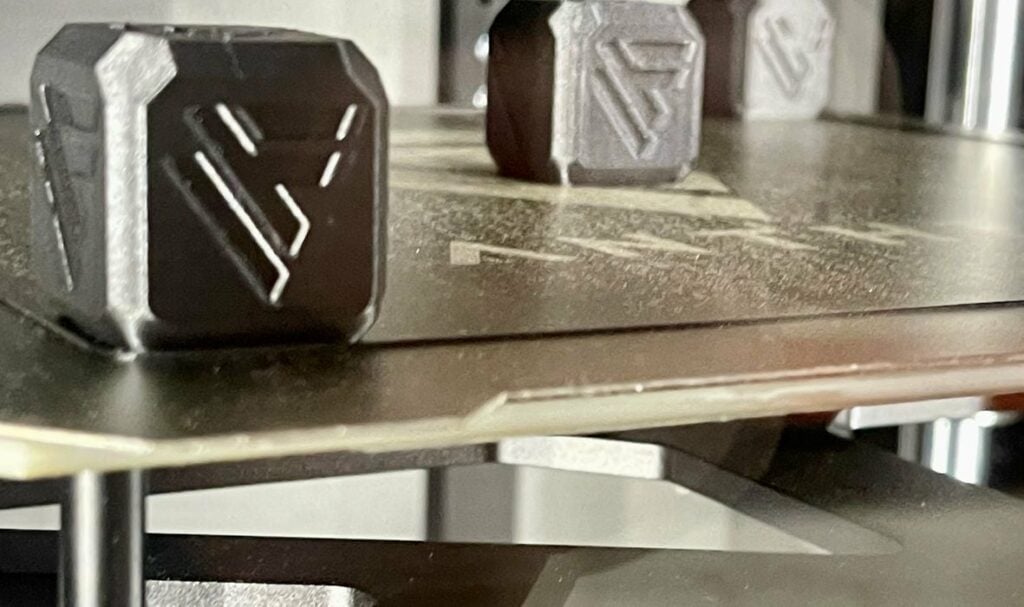
High speed printing invariably results in poor print quality, but that definitely was not the case on the HS3. We did not observe typical high speed effects like ringing, misaligned layers and such. In fact, virtually every print we pulled off the HS3 was nearly perfect – and in carbon fiber, so they were incredibly strong.
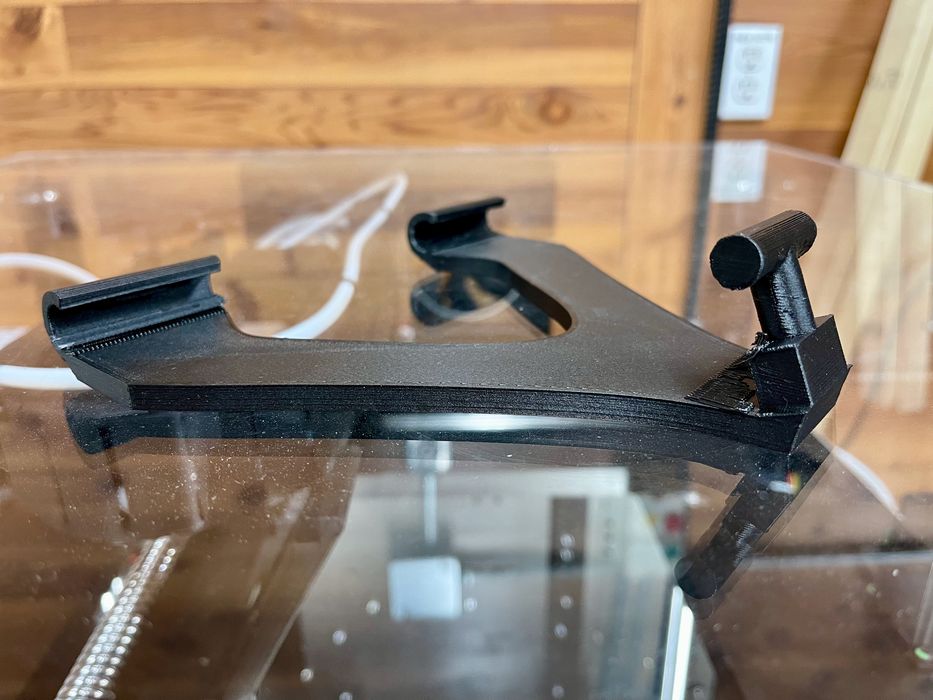
For example I designed and printed this tablet mount for a drone controller, which will take considerable abuse when loading in the tablet. It’s working really well because of the strength of the carbon fiber material.
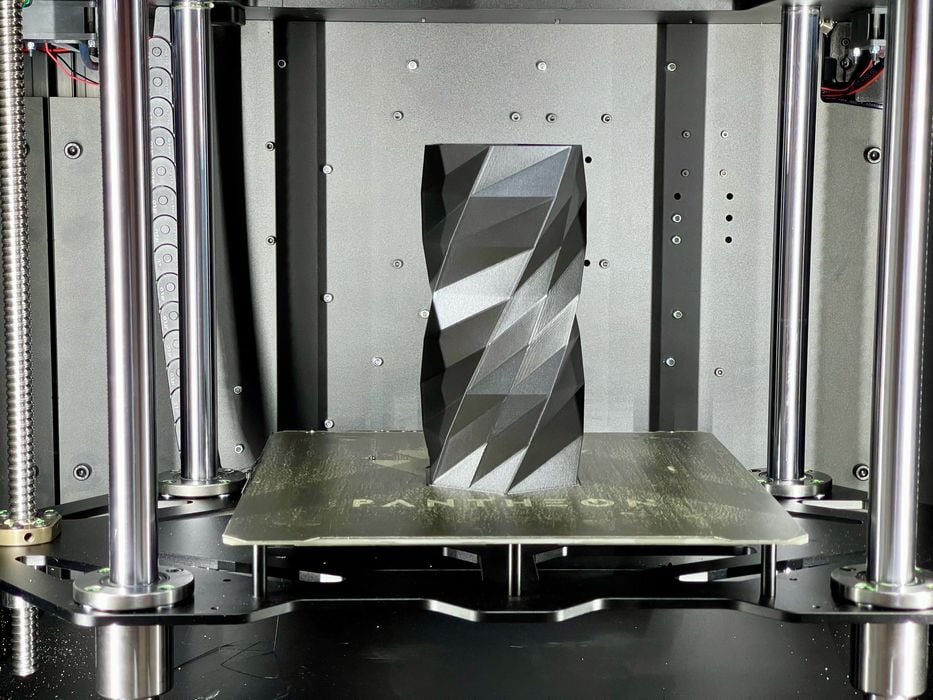
This 275mm tall vase was printed in only 45 minutes. Let me say that again: forty five minutes! It was mesmerizing to watch this print as the speed was so great you could visibly see it grow in real time.
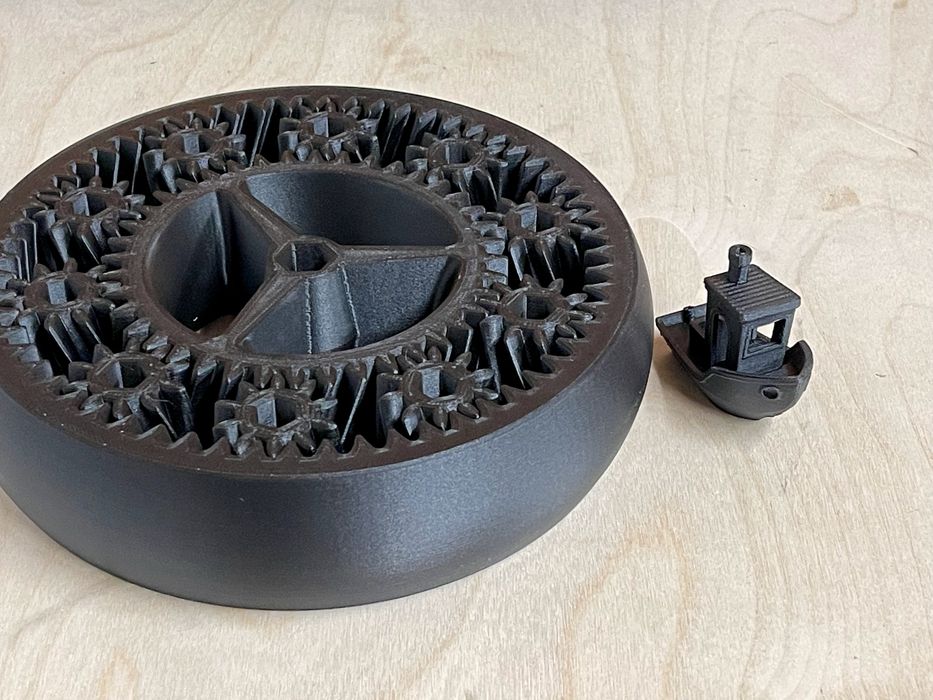
Five hour #3DBenchy prints completed in less than an hour and exhibited excellent print quality. The enormous planetary gear print took only five hours to complete.
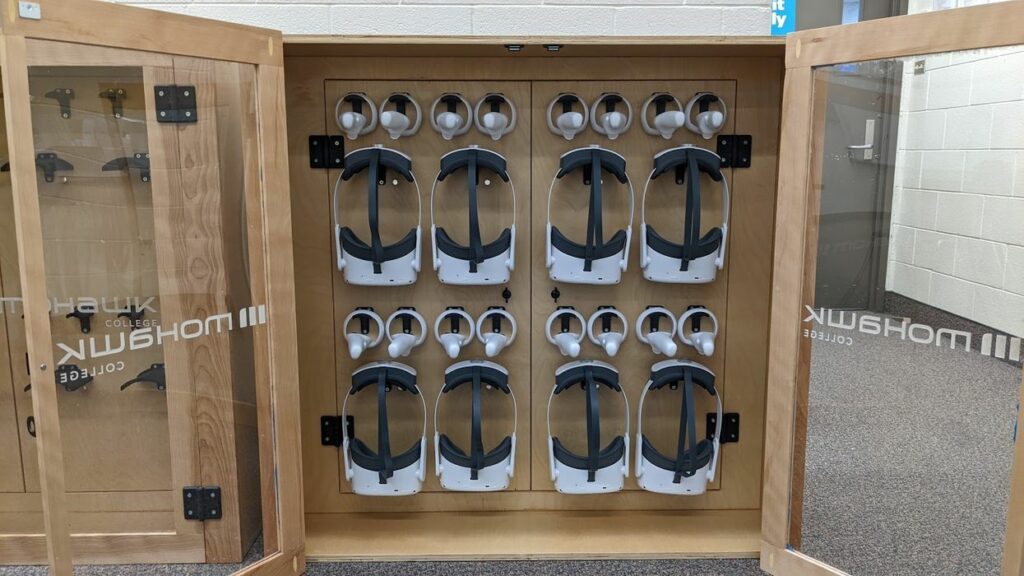
This cabinet of VR headsets uses 3D printed mounts made on the HS3. It’s entirely possible to produce end-use parts for commercial purposes with this machine — because we did.
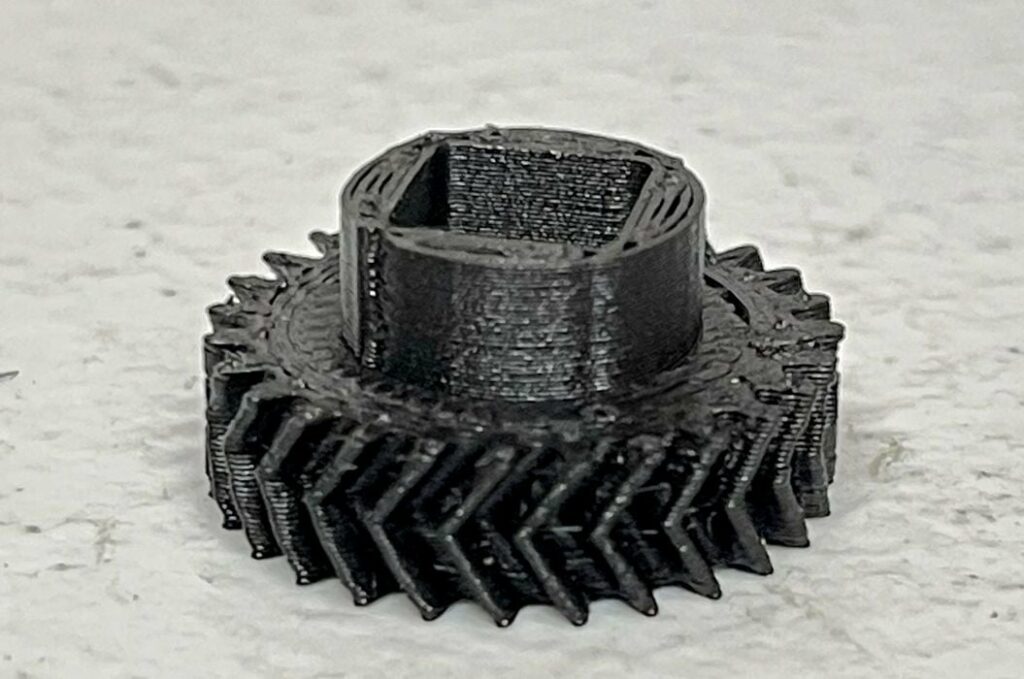
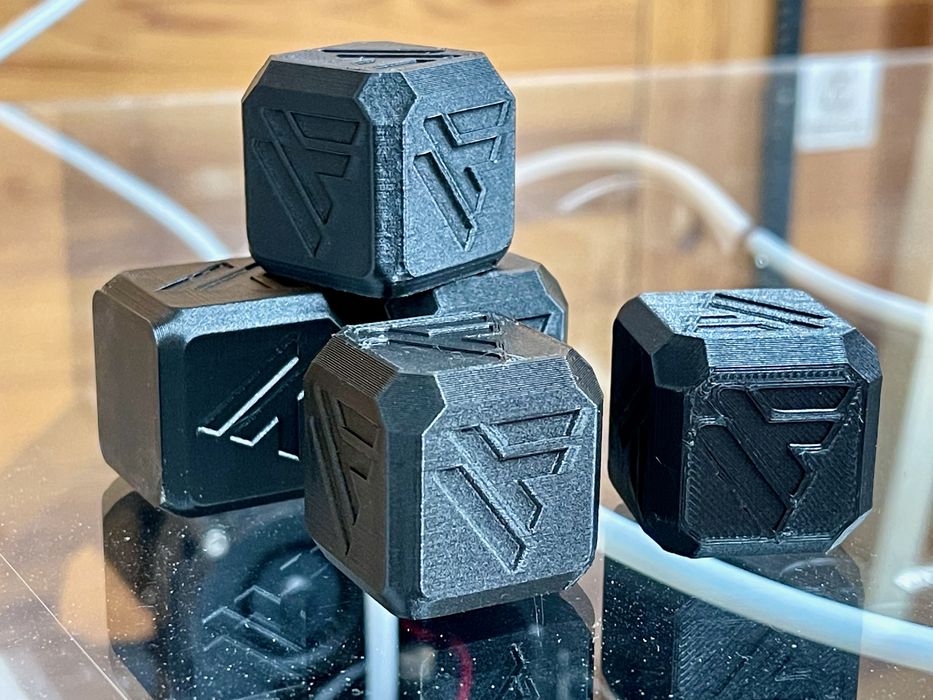
Even relatively small parts could be printed on the HS3, including this tiny gear. The strong carbon fiber material made the part actually usable.
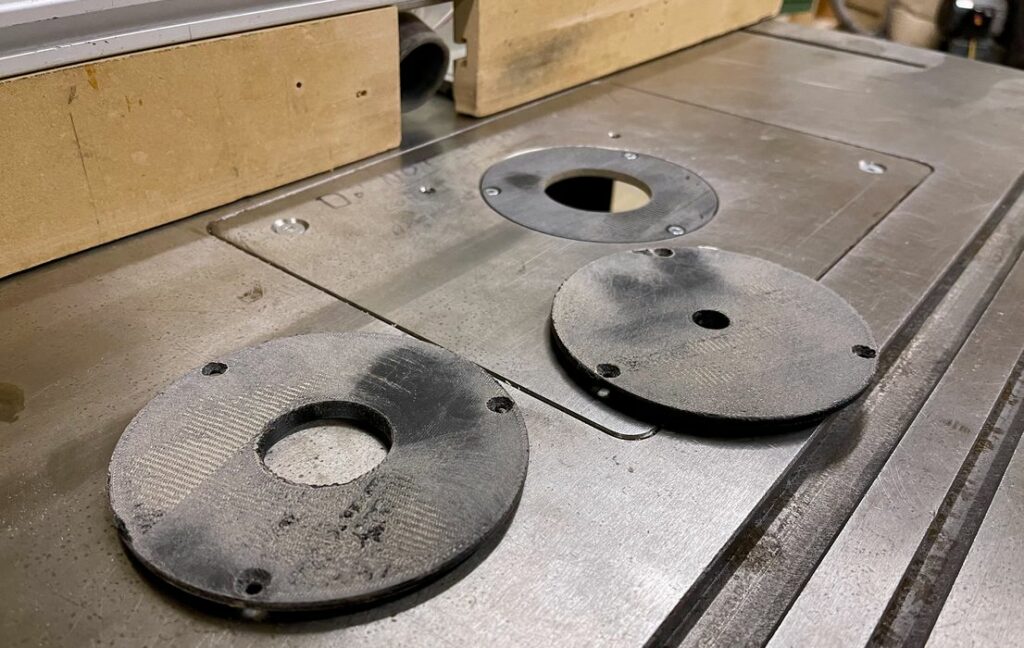
These parts were quickly designed and printed to replace covers on some of our woodworking equipment. The strong carbon fiber material makes it easy to make actual end-use parts on the HS3.
Pantheon HS3 Final Thoughts
The Pantheon Design HS3 high speed 3D printer is a marvel. It’s combination of print speed and quality are unmatched in my experience. While our pre-production unit didn’t have some convenience features, it clearly demonstrated an extremely powerful print core that will certainly be a force going forward.
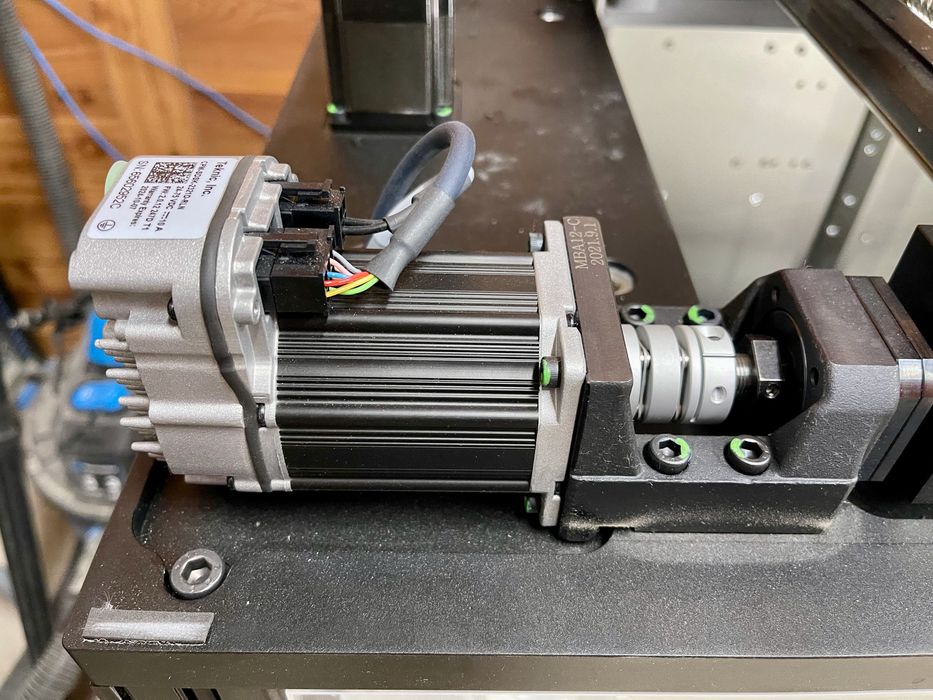
Our pre-production model is not the final design, as we’ve already seen changes in Pantheon Design’s HS3. Above is a new extruder system for the HS3, and below is a beefed up aluminum print plate that should distribute heat very evenly.
The HS3, once finished and released, will no doubt become a useful tool in many factories and workshops that requires fast built, high quality carbon fiber parts.
PANTHEON DESIGN
HS3 3D PRINTER
★ BEGINNER 1/10
★ ENTHUSIAST 4/10
★ PRODUCTION 8/10
BEST FEATURES
✔︎ Super fast printing
✔︎ Amazing print quality
✔︎ Large build volume
QUESTIONS
✖︎ Not yet released
✖︎ Missing conveniences
✖︎ Material choices
This is part two of a two part series, please read part one.
Via Pantheon Design
That’s too bad out can only use 1 material. Makes it pretty useless for most people. I really like the design, but limiting materials is a no go for me. This is along the lines of what Stratosis does which is why they’ll never get my money.
How do we make it a 10/10 for manufacturing, in your opinion?
Thank you Kerry, it was a great read and valuable feedback. We will include siting recommendations in the future. The aluminum plate is mostly to ensure flatness. It’s made of cast aluminum and machined flat. Combine this with the new contact probe on the new print head and you will never have first layer problems again.