
Our look at the Method X 3D printer concludes with software, print results and final thoughts.
This is part four of a four part series, please read parts one, two and three.
Method X 3D Printer Software
The software system for the Method X is CloudPrint, a cloud-based system designed by MakerBot some years ago. The cloud nature of the system allows for easy operation of the Method X regardless of your location: as long as you have Internet, you are gold.
CloudPrint is very unlike any other slicing system you may be familiar with. Do you know UltiMaker Cura or PrusaSlicer? That won’t help you at all; CloudPrint is that different. Because of that we were a bit slow to figure out all the features of the software.
CloudPrint allows you to load a 3D model, slice it, dispatch it to the printer and monitor the print progress, all in one interface. There’s also a queue concept, where jobs can accumulate while another is active. When complete, the next job can be launched. However, you must clear the build plate.
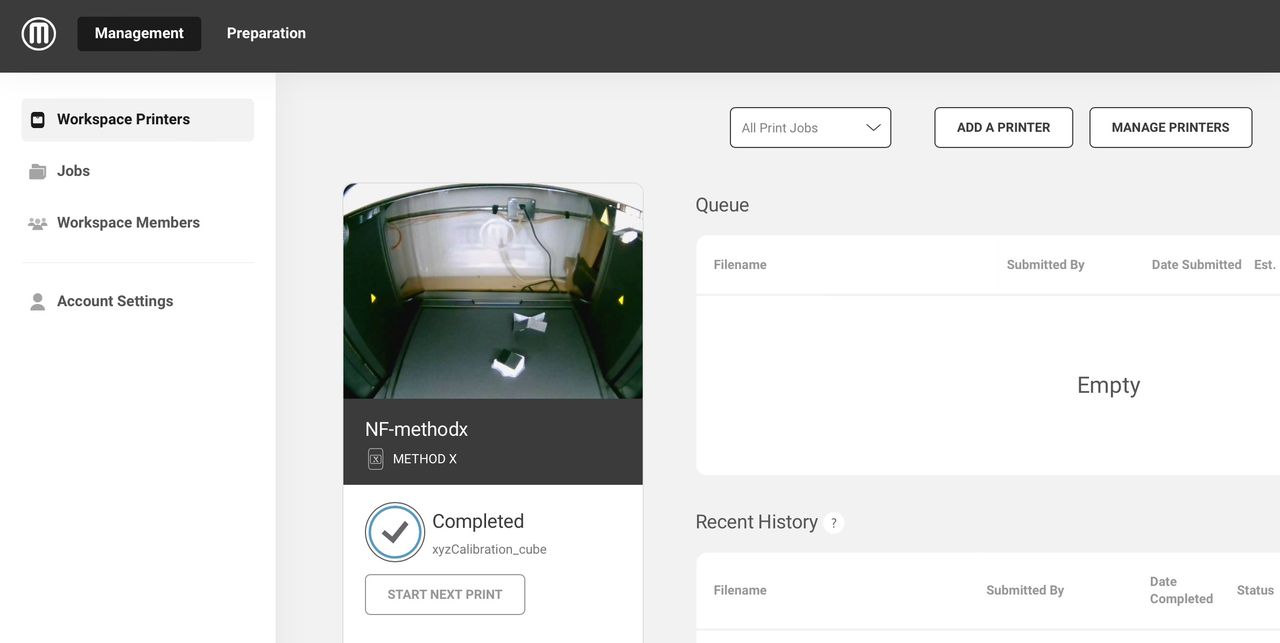
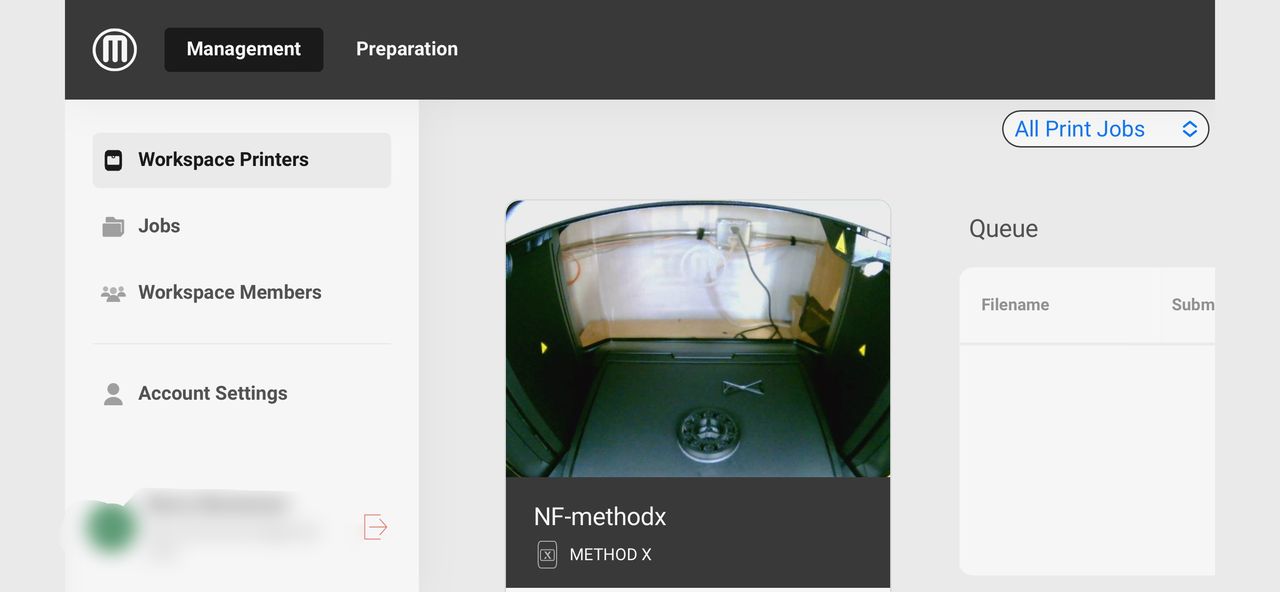
There is an on board camera on the Method X that can show you the print plate, as you can see in these images. However, we found that it was updated only intermittently. We often were refreshing the screen to coax it to update. Other systems tend to show a more real time view of the action, but it doesn’t seem so on the Method X.
This might be problematic if someone saw parts on the tray and decided not to launch a job — even though they could because the tray had been cleared but not visually updated. CloudPrint should update the machine view more often.
One problem with the slicer is that it permitted us to overlap the prime tower with the model. In this example, the print failed because of this and we had to re-run the job. Always double check the location of the prime tower!
The slicing system is very good at ensuring there’s a match between your selected materials and the machine, and this is done to avoid problems by using correct print profiles. However, we sometimes found our materials defaulting to other materials and we found we had to double check this on every job.
Viewing may at first seem very problematic in CloudPrint, as the default settings don’t seem to allow you to rotate the view. We operated in this manner for a while until later we discovered deep down in the view settings there is a way to change the default behavior. Once that was done, we were able to properly rotate the view as is commonly done in all other slicers.

A puzzling constraint was the lack of a “HQ” (high quality) option for ABS-R material. Here you can see there’s only a choice of “Balanced” or “Solid”. We don’t know what Balanced means, but solid would likely not be often used. However, if we switched the material to ABS instead of ABS-R, suddenly an “HQ” option appears. This may be due to lack of profiles from the manufacturer.
Method X 3D Printer Print Results
Print results were outstanding on the Method X, and that’s very likely due to the huge number of sensors in the system. These are used to coordinate activity during printing to ensure proper quality is achieved, and it seems to work very well.
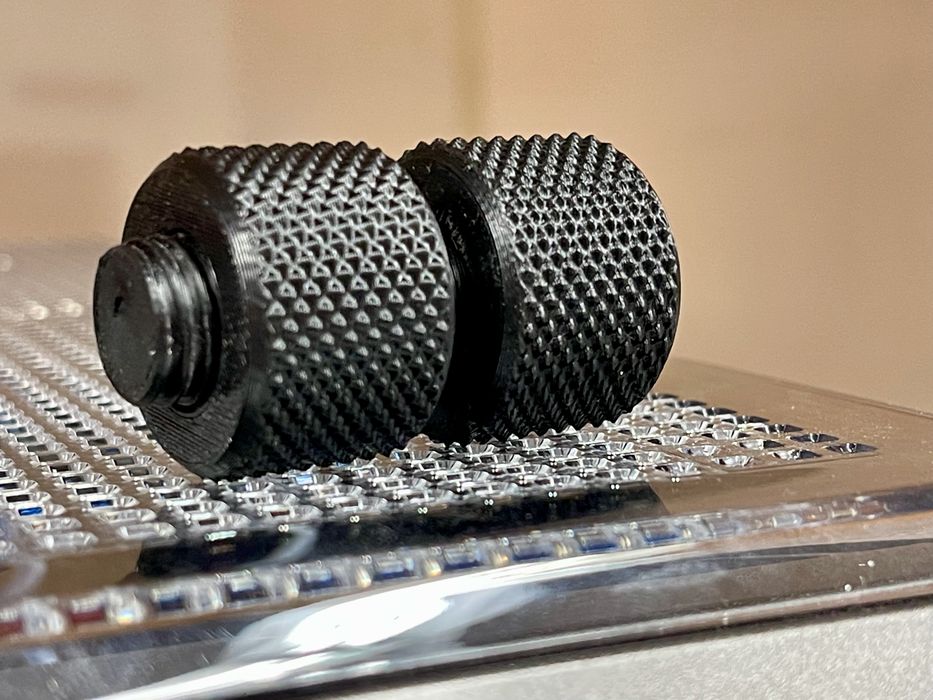
We printed some bolts, and they fit together extremely well.

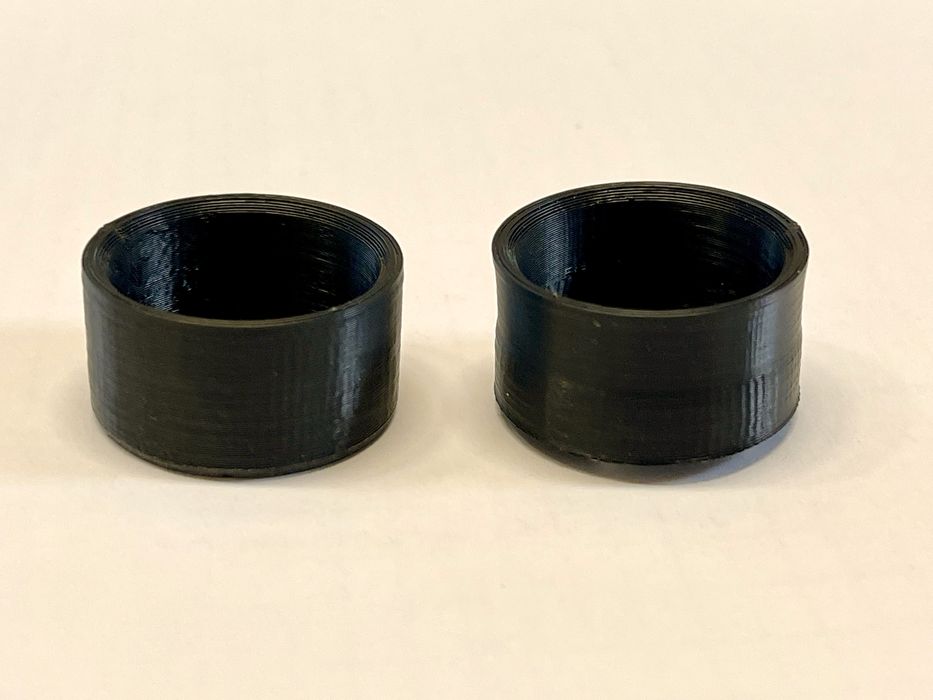
We performed the concentricity test, and the two parts slid together with a very satisfying snug. We have not seen this test work as well on any other machine. Claims of parts being dimensionally accurate are absolutely true.
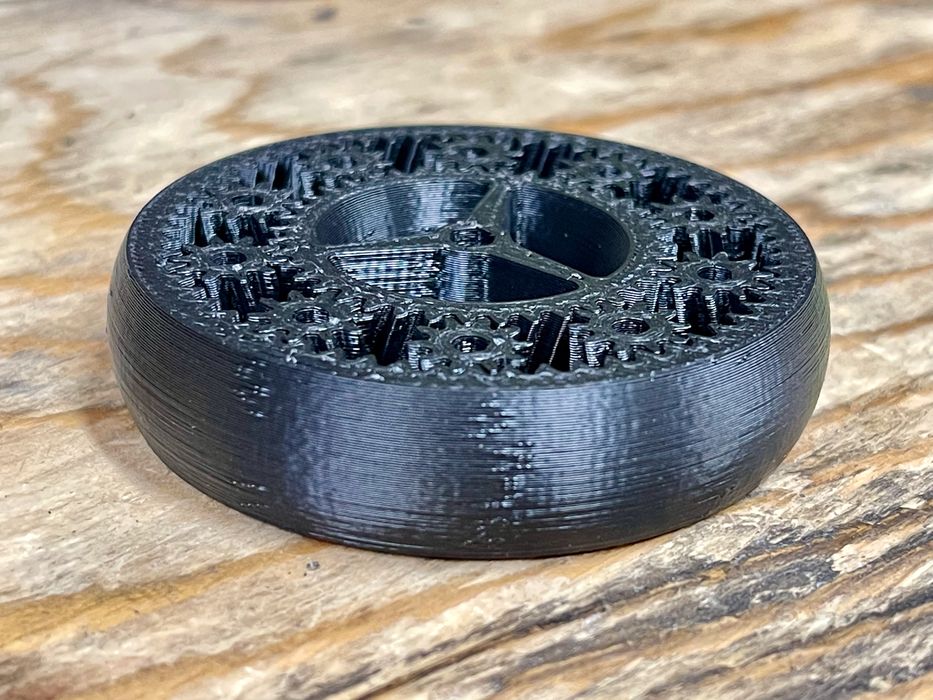
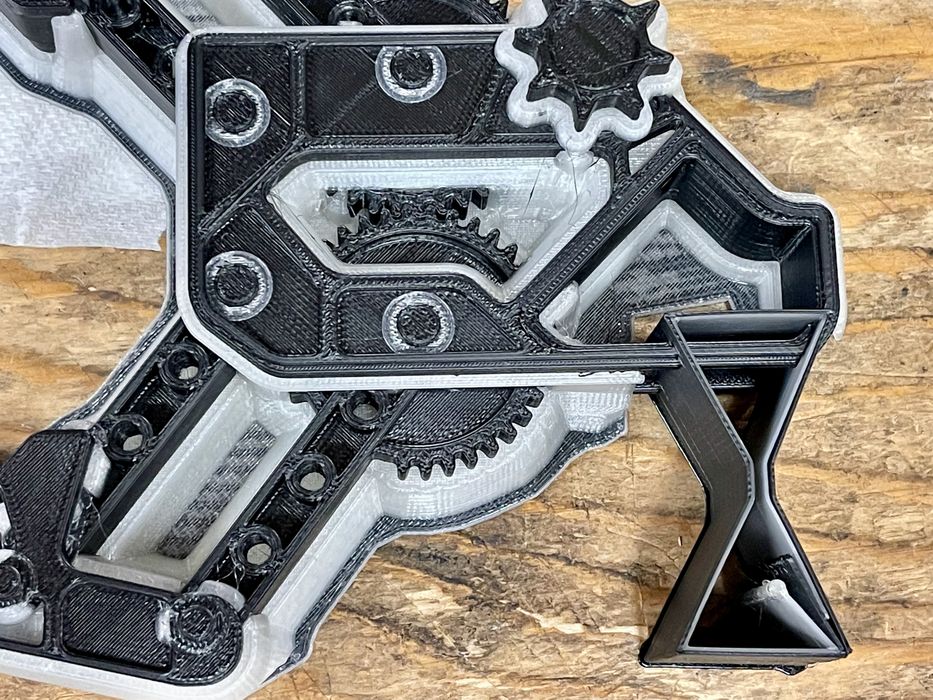
The planetary gears 3D model worked perfectly. This is quite rare for an ABS version of this popular 3D model, unless things are dialed right in.
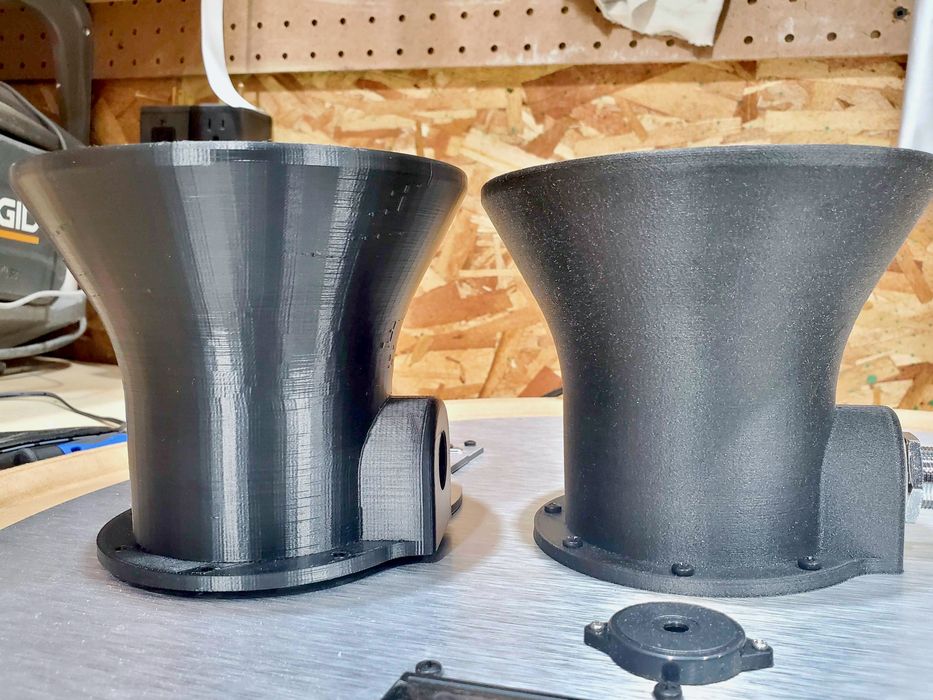
We compared the quality of a print made on the Method X in ABS-R with the same part made on a Pantheon machine in PETG-CF. The quality was very similar, although visually they may look a bit different due to the shininess of the ABS-R material.
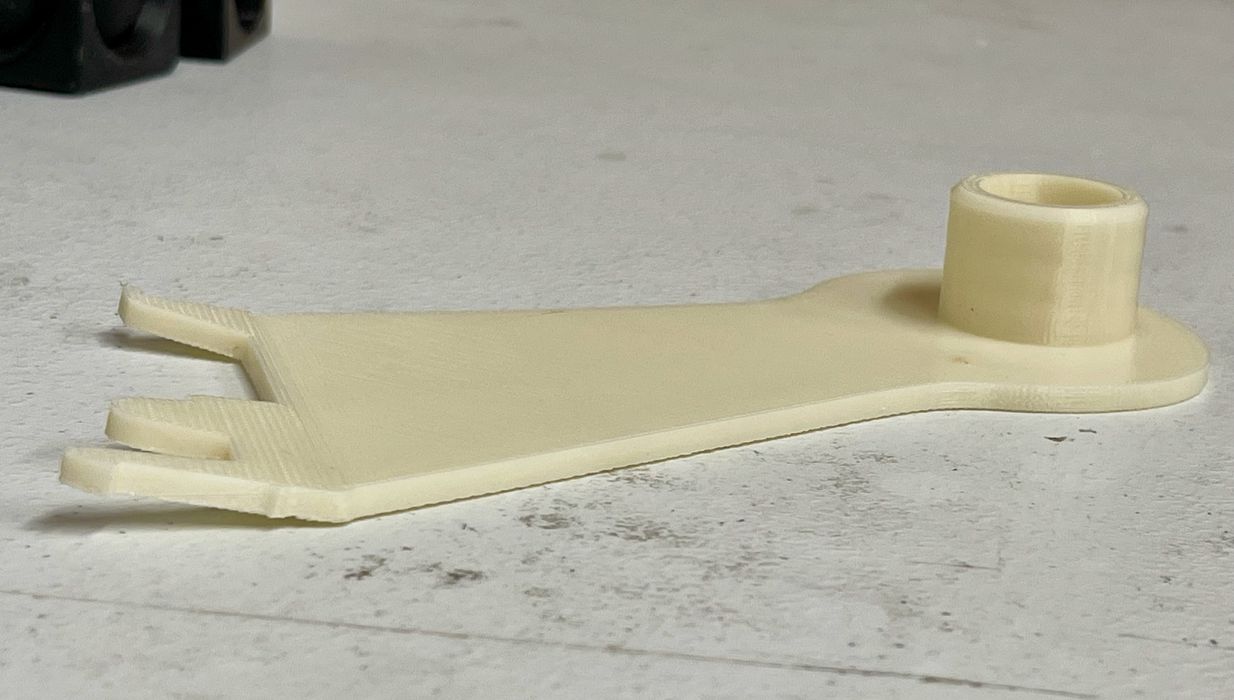
This is an example of the perfect part for the Method X. It’s a holder arm for a paper towel dispenser, which we needed to replace. Notice there is a very, very small inclination on the left side. This was very easily handled with the RapidRinse support material, which allowed us to print this item flat.

Here’s the interesting aspect: once printed, the part simply snapped perfectly into the dispenser. The dimensions of the part were absolutely perfect, and there was no need for iteration. Iteration is almost always expected on 3D printed parts, but apparently that’s not the case with the Method X.
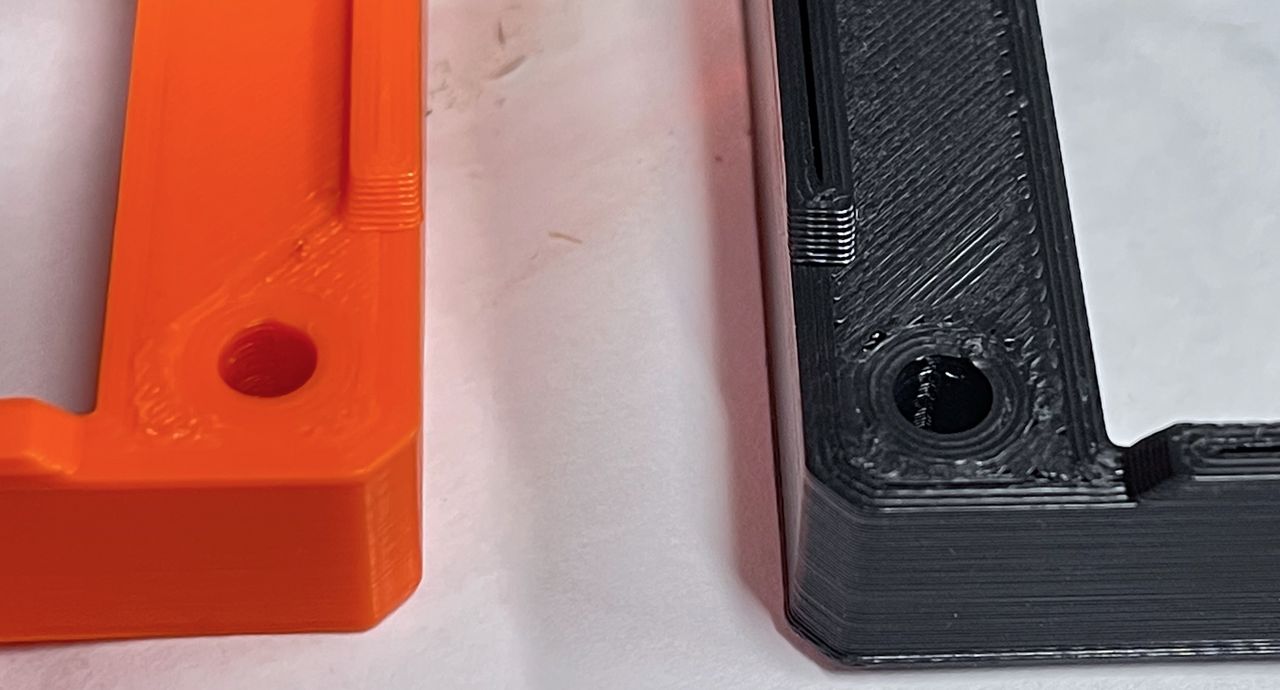
Here we printed a similar part on the Method X and compared it with a Prusa MK3S equivalent in PLA. As you can see, the quality is about the same, which is quite surprising for ABS. The Method X is easily the best ABS printer we’ve yet used, as far as quality is concerned.
Method X 3D Printer Final Thoughts
The Method X is an unusual device that has an experience very different from other 3D printers. It’s almost like you have to learn the tools from scratch at times. CloudPrint is very different.
The Method X is capable of producing the finest quality parts one could reasonably expect from a FFF device, which is even more surprising given that we were testing ABS material. Combined with the soluble support, one can easily imagine producing highly complex ABS parts with ease.
However, the Method X is also quite expensive to operate, as the support material is pricey and the software tends to use a great deal of it. Nevertheless, I am sure there are situations where cost is less important than quality, and that’s likely the best use for the Method X.
ULTIMAKER
MAKERBOT METHOD X 3D PRINTER
★ BEGINNER 3/10
★ ENTHUSIAST 5/10
★ PRODUCTION 8/10
BEST FEATURES
✔︎ Print quality
✔︎ Soluble support
✔︎ Dimensional accuracy
QUESTIONS
✖︎ Filament drying
✖︎ High operating cost
✖︎ Slow print speed
This is part four of a four part series, please read parts one, two and three.
Via UltiMaker