
Our look at the Creality Ender-3 S1 desktop 3D printer continues with setup, calibration and operations.
This is part two of a three part series, please read parts one and three.
Creality Ender-3 S1 Setup and Calibration
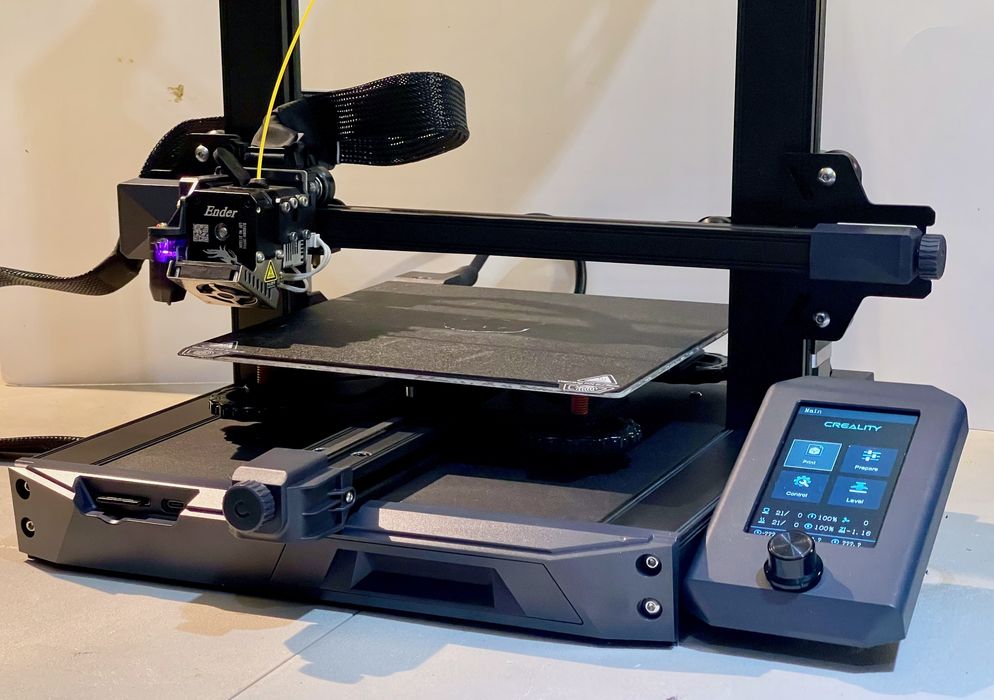
The Ender-3 S1 has a very easy to read color vertical control panel. It’s not a touch screen (for that you must get the Ender-3 S1 Pro version), but there is a handy knob that can be rotated and pushed in to select options.
The first step is to level the print surface, which is done with an automated procedure. Just select this option and let the machine do its thing. This is quite a bit easier than previous machines where tedious manual leveling was required.
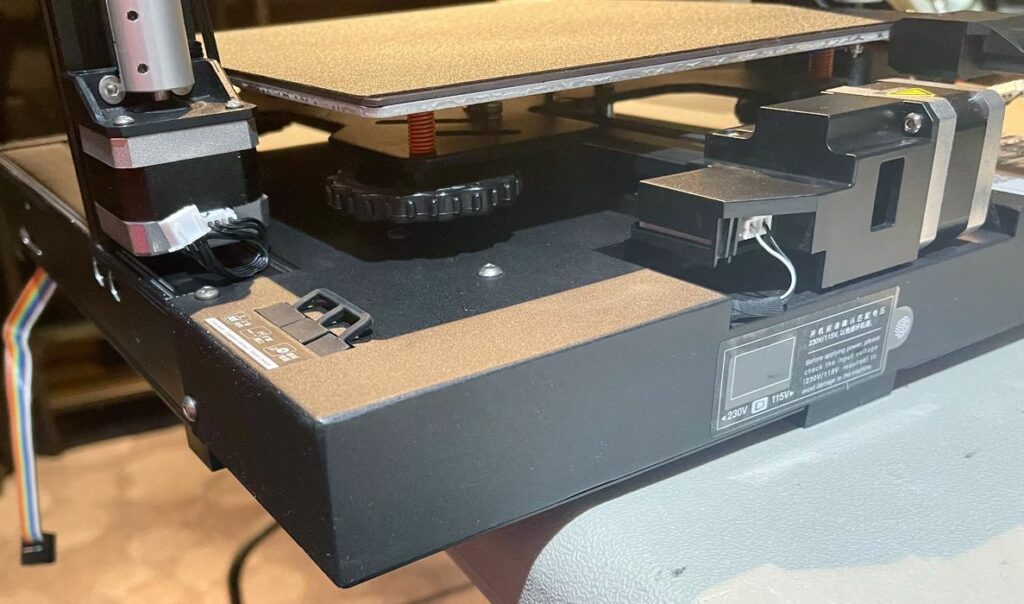
Should you wish to do some manual leveling — which could be necessary if the print surface is wildly off level — there are four adjustment knobs under the print surface. These gigantic wheels are really easy to turn because of their size, and also very precise for the same reason.
I actually did use the manual approach because I wanted to get the bed as physically level as possible before using the automatic procedure. Really the automatic leveling should be compensating for non-flat portions of the surface, not for actual leveling of the entire surface. The Ender-3D S1 will force you to do this if the tilt results in a distance farther than the CR-Touch sensor can reach.
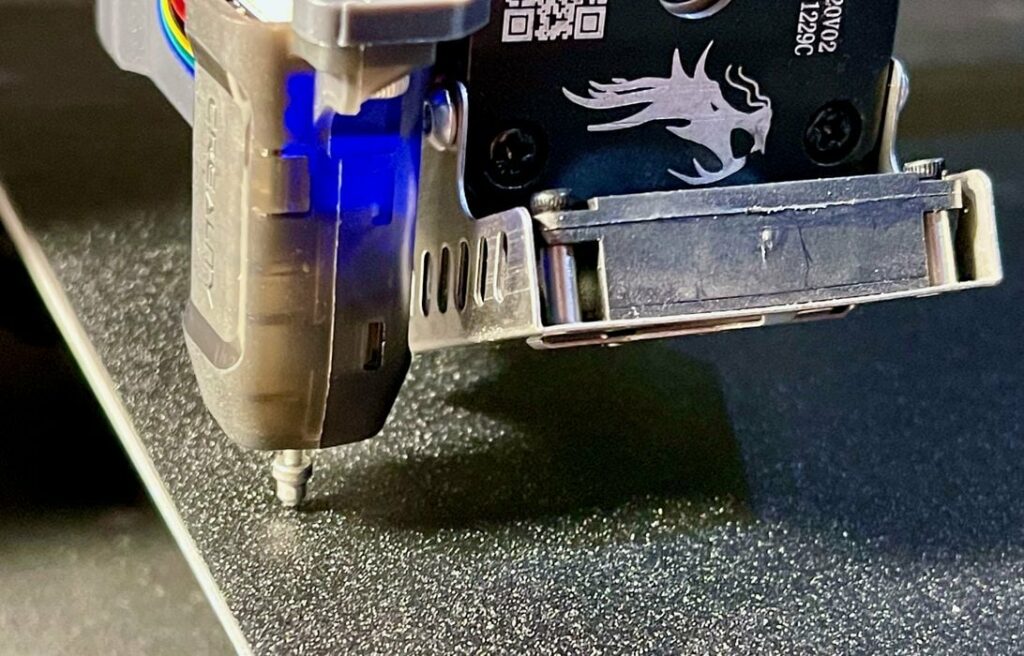
The leveling process also sets the Z-gap between the nozzle tip and the print surface. I’m very careful with this setting because if this isn’t done with sufficient tightness, the prints won’t stick properly.
Once leveled, the machine is ready for filament loading. I had not used the Sprite extruder before so I was very curious to see how easy or difficult it would be to load materials. Often extruders can be quite tricky to load, so this was a good test.
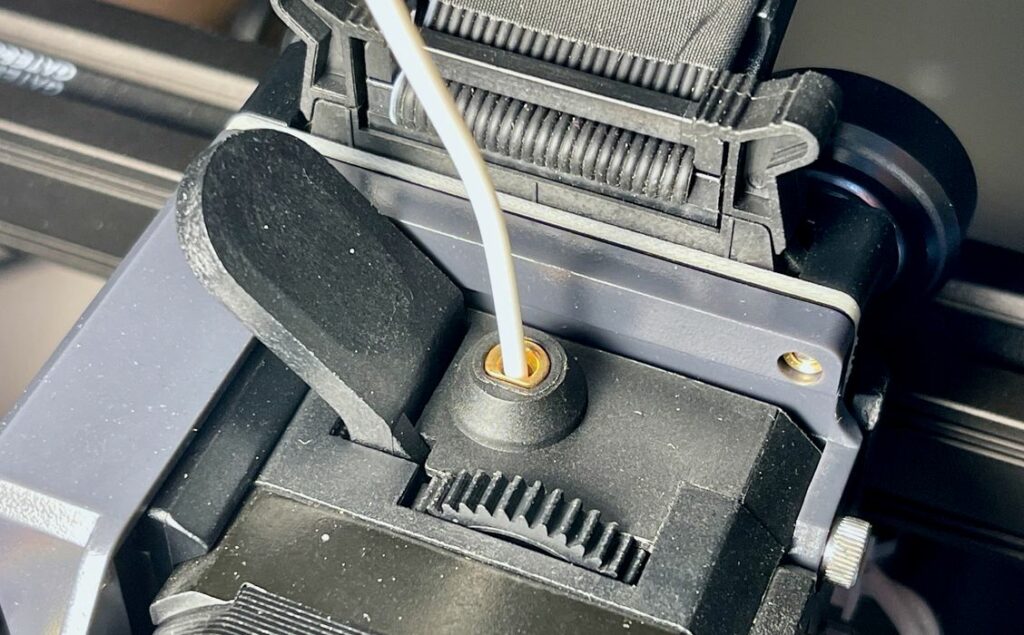
In fact, it turned out that the Sprite extruder is really easy to use. There is a lever that must be held open when inserting a filament, and it requires very little pressure, unlike many other extruders I’ve used in the past.
The question then was, “would the filament jam?” I have yet to experience a jam on the Sprite extruder. It seems to easily accept filaments and has them ready to go immediately. The Sprite seems well-designed, at least for loading filament.
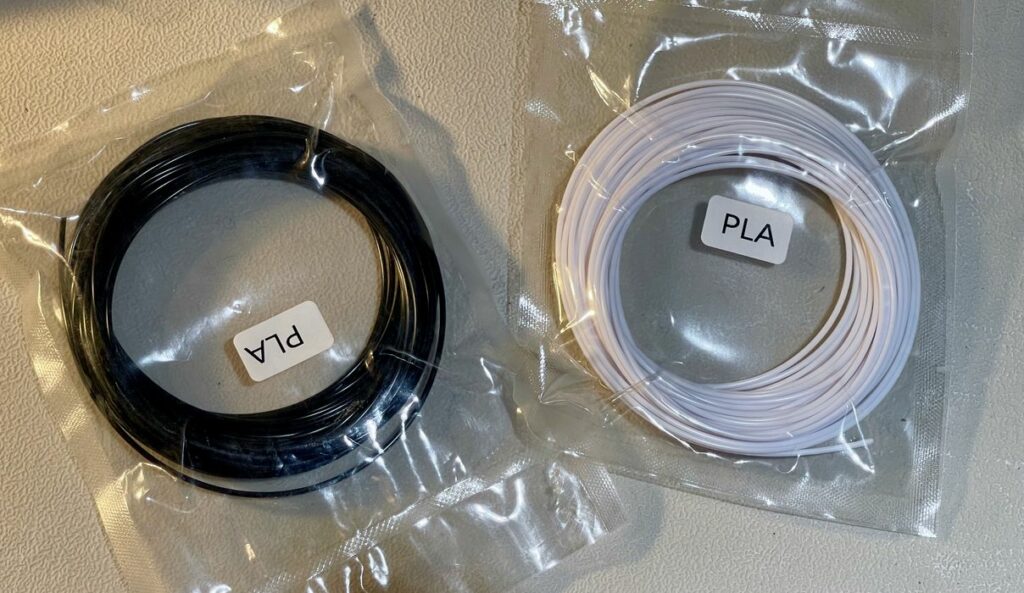
The Ender-3 S1 is accompanied by a small coil of PLA filament, as shown here. While filament is necessary for operation, I can’t say I’m a fan of these loose coils. Why? This is why:
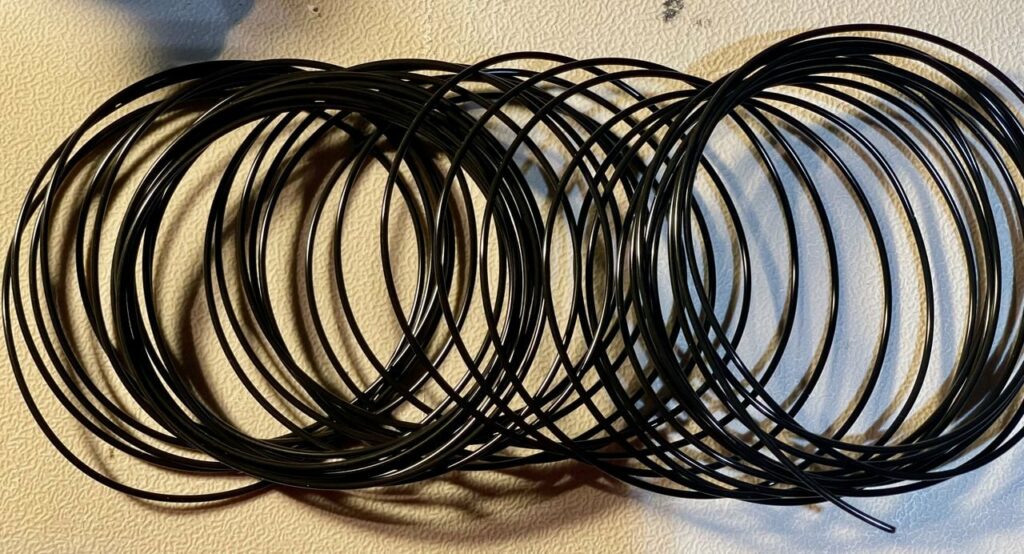
They inevitably tangle when you open them up. As they sit on the spool holder bar, it’s difficult to see tangles and in the end I always end up manually untangling and recoiling them, which is a tedious affair. I suggest that Creality and other manufacturers of inexpensive 3D printers simply avoid these coils and recommend purchasers add a proper spool of material instead.
Anyhow, at that point the Ender-3 S1 is ready for printing.
Creality Ender-3 S1 Operations
Operations are performed from the control panel by using the handy rotating knob. While this may seem less convenient than a touch screen, it is still highly functional. However, I do admit I have attempted to touch the non-touch screen a few times by mistake. That’s probably because I’m trying to operate multiple machines here, most of which have touchscreens. If you’re focusing on using the Ender-3D S1 I am sure you will quickly get accustomed to the knob interface.
The first print to do on any machine is the standard print file typically accompanying the machine on the SD card or USB stick. In the case of the Ender-3 S1, there’s a “rabbit.gcode” file on the supplied SD card.
These prints are usually the best to start with because they are already highly tuned by factory techs, so you know you have a good print file. In other words, you won’t get confused if something goes wrong: it’s not the print file, it’s something you did with the assembly.
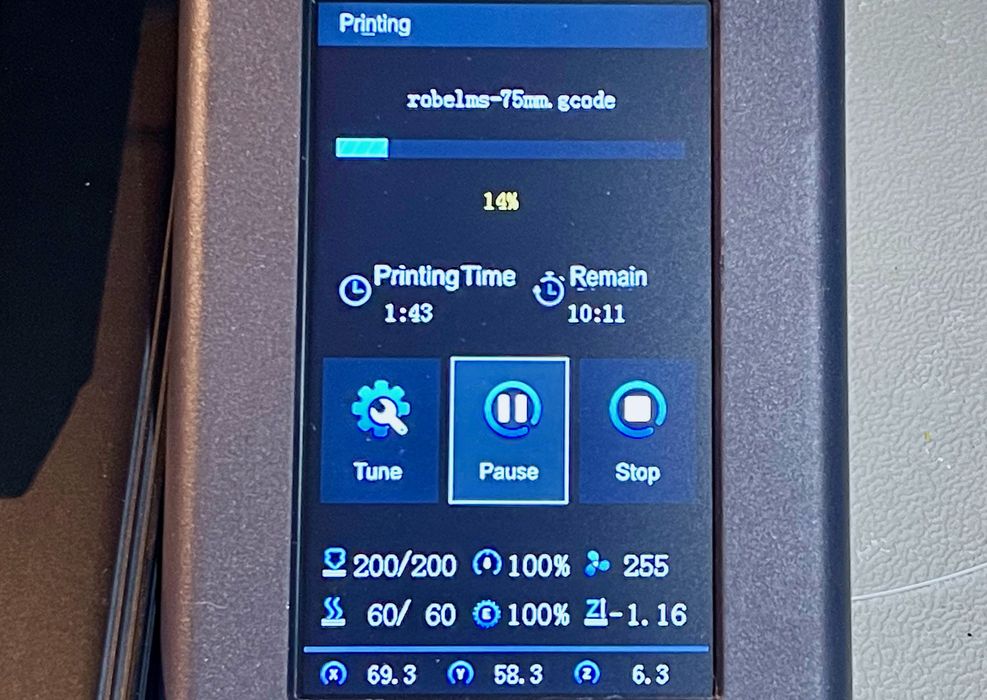
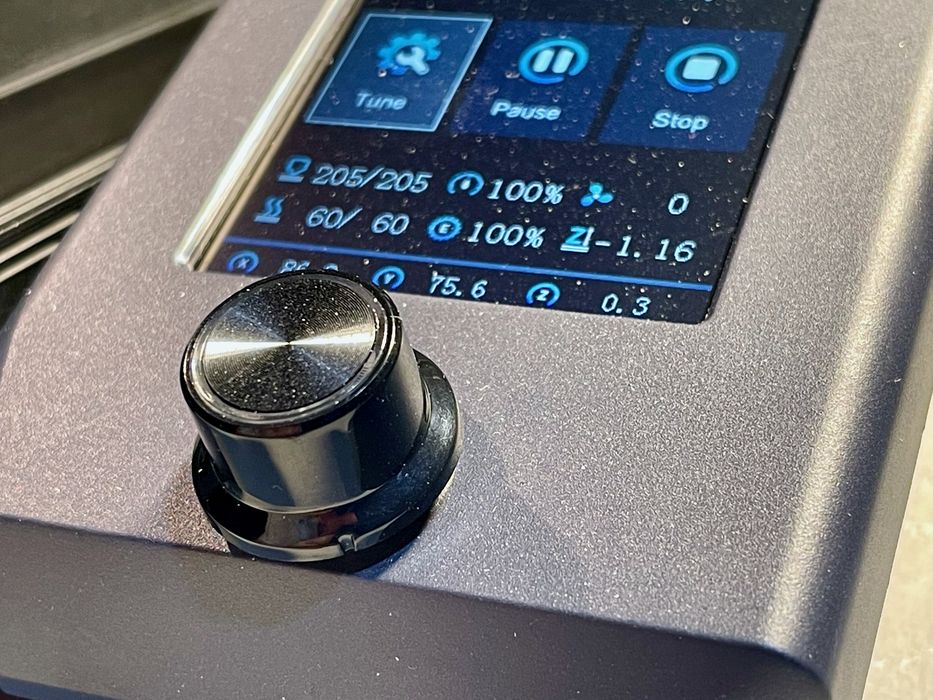
During a print job the Ender-3 displays all required information for the operator, and it’s easy to follow the status of the print. You can even see the Z level, something not always visible. I found the estimated print times to be reasonably accurate.
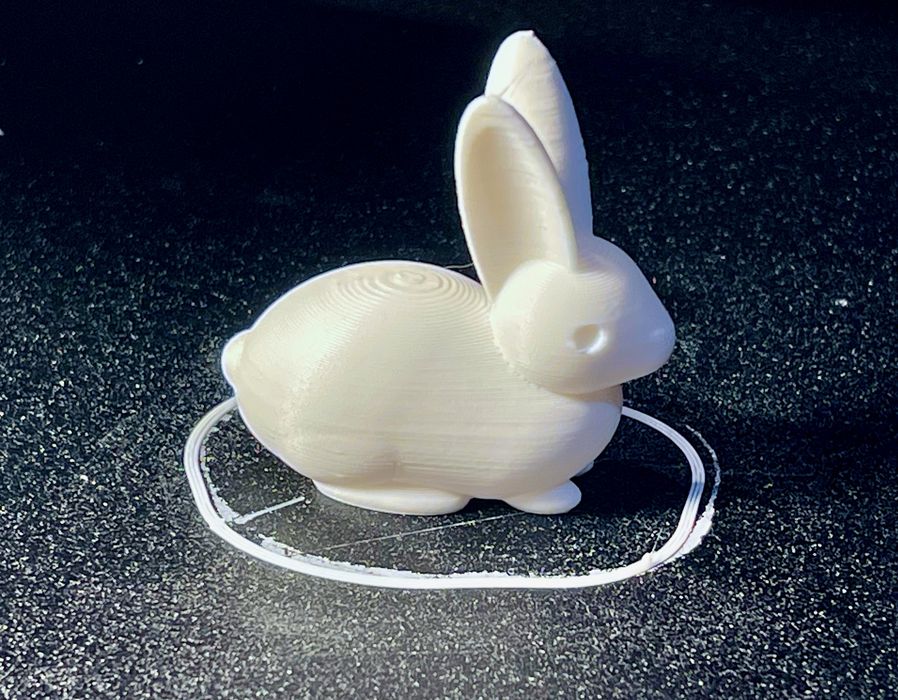
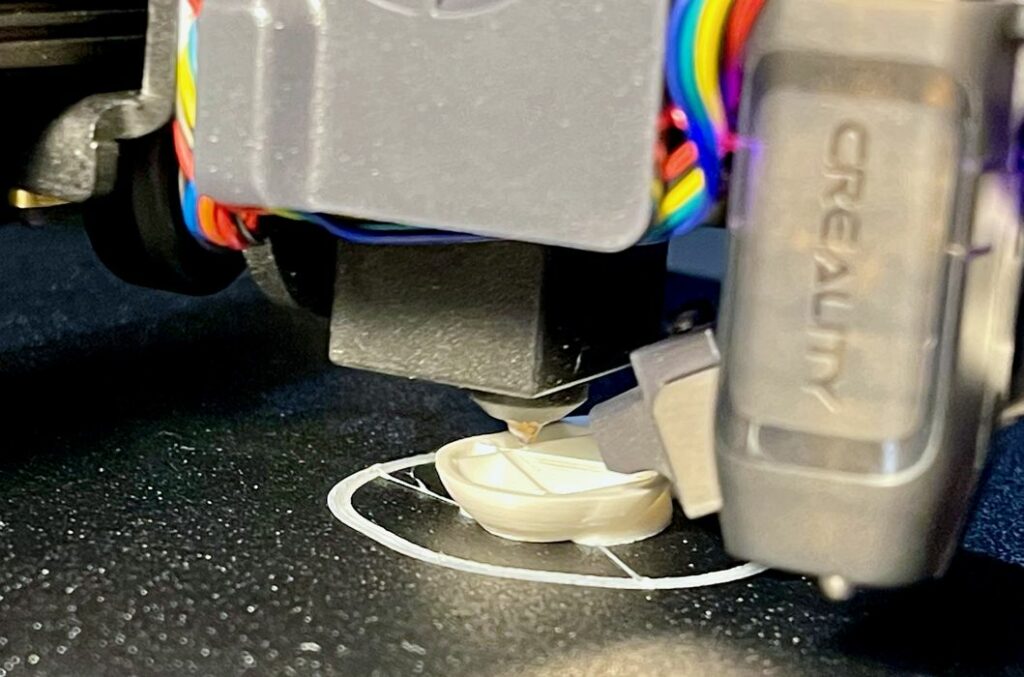
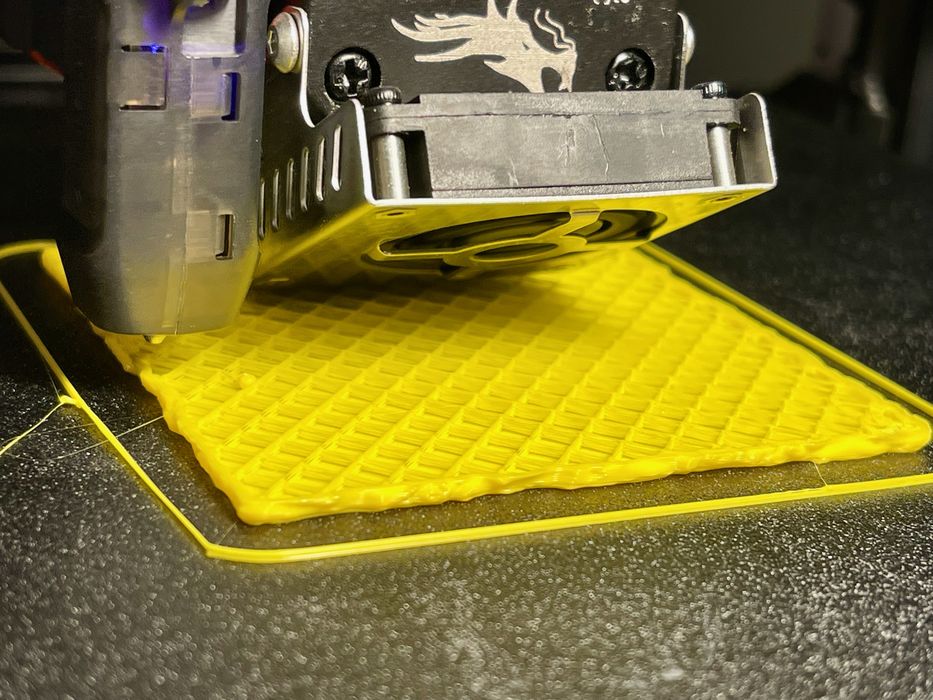
My rabbit came out with perfect quality, as you can see here. However, the print popped off the only with some effort, even after twisting the spring steel print plate.
I wondered about that, and then realized I had a problem: the rabbit.gcode file also printed a short skirt ring around the rabbit to ensure flow. This was stuck extremely well to the plate, and I could not get it off. When the plate twisted, so did this ring because it was not thin.
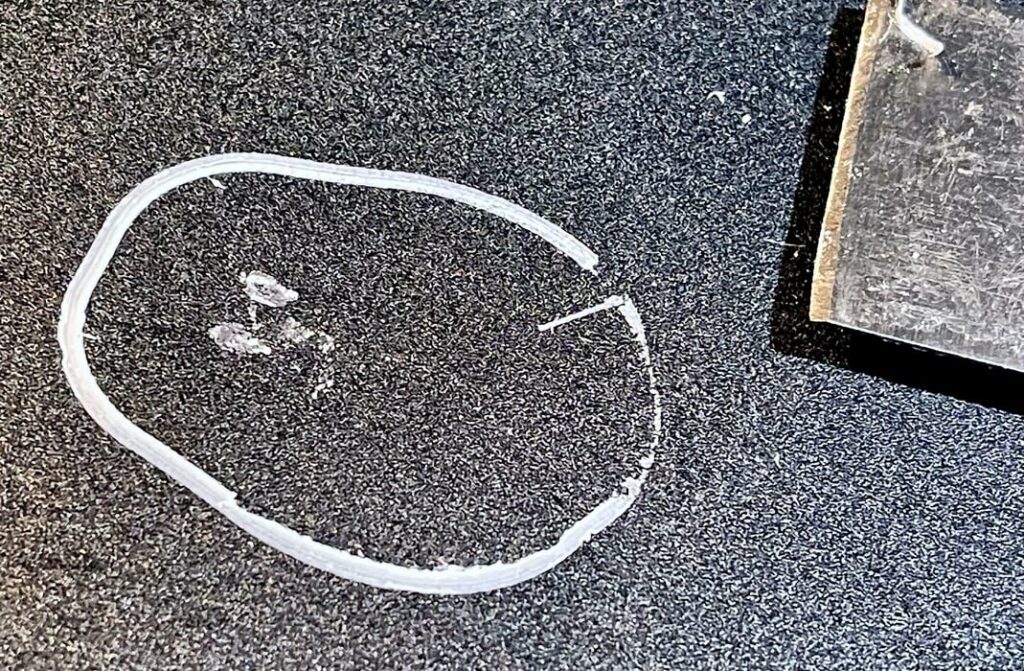
I eventually realized my mistake. I had set the Z-gap too tight, and the skirt was pasted deeply into the crevices of the textured print surface.
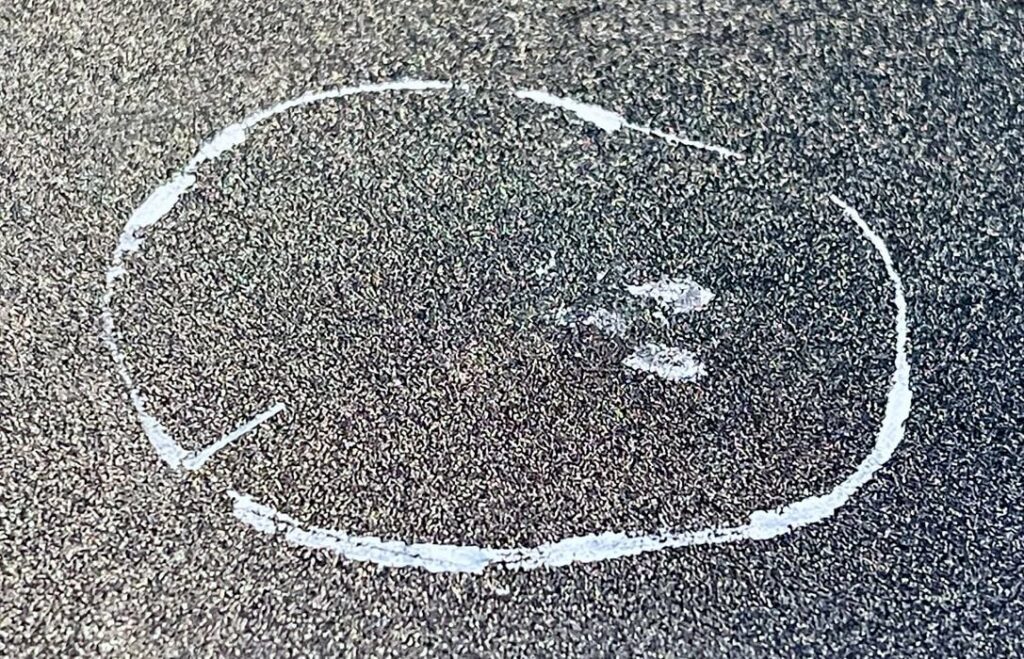
After considerable effort with several tools, I managed to get most of it off, but there was a residue left that will probably be permanent. I had to resort to using metal tools, usually a no-no on coated print plates like this. But they can be effective if you are extremely careful not to gouge the surface. Also be very careful not to gouge yourself, too!
The next issue came up immediately when replacing the print plate: there are no alignment pins. Many 3D printers using plates of this type have a couple of alignment pins at the back of the heated surface to ensure the plate is properly laid down. There are none on the Ender-3 S1, so the plate can be off by several millimeters or more, and you cannot slide it into place due to the strong magnets.
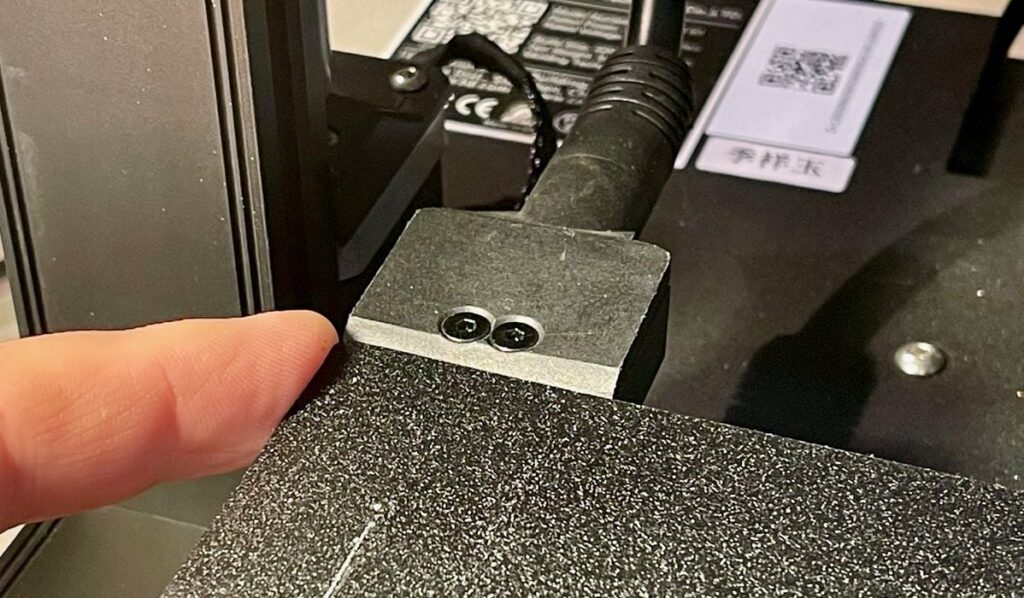
I eventually found a solution: use the cable at the rear of the heated surface as a partial alignment tool. Just place the edge of the plate against it, align the left side with your fingers and drop the plate. It will be very close to perfect every time.
The Ender-3 S1 includes a filament out sensor, so of course I had to test it. I had planned to boldly snip the filament, but as fate would have it, something else happened. The questionable coil of PLA actually snapped on its own, conveniently just above the sensor!
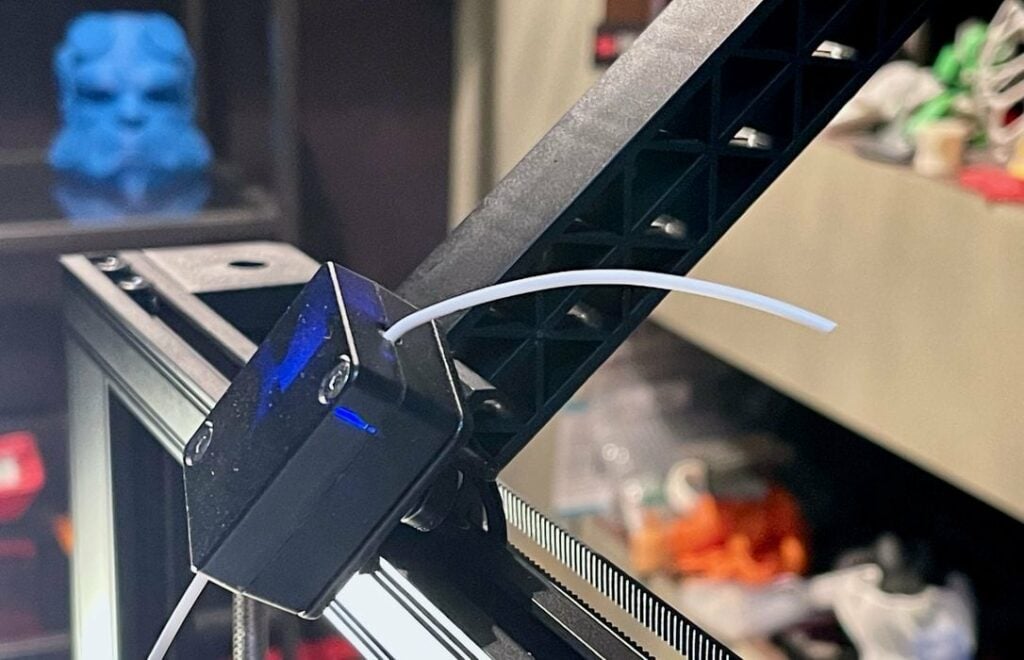
I watched as the filament entered the sensor, and sure enough, the broken filament was immediately detected and the print job was paused. A message on the screen correctly informed me of the situation, and I took the time to swap in a different filament. The print could then be resumed.
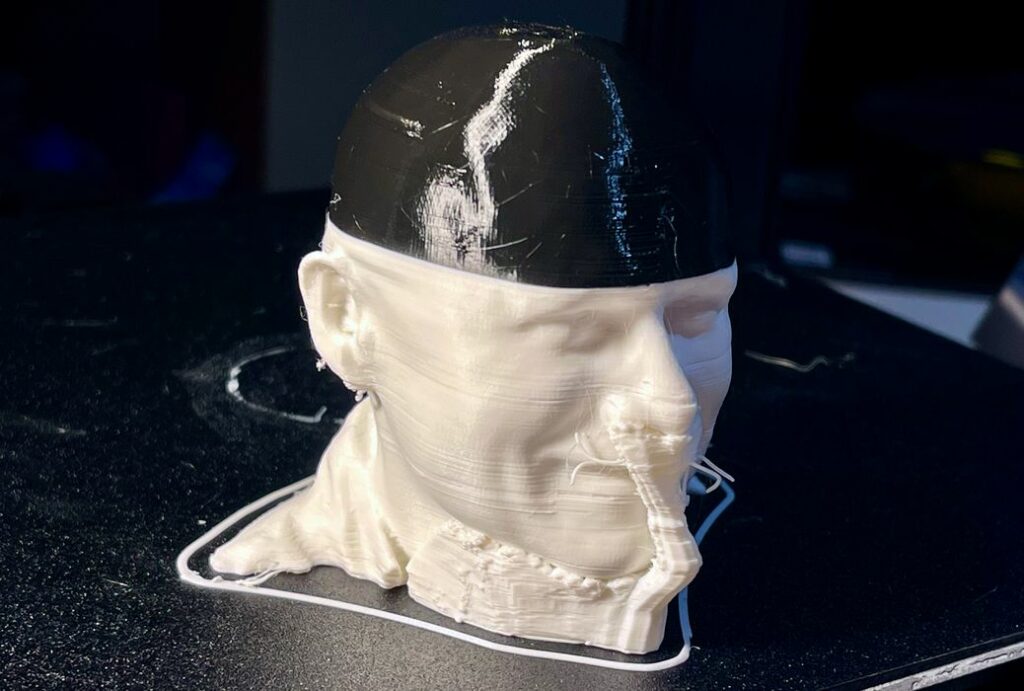
I found this process to work flawlessly, and there was no visible effect on the print, as you can see here: I changed from white to black PLA filament.
Another feature of the Ender-3 S1 is that it can detect a power failure and take appropriate action. Here I had no convenient power failure, so I generated my own with a quick pull on the power cable. The Ender-3 S1 immediately went silent.
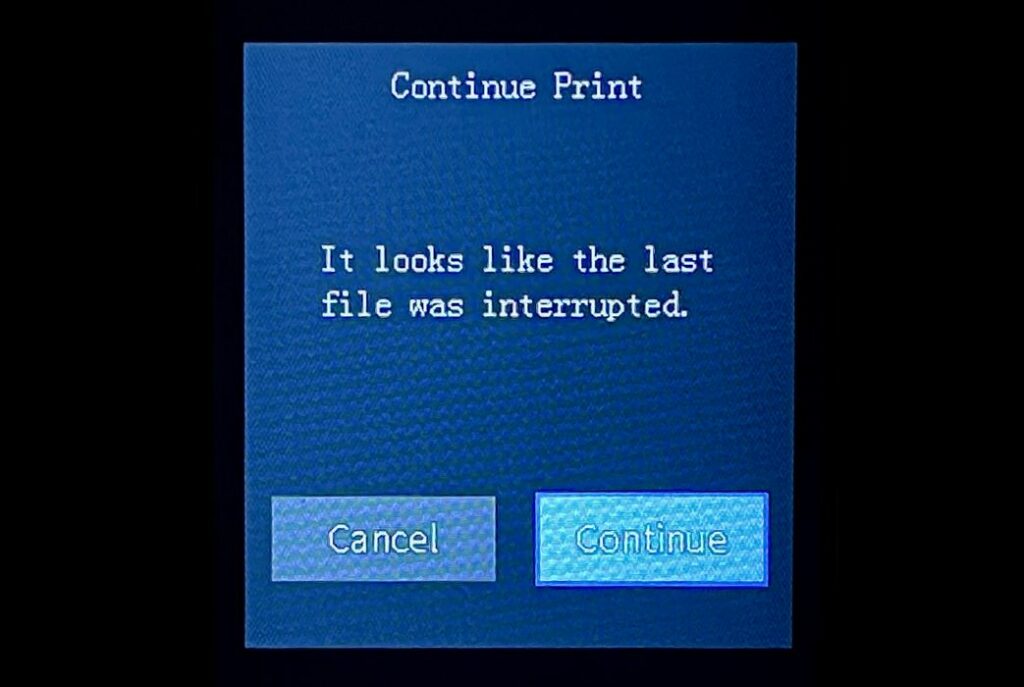
When I re-powered the machine, it instantly realized it was in mid-print and offered to resume as per this display.
I confirmed my intentions, and printing resumed after a brief warm up period.
This is part two of a three part series, please read parts one and three.
Via Creality