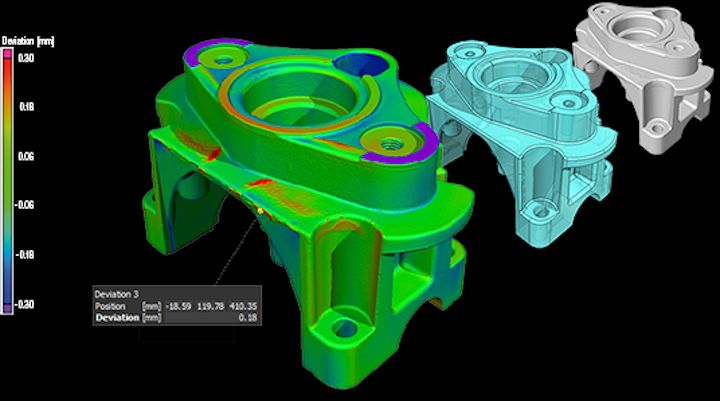
Quality has become one of the most important aspects of additive manufacturing, and there’s an unusual way to ensure quality using CT scans.
When 3D printing emerged it remained in the prototyping space for many years, largely due to the relatively fragile materials available on the equipment at the time. However, once metal 3D printing matured it began to slowly make its way into production areas, becoming additive manufacturing.
After metal AM became an accepted manufacturing approach, some turned to polymers to see whether they could also be used to produce end-use parts. This is possible, but in order to access more applications, the level of part quality must increase.
Thus there’s been considerable interest in increasing 3D printing quality. This has manifested itself in various ways, such as highly refined materials, new 3D printer quality features, centralized 3D print profiles and much more.
But in the end, the part must meet the specifications, no matter what technology was used to produce it.
This leads to post-production quality inspection tools, where completed parts are examined to ensure they fall within tolerance levels.
A frequent approach to inspection is to use 3D scanning. The object’s exterior surface is 3D scanned using any of several technologies, and the resulting 3D model is compared with the target 3D model to detect deviations.
An interesting experimental example of this approach was demonstrated by Oqton where we saw a chamber into which a completed 3D print was placed. Even though the part could be placed in any orientation, the system would still 3D scan it and be able to match it to a database of 3D models for comparison.
This type of system uses an optical approach for 3D scanning, but there’s another approach for obtaining scans: CT, or computed tomography.
This is the same technology you’d see in healthcare applications, but instead it’s applied to parts. A CT scanner will rotate around an object (or vice versa) and project X-rays. Images obtained from the X-rays are compiled using reconstruction algorithms to develop a finely detailed 3D model.
Depending on the material being scanned, it’s possible 3D representations of the interior of the object can also be obtained.
One software tool that’s specifically designed to work with CT scans is Volume Graphics’ CT data analysis suite. This software is specifically designed to handle the very high resolution CT scans to “detect, analyze and visualize minute structural deviations”.
I have a suspicion this type of non-destructive testing will increase in usage in the future, as complex 3D printed production parts will require additional inspection. To enable use of AM parts in wider application environments, more refined part quality testing will no doubt be required.
Could automated CT scanning be the way to do so? It’s possible, as it’s been done with many other manufacturing processes for years, and even some AM applications. In time it may become a de facto standard approach for assuring production part quality.
Via Volume Graphics
