

The process of 3D printer calibration is a curious thing; it can be quick and dirty, or an incredibly long and detailed process.
What is calibration? I’m not sure there’s a specific definition, other than adjusting the physical characteristics of the 3D printer and the software slicing parameters to obtain 3D prints that consistently meet with desired level of correctness from the operator.
In other words, it is often a subjective matter. Of course there are situations where the individual making judgement is not the operator, such as in the case of a 3D print being produced for a customer.
3D Printer Calibration Overview
The process of calibration of 3D print parameters is usually the most tricky part of the job, as there are plenty of parameters and many trouble situations that may require resolution. Invariably this stage is accomplished by repeated 3D prints of a standard test object, with incrementally changing print parameters each time.
This is where things begin to differ sharply among 3D printer operators. My own process is somewhat simple, compared to many others.
Usually I begin by 3D printing a simple 20mm calibration cube. This is a notably uninteresting object, but I print it to simple prove that the system works at all. If it can be 3D printed, I know that at least the extrusion system is working, and the bed provides some level of adhesion.
![Some of my test “Robert” heads for 3D printer calibration [Source: Fabbaloo]](https://fabbaloo.com/wp-content/uploads/2020/05/calibration-robert-1_img_5eb08c3a90b3c.jpg)
Sometimes I will my my “Robert Head” 3D model instead of the 20mm cube, but the goal is the same: verifying only the most basic functionality.
But the classic 20mm calibration cube is most definitely not the end of the line for ensuring print accuracy. It’s just the start.
The #3DBenchy Test Object
![A pile of used #3DBenchys used for calibrating a 3D printer [Source: Fabbaloo]](https://fabbaloo.com/wp-content/uploads/2020/05/calibration-benchy-1_img_5eb08c3c088e8.jpg)
The next step I take is to 3D print the venerable #3DBenchy. It’s familiar to almost anyone, and was introduced to the community in 2015 by Swedish company Creative Tools.
The #3DBenchy (or “Benchy” as some would abbreviate it) is an incredibly well-designed 3D model. While it clearly does not include a comprehensive set of geometric features to test all possibilities, it does have just enough to put your 3D printer through a reasonable test of basic functionality.
The #3DBenchy model includes slopes, curves, overhangs, some fine details, flat surfaces, and other basic geometric features. By 3D printing this item you will perform tests on several essential 3D print capabilities.
It’s fortunately relatively quick to 3D print, as well. This helps immensely when repeatedly 3D printing #3DBenchys with slightly different parameters. The process is to identify a flaw in a print and then tweak a setting in order to resolve it.
Typically experienced 3D printer operators can get the device’s parameters in decent shape after 6-10 #3DBenchy iterations.
Is that the end of calibration?
For me, it usually is the end. If I can 3D print a good #3DBenchy, I’m usually done.
Advanced 3D Printer Calibration
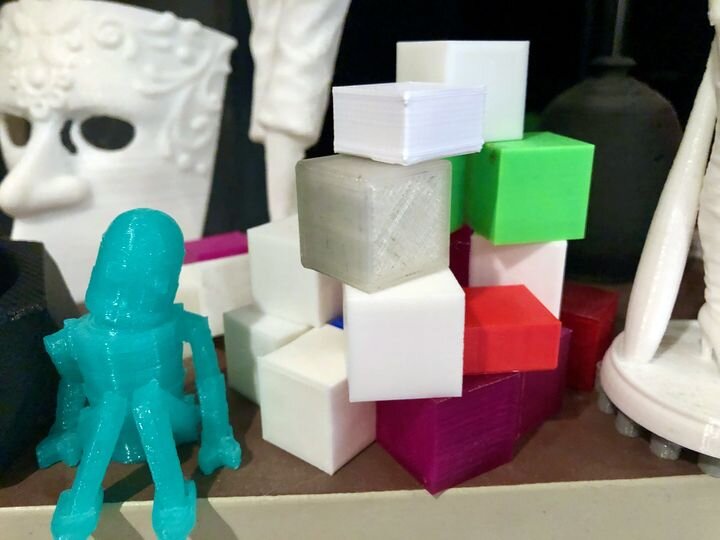
![Some more complex test objects for calibrating a 3D printer [Source: Fabbaloo]](https://fabbaloo.com/wp-content/uploads/2020/05/calibration-complex-1_img_5eb08c3d6d4ba.jpg)
Sometimes a higher level of calibration is required if the target 3D model is extremely complex and has a number of challenging features. If this is the case, then more powerful benchmark objects must be employed.
Which one should be used? There are many to choose from. A casual look at items on Thingiverse tagged “calibration” yields almost 1800 objects. However, many of these are pretty basic and offer little value over the basic #3DBenchy.
There are several benchmark objects that can be appropriate at this stage. I’ve often used the CTRL-V collection, which is a basic shape with a ton of challenging geometric structures on top. There is the original version, version 2 and a version 3. There are several other suitable advanced test objects, and everyone seems to have their preference.
Specialized 3D Printer Benchmarks
An alternative calibration approach might be to use a series of benchmark objects that are specifically designed to test particular 3D printing capabilities. Here are some:
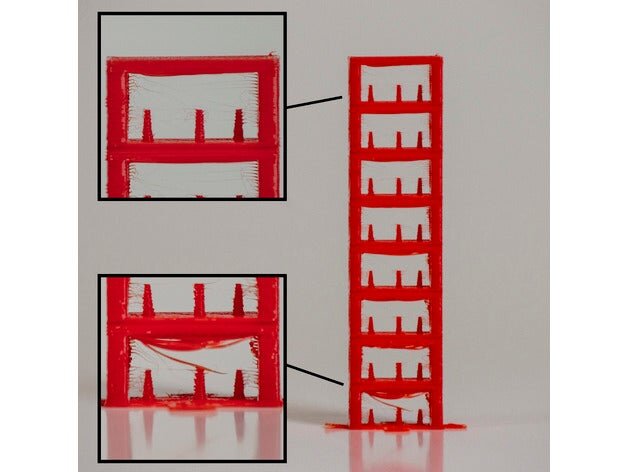
A temperature tower can be used to test the effect of varying heat by shifting the nozzle temperature on successive vertical zones. A visual inspection of the results can help dial in the optimal extrusion temperature. (Thingiverse example)
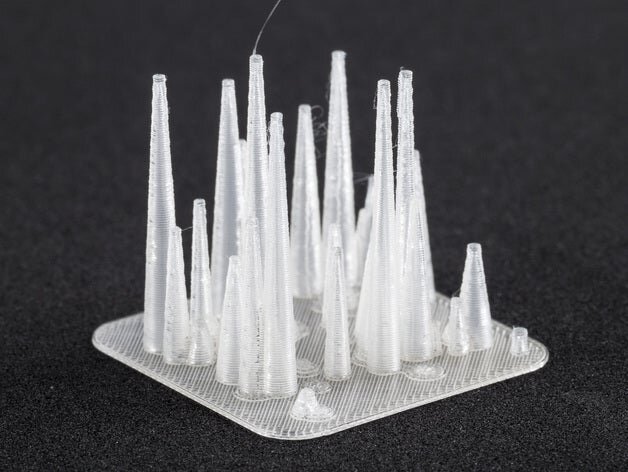
A retraction test is one that can be used to tune out those annoying strings that appear between discontinuous segments. They are essentially “drips” from the hot nozzle while it’s not extruding. (Thingiverse example)
And there are others, including some for bridging, others for cantilevers, etc.
How do you calibrate your 3D printer?