![Prototype XBOX controller design 3D printed on an HP 580 color MJF 3D printer [Source: Ogden-Weber Technical College]](https://fabbaloo.com/wp-content/uploads/2020/05/image-asset_img_5eb08c6776d69.jpg)
Our post on how HP 3D printers can be used for prototyping generated some feedback.
The post detailed how HP equipment could, in some situations, be successfully used for prototyping activities in spite of the somewhat lengthy turnaround time due to the nature of HP’s MJF 3D printing process. Normally you’d want to obtain the prototype parts as soon as possible, suggesting there might be better solutions for prototyping equipment.
But, as is often the case, the answer depends on the specifics of the situation. While HP’s process lends well to larger-scale production applications, it can be used for prototyping when:
-
Design iterations take much longer than the printing cycle, or
-
Many different prototypes can be 3D printed in a single batch
Using HP 3D Printers In Schools
We were contacted by Fabbaloo reader Justin Andrews, who is a Computer Aided Design Instructor at Ogden-Weber Technical College in Utah. It turns out that Andrews uses HP equipment in the school, specifically a full-color HP 580 device. The machine is used to produce student projects, which are essentially “prototypes”, being one-off designs that are not being produced serially.
Andrews points out several advantages within the HP MJF system that could be leveraged by those prototyping.
Leveraging 3D Printer Build Volume
![Jam-packed build chamber for an HP 580 color MJF 3D printer [Source: Ogden-Weber Technical College]](https://fabbaloo.com/wp-content/uploads/2020/05/image-asset_img_5eb08c67b95c3.jpg)
One is that unlike FFF 3D printers, the MJF process allows the entire 3D space of the build chamber to be used during a print. In the case of producing a typical 3” x 3” x 3” object, Andrews says:
“I can print any number of these “things” from 1 to 18 (2 deep*3 wide*3 high) at the same time. Heck, I can also throw in 30 keychains I just remembered I needed for the next day’s marketing meeting – and that’s just in the gaps left over from stacking 18. (Note: we can print 1400 full color, 1″ dog tag style key chains – in one build!)
Each part/model can be unique and from a different student or team – each added to the printer’s build/que throughout the day. The printer will easily finish a full bed/build of parts over night, no matter how many parts or how full the build is (the MAX print time including cool down is around 15 hours, so you might even get in 2 full builds if you had to).”
Reducing Post Processing
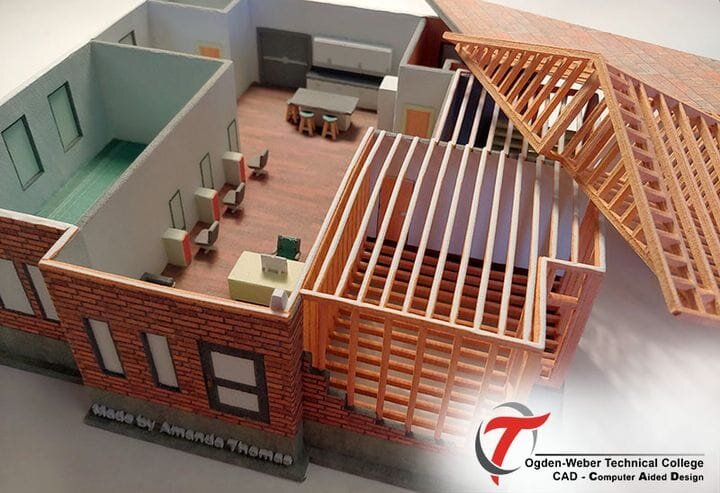
![House remodeling prototype design 3D printed on an HP 580 color MJF 3D printer [Source: Ogden-Weber Technical College]](https://fabbaloo.com/wp-content/uploads/2020/05/image-asset_img_5eb08c6803340.jpg)
There are advantages to post processing as well. Most 3D printing processes require tedious removal of support structures, post-print curing or other manual procedures. Here, Andrews says:
“For post, a quick blast to blow the dust off, taking no more than a minute per person/team. Also, remember there are no supports, no post curing, no directional weakness, or post sintering. That’s it…go use the “things”, redesign them, take them to meetings, test them, give them away…”
Applying 3D Printing Technology
I think the message here is that we sometimes over-categorize equipment and thus fail to see that every situation is potentially unique. Machine characteristics may or may not fit any given scenario, and it’s up to you to see if they do.
Andrews sums up this sentiment well:
“I constantly come across individuals and companies that have placed “boundaries” defining what specific 3D printing technologies are “supposed” to do. We are in a highly dynamic and evolving industry. Even though 3D printing is over 30 years old, this field is currently going through an explosion of possibilities. As an educator teaching on the cutting edge, I have to look for systems that can bridge the gap between possibilities, cost, and industry potential. While there are users that will benefit from a very “tight” focus (example: dental photopolymer printers), many users need a professional system covering everything from prototyping, to presentation, to production.”
Given the highly competitive nature of 3D printing today most machines have unique characteristics in their attempts to differentiate themselves in the market. Some of these factors just may be what you’re looking for.

