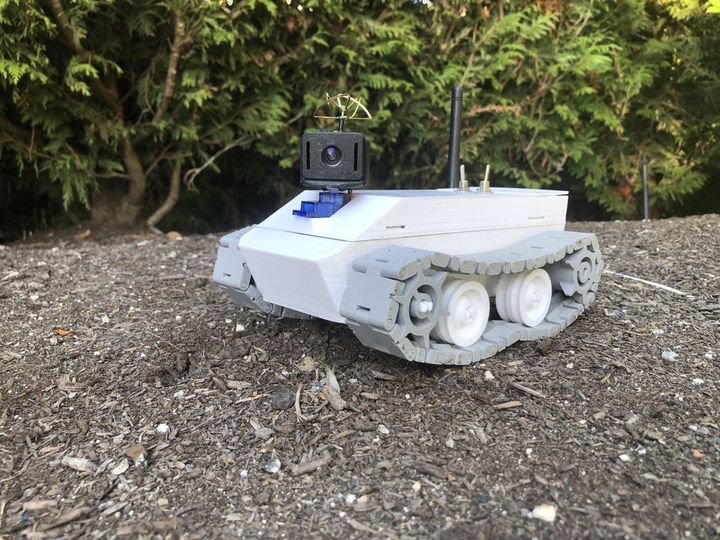
This week’s selection is the 3D printed Arduino Tracked Car by Instructables contributor Morrisl4.
The semi-anonymous Morrisl4 is apparently based in Canada and has provided several projects to the Instructables site, including a remote control boat and a fidget spinner. This project is similar to the RC boat, but is a bit more complex.
Morrisl4 explains the project:
”This is an excellent project that combine the knowledge of 3D printing, Arduino, and FPV (First Person View) camera. It is a great beginners project for anyone interested in making their own RC tracked car, or just want to use 3D printing, Arduino, and FPV for their own creations. Basically, it is a little exploration rover. Step by step video guides of making this project is provided.”
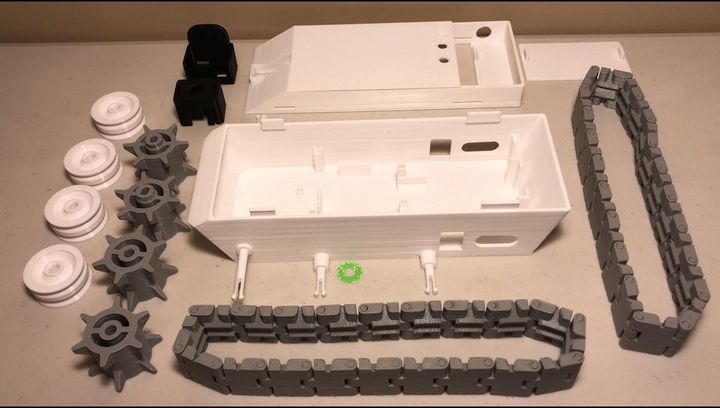
The tracked car indeed includes tracks, and they’re perhaps the most complex item to 3D print of all the parts used in this project. Morrisl4 suggests orienting them in a certain way to ensure proper 3D printing. The track is one of those always-interesting “single print mechanisms”, but it does include many elements.
The entire inventory of 3D printed parts for this project include these pieces:

It does not look particularly complicated to produce the other parts.
In addition to the 3D print aspects, there are electronics to install. This includes an Arduino board, the software for which is also provided by Morrisl4 in downloadable form.
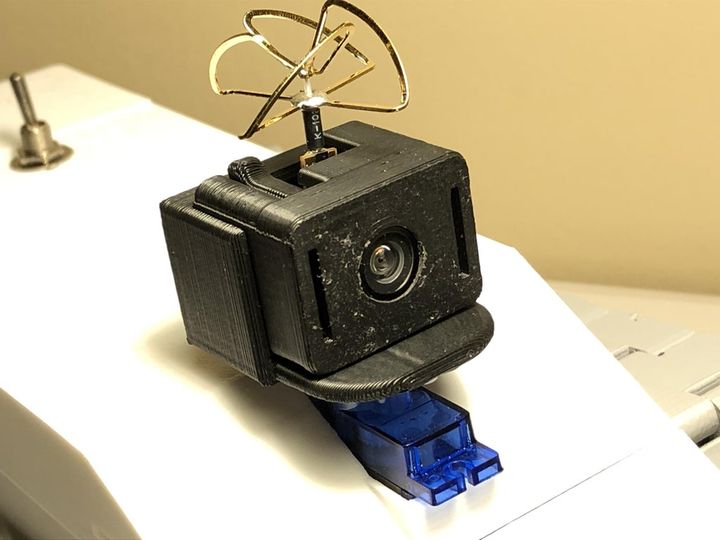
One of the more interesting aspects of the tracked car is that it includes a FPV (first person view) camera. This enables the RC operator to drive the vehicle as if they were in it.

But there’s one catch: Morrisl4 suggests that the FPV camera will get a little warm when operating. Apparently the temperature is expected to be sufficiently high to adversely affect PLA material. Therefore, Morrisl4 recommends using ABS for the FPV housing parts. I suspect PETG may also be sufficient for this use.
Here’s Morrisl4’s video on the project:
If you’re interested in making your own 3D printed rover with which you can explore your backyard, this is the project for you.
Via Instructables
