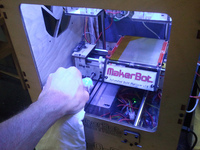
 You’ve assembled your 3D printer after great effort and are anxiously awaiting your first printout. It will be amazing. It will shock everyone watching. Printing an actual object!
 But it turns out to be a sullen lump of misshapen plastic.
This is the dilemma of many who assemble their own 3D printer. The effort is not so much in the construction (which can be a lot of work), but instead is the seemingly endless tuning required to “dial in” the right parameters that produce perfect 3D prints.
There are hints here and there around the net, including a pretty good tutorial by MakerBot and excellent instructions by Dave Durant, as well as innumerable hints hidden in blog posts, forums and wikis.
We found a very straightforward explanation in Thingiverse by Coasterman, who includes a series of “essential calibrations” that step-by-step lead you through the basics of tuning your 3D printer. The approach builds on the basic elements first, then follows with more challenging settings. Also included are all the objects you’ll need to test with.
If you’re having trouble getting objects to hold together, we’d recommend you try these out.

