
So you want to do resin 3D printing? Here’s ten things you have to know.
For years the idea of desktop resin 3D printing has been quite challenging. The inconsistent equipment and materials led to an enormous amount of learning that each participant had to gain, usually by trial and error.
Nowadays desktop resin 3D printers are far more forgiving and sometimes include automation features. They are available at very low price points, and this has attracted even more people to the technology, particularly gamers wishing to produce figurines and sculptures.
I thought it wise to provide some tips that might not be as visible to those newcomers that are considering buying a desktop resin 3D printer. It’s easy to look at the specifications, but there are a number of other important things to know that the manufacturers might not tell you. Keep these in mind:
Peeling Process
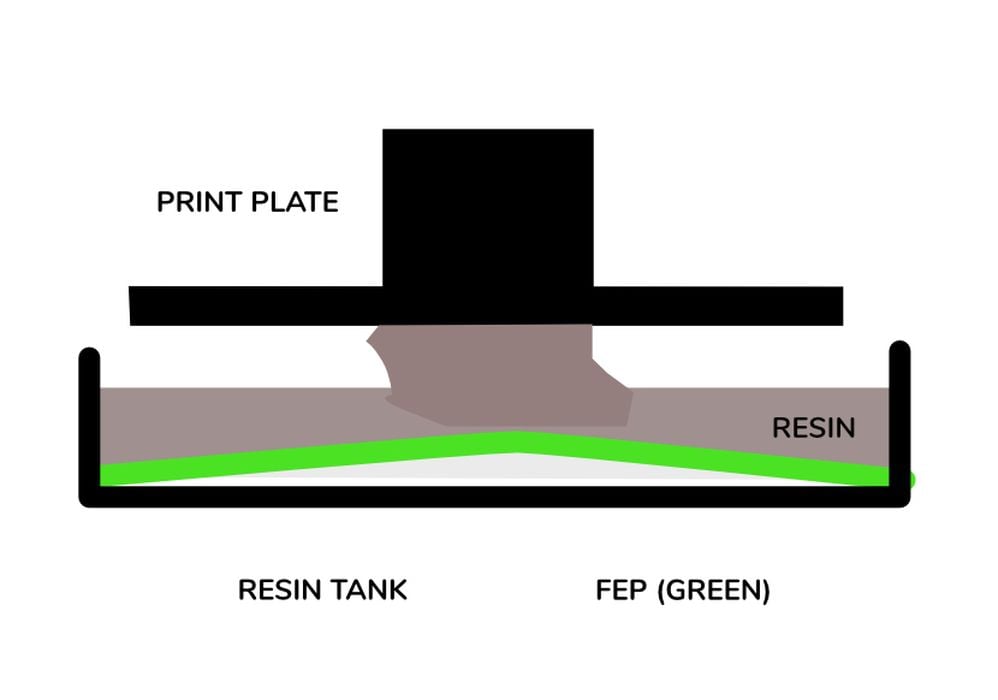
Newcomers often don’t realize what’s happening in-between print layers. It’s a process called “peeling”, and occurs because the newly solidified layer of resin also sticks to the bottom of the resin vat. The model must be “peeled” off the vat by moving the build plate upwards.
This makes sense, but what is less understood is HOW the peel takes place. The vat film is a flexible material, and as the plate moves upward, the film bows up in the middle where it’s attached to the print.
This bowing increases until the edges of the model crack away from the film. Once started, the release happens quickly and the film bounces back to level, usually with an audible “pop”.
It’s important to understand how this works because you may need to increase the lift height. For example, if you print a slim model in the middle, a low lift height is sufficient. But if you print a full build plate the bowing isn’t enough unless you lift the plate high enough.
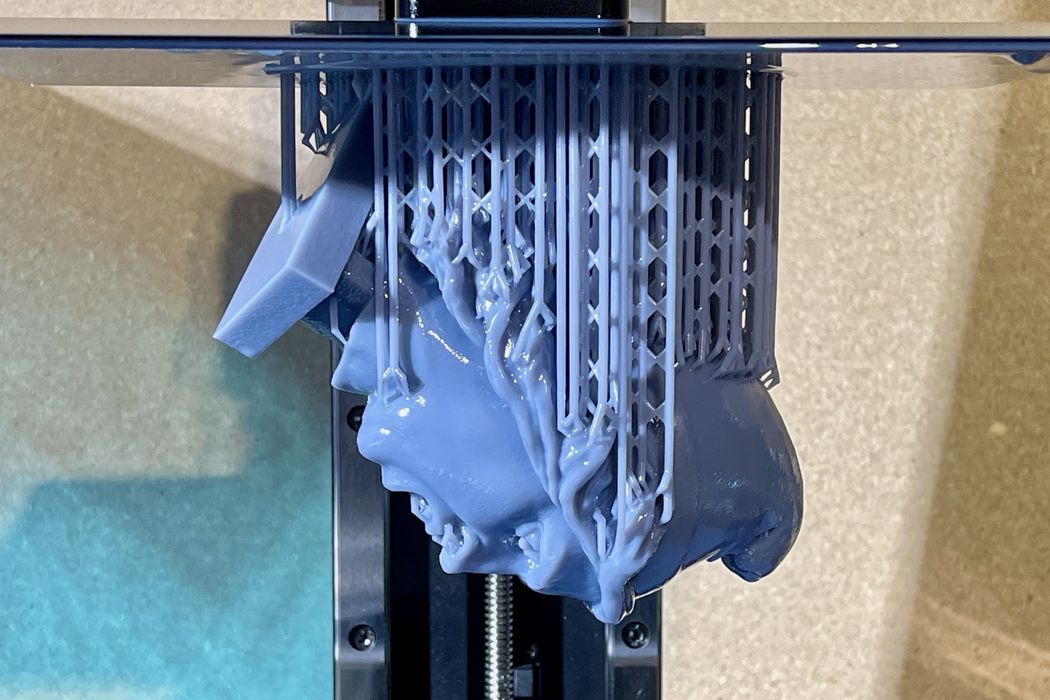
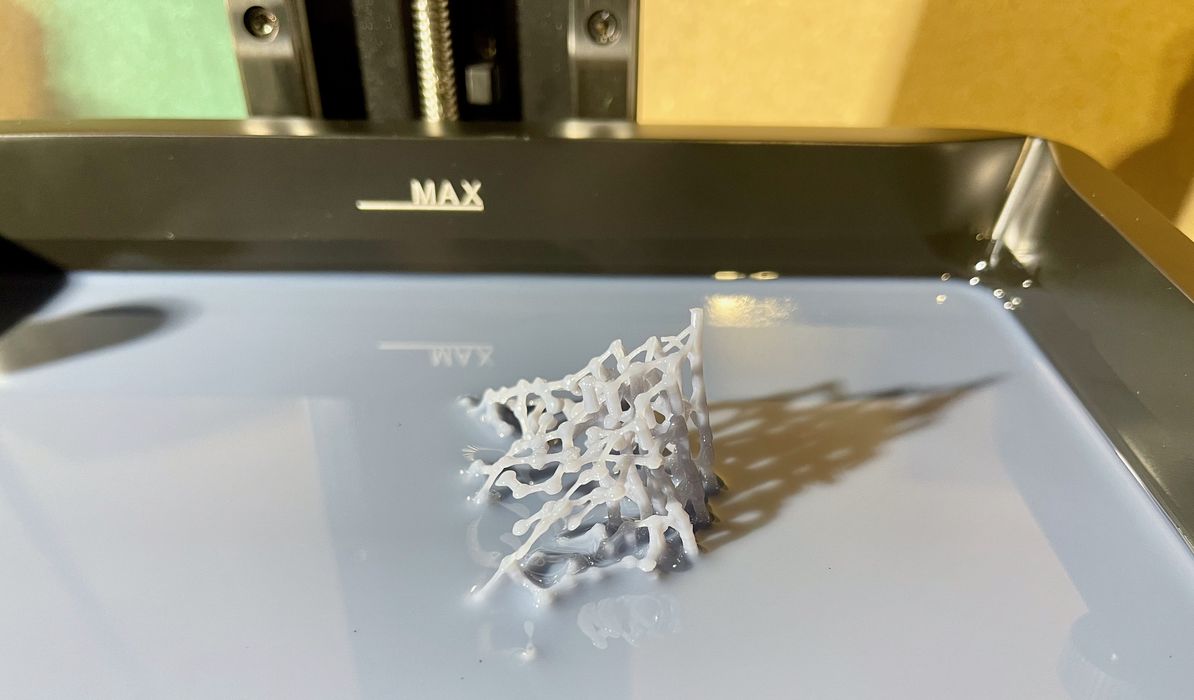
Suction
When the plate is lifted the model peels off the plate — usually. You want to make sure it is easily releasable to avoid the suction problem. Imagine trying to pull a flat brick off the bottom: there is a huge amount of material sticking. Now imagine that brick tilted at 45 degrees: the amount of area sticking on each layer is far less, making release easier.
Always tilt objects to minimize the area of each layer.
Exposure Times

Exposure times will be your prime focus. If they are too short, then you will get weak and insufficient material that could not be able to hold itself up when printing.
If you expose for too long, the model will be very rigid and possibly crack. You will also lose a lot of detail.
The game here is to find the exposure setting that’s just right: enough to provide sufficient strength for the print, but not too much to wash out the fine details. This always requires experimentation.
Note that exposure times on resin bottles are meaningless: each printer has somewhat different energy levels, so you have to determine (or find) an exposure setting for the combination of that machine with that resin.
For this reason pre-sliced models shipped with machines are usually terrible, unless you happen to be using the same resin from the manufacturer.
Film Damage
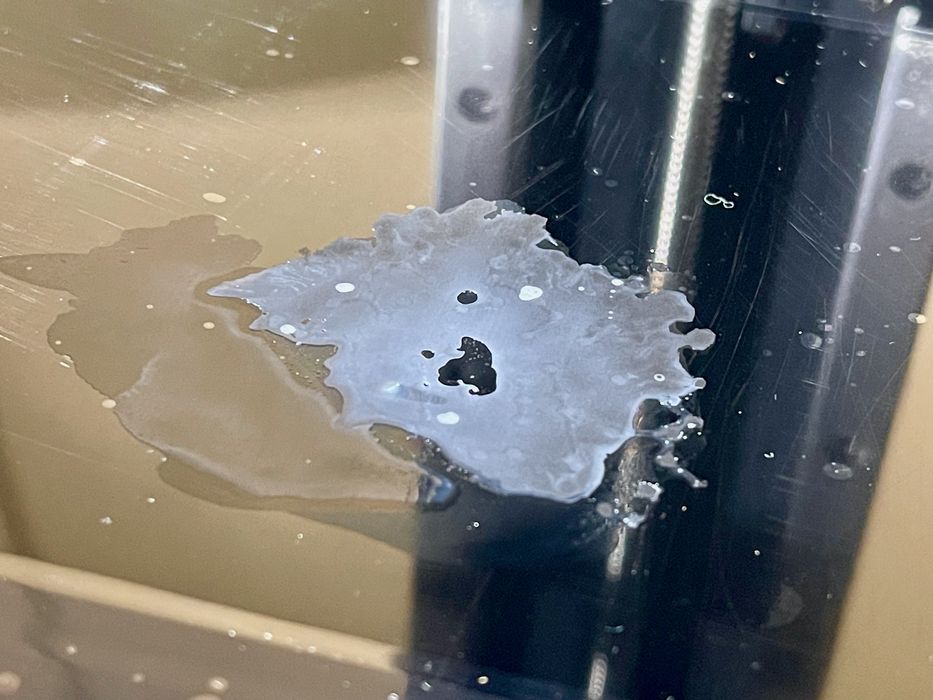
Damage to your tank film will be the prime danger. This occurs when loose parts of the model or support structures come loose — often due to poor exposure times — and fall into the resin vat. On the next layer change the build plate could press the bits into the film, sometimes making a hole.
I’ve destroyed many films in this way. Sometimes they are quite invisible and you may only notice when you see strange deposits under the resin tank.
To avoid this damage, be extraordinarily careful when setting exposure times and organizing support structures.
Plate Adhesion
Support structures and the model can fall off the plate, even if you have the correct exposure time. In those cases you must increase the initial, first layer exposure time. It’s relatively harmless to do so, as it’s only one layer and you won’t lose time or details.
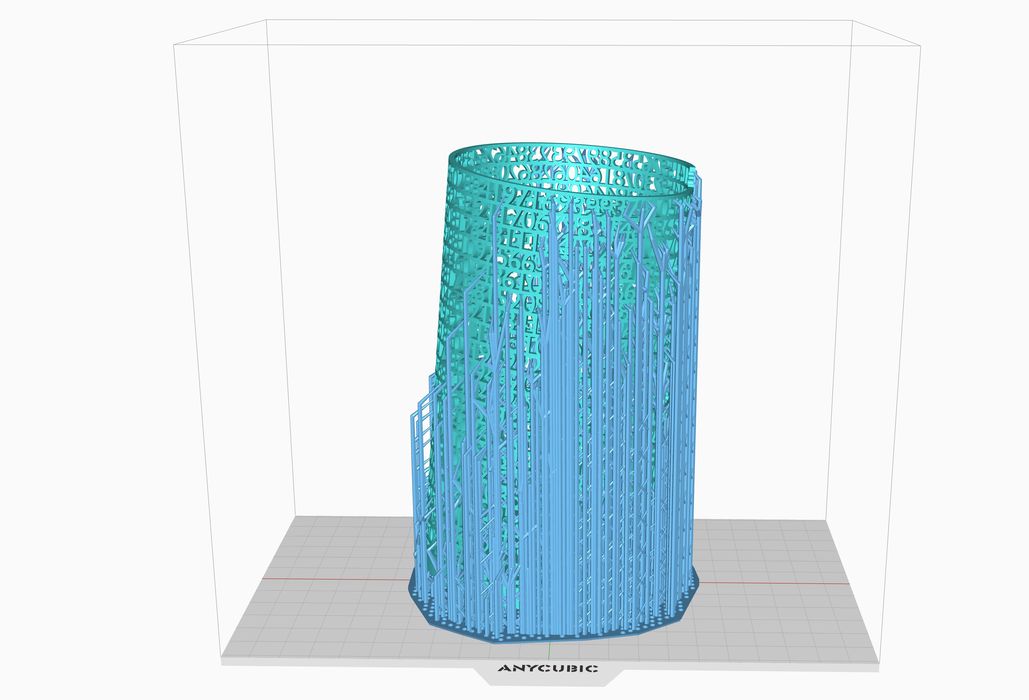
Supports
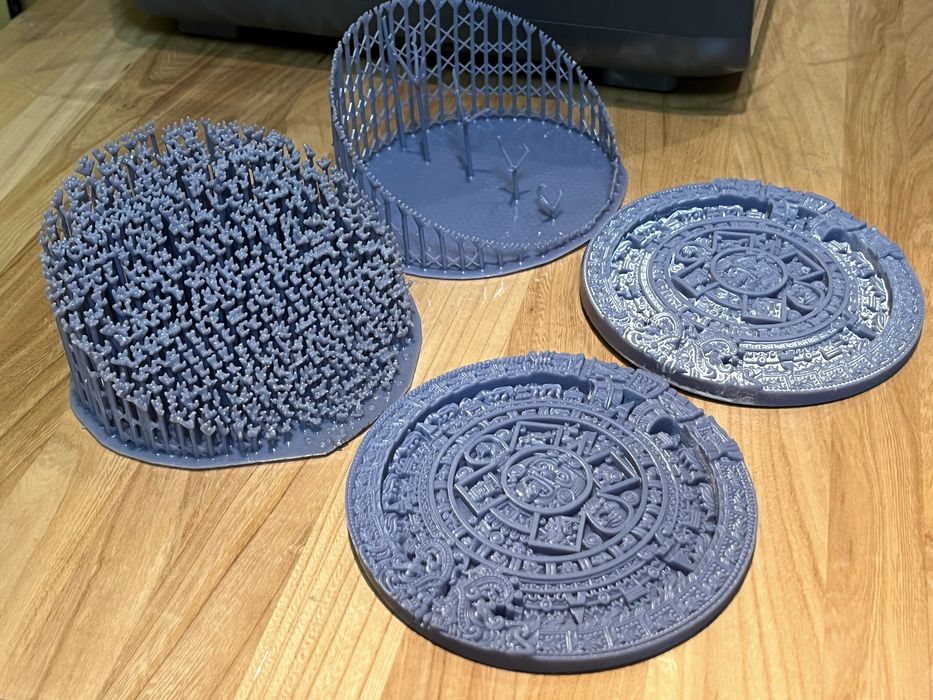
Support structures are the most complex aspect of resin 3D printing. By and large, most of the software tools that prepare print jobs do a terrible job of automatically generating support structures.
If they aren’t sufficient, you will have a print failure or a mis-shaped print. The best practice is to place support structures manually, using many small and thin supports rather than fewer large ones because they cover more overhangs and are easier to remove. Do not be concerned about the amount of material used by the supports, because if the job fails you’ll be using more resin anyway.
Safety
Safety must be top of mind when resin 3D printing. Resins are typically toxic, and even though a brief exposure may not provoke any affects, repeated exposures build up in the body and will eventually have a sudden and severe reaction.
Always wear required PPE: nitrile gloves, sleeves, safety glasses and possibly a suitable respirator. Always ventilate the room where the printing occurs.
Read up more on resin safety practices, there is much to know.
Cloud
Many recent desktop resin 3D printers come with an associated cloud system. The idea is for you to login to the manufacturer’s cloud to monitor and control your device. You can usually also store and find 3D models.
It’s all very convenient — if you use only that manufacturer’s equipment. If you have different 3D printers, you will end up using a variety of cloud systems and software tools that can be quite confusing. With new and better machines coming out constantly, it’s very likely you will end up with logins all over the place.
Design
There are multiple online 3D model repositories, each usually associated with one of the 3D printer manufacturers. These would be sites like Printables (Prusa), Makerworld (Creality), Thingiverse (UltiMaker), and several others.
While these sites boast many thousands of 3D models (with Thingiverse holding several million), it is usually next to impossible to find what you want. That’s because:
- The search functions are poor
- There are too many variations
- The model doesn’t exist and you can’t tell it doesn’t exist
Just because there are lots of 3D models doesn’t mean you will find what you want. You may need to design your own 3D models.
AI Features
Many machines now have some basic AI features, such as automatically detecting a print failure through the webcam. However, that’s just the start. In coming years there will a vast array of AI-powered functions for desktop 3D printing.
The one that’s now emerging is called “text to 3D”, which will accept a sentence and create a printable 3D model on demand. This is vastly different from the traditional method of making a 3D model with a CAD tool. The old way is expensive, requires a huge amount of learning and takes a lot of time. It’s likely the basic 3D model needs of many new 3D printer operators will be met by these AI tools in the near future, so the thought of spending a huge amount of effort on CAD tools may not be necessary for many.