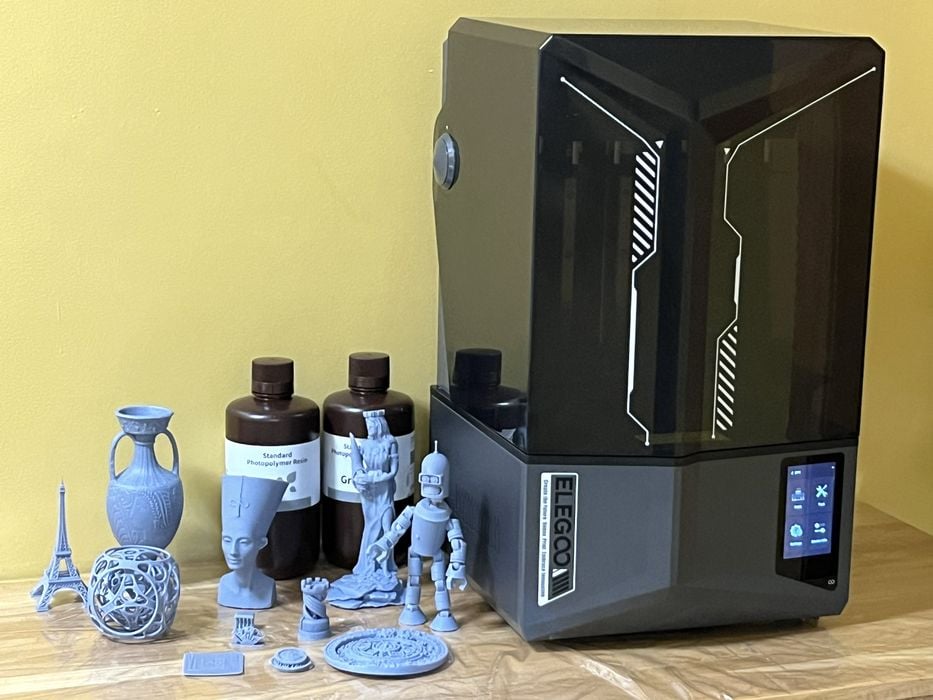
Our review of the Elegoo Saturn 4 Ultra 3D printer concludes with a look at print results and final thoughts.
This is part three of a three part series, please read parts one and two.
Elegoo Saturn 4 Ultra Print Results
We returned to where we had left off with the review, but first downloaded and installed the latest Beta update to CHITUBOX, along with updating firmware for the printer.
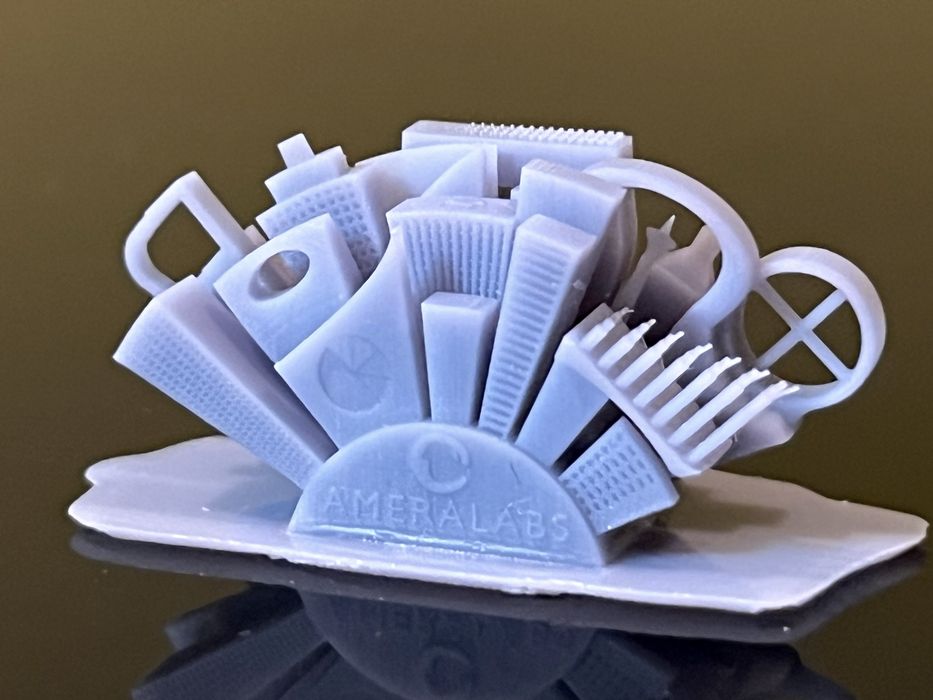
We went through a few of the typical models we use for reviews so we could get a feel for the machine. We started with a small calibration print, “Ameralabs Town”,. The print took an actual time of 45m, a bit longer than estimated, and turned out very good with a very high level of detail in both positive and negative features.
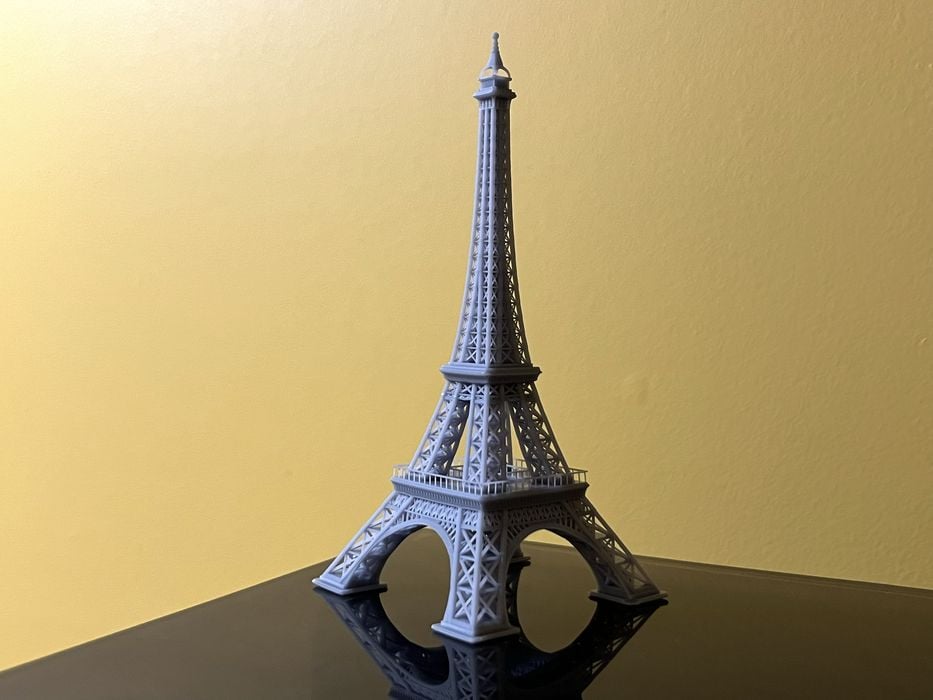
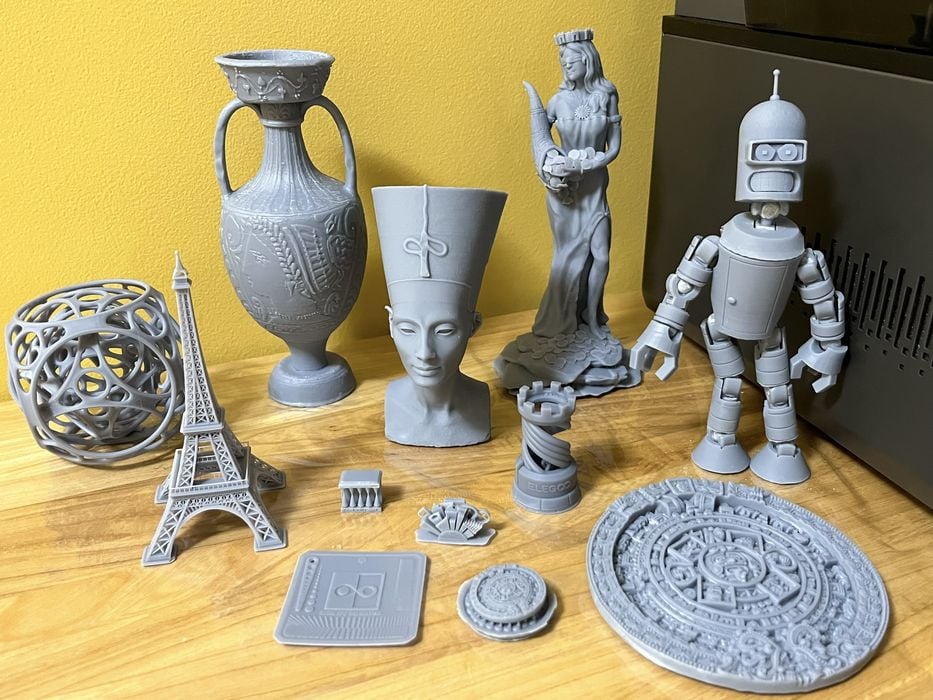
We then printed the Eiffel Tower 3D model, getting an estimated build time of 03:48:25 and using 9.25 ML of resin. Time to the completion was 5h4m, while the CHITUBOX estimate was quite lower at 3h48m, with print quality looking quite impressive.
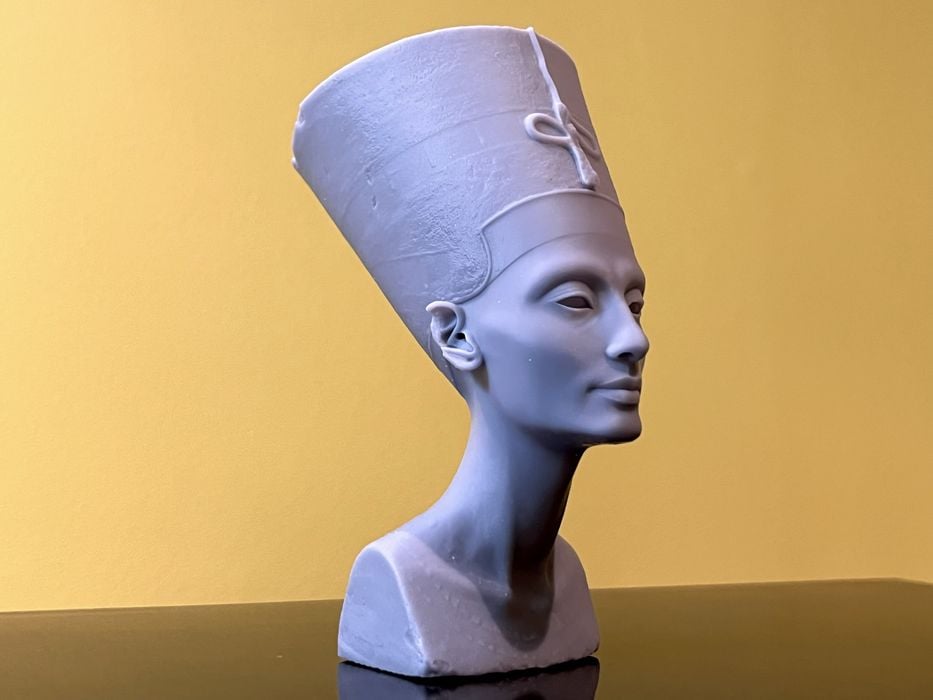
Nefertiti was the first print we attempted with with CHITUBOX automatically-generated support structures. The print completed in under six hours and supports were easily removed, giving little to no model scarring. In fact, the surface quality of the model was fantastic with a very high level of detail.
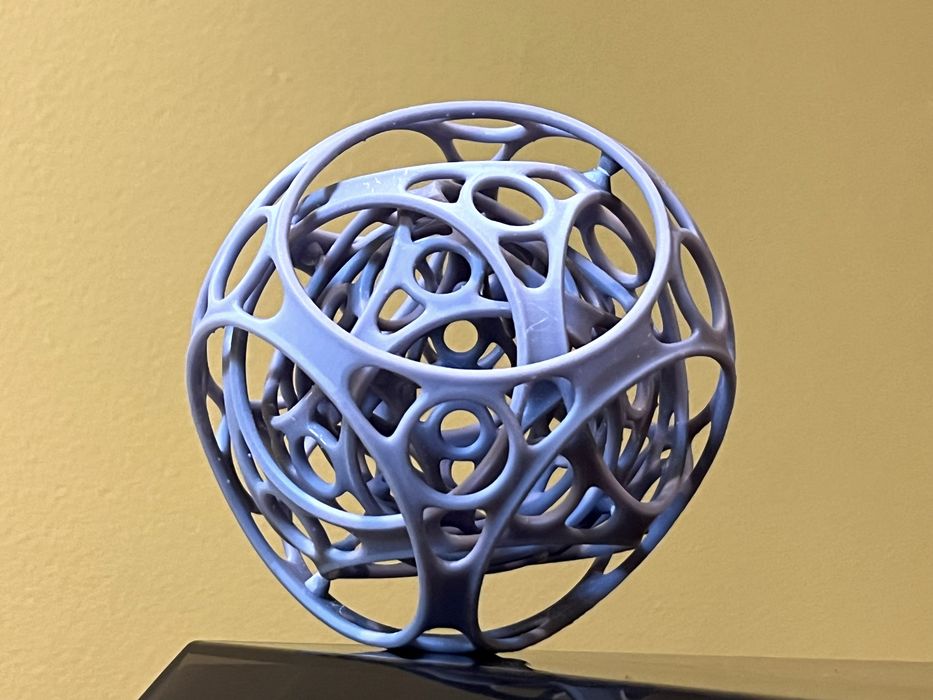
The delicate Gyro Air 3D model was printed using light support structures. The actual print time was 3h15m, again longer than estimated, with supports that removed very easily. There was little to no scarring or cleanup, and the surface quality of the print was superb: it articulated perfectly right away.
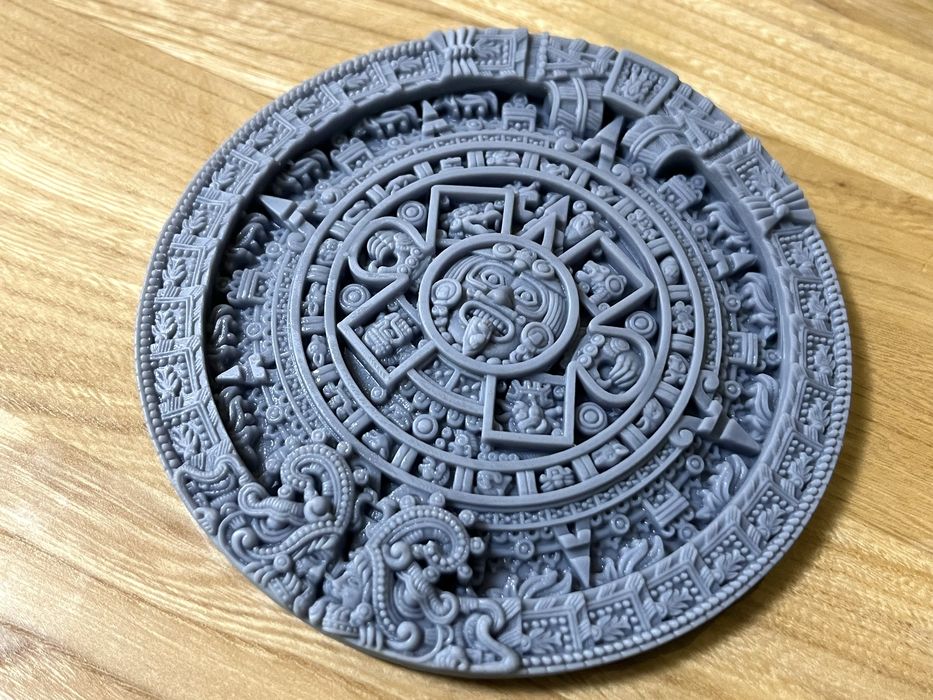
The Aztec-Mayan Calendar Wheel is a great 3D model for demonstrating the level of detail that a printer can deliver in both positive and negative surface features.
We sliced the file at 50% original size, with the intent to squeeze those delicate features into ever smaller spaces. The job completed in 1h43m, and again, we were impressed with the high level of crisp detail that the finished print achieved.
At this point we realized all of our test jobs were done in the center of the build platform, where an area of similar UV exposure was available — remember we observed issues on the sides previously.
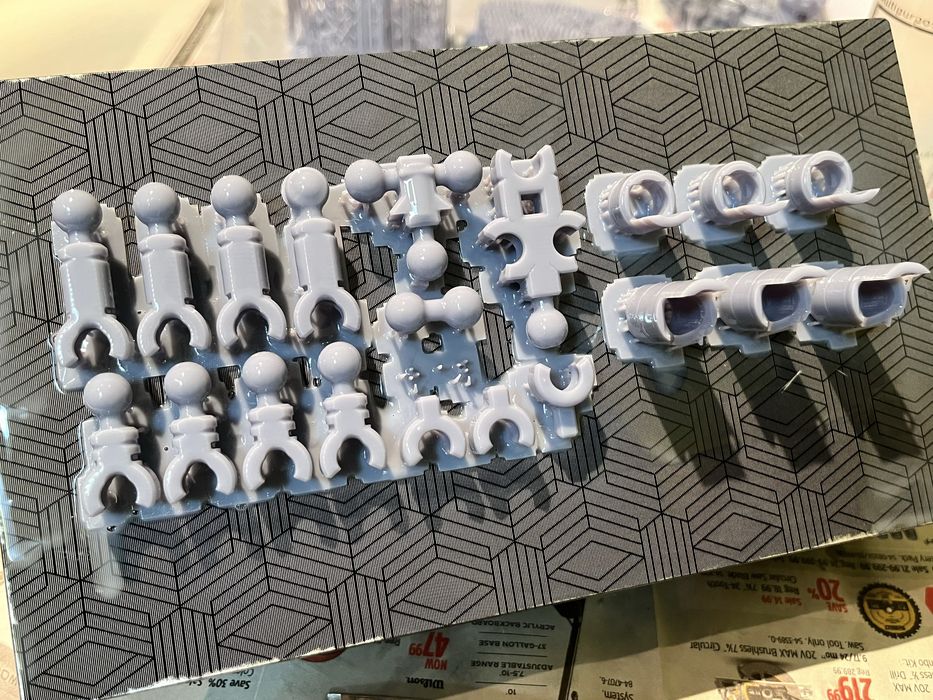
We decided to use a larger area of the platform with a multipart job just to see how much the varying exposure rate would affect things. For this task we chose the multi part Mini Bender figurine to print and assemble.
We had an unexpected problem where CHITUBOX Basic V2 2 Beta crashed while slicing the print, so we switched back to CHITUBOX V 1.9.6 beta and successfully sliced the first tray of parts.
Given that our error was most likely just caused by one or two parts in the print, we switched back to CHITUBOX Basic V2 2 beta and tried slicing the second tray of different parts and had success. Beta software can provide unusual results at any time.

All supports easily detached from the printed models and the pieces fit together with next to no touch ups. The assembled print articulated as designed and had great surface finish.
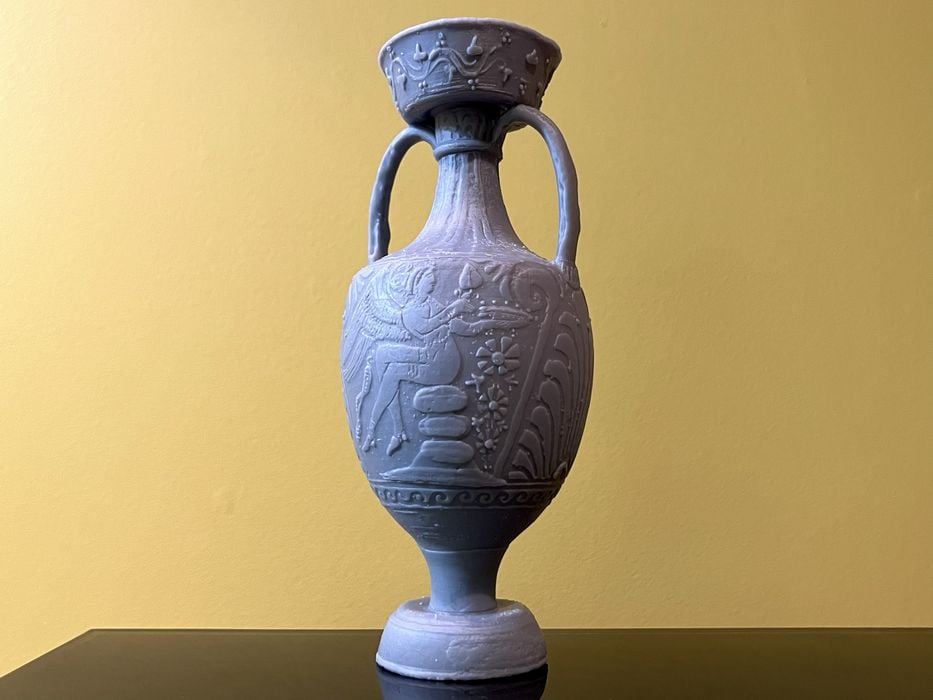
The Ampulian Amphora Vase is a somewhat larger 3D model, so we switched from using light supports to medium. The actual print time was 7h30m, and completed successfully with no defects. Even internal supports were fairly easy to remove with minimal scarring. But most importantly, the surface finish on the model was absolutely fantastic.
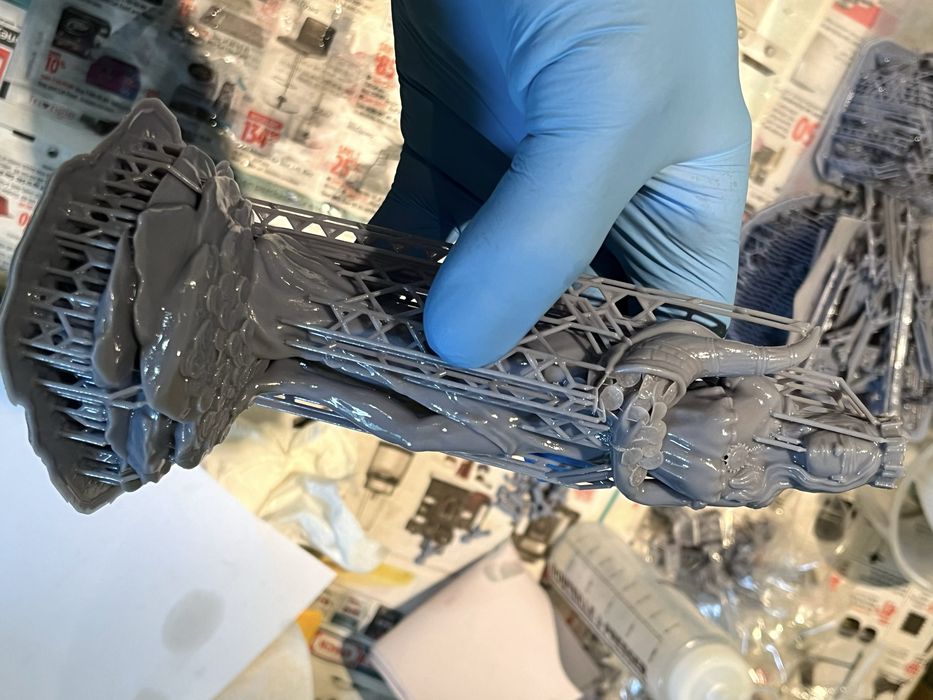
For our final print we chose a Diosa de la Fortuna statue.
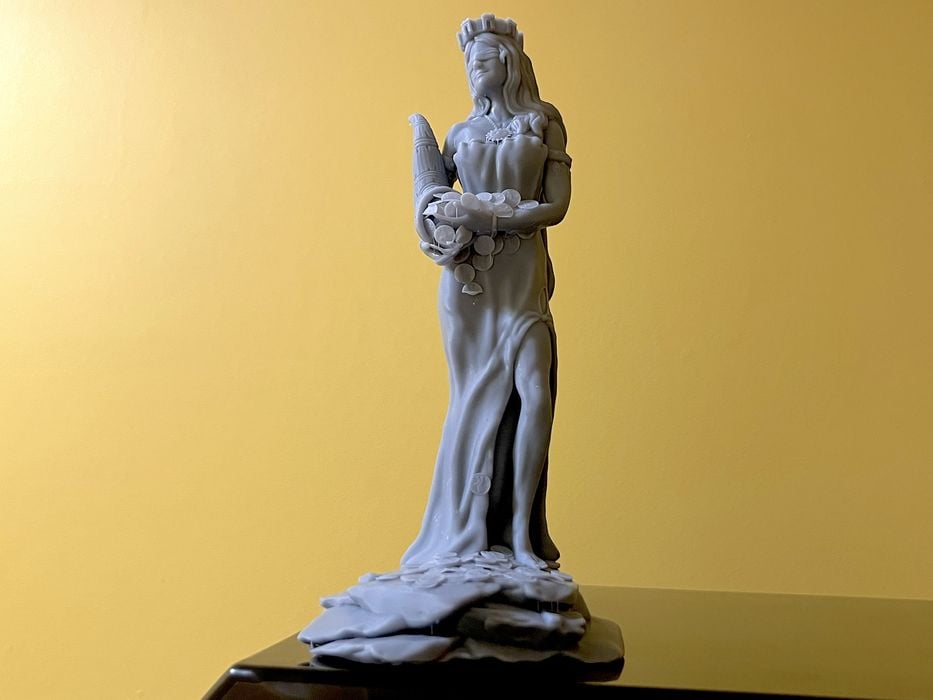
The support structure was quite easy to remove, with the exception of a few of the delicate tiny coins coming off with them unnoticed. The overall print quality of the model was again superb.
Just for fun we decided to do an encore print of the Aztec-Mayan Calendar Wheel, but this time we would print two copies at only 25% and 12.5% of the original size, just to see how much detail the 12K resolution LCD could deliver.
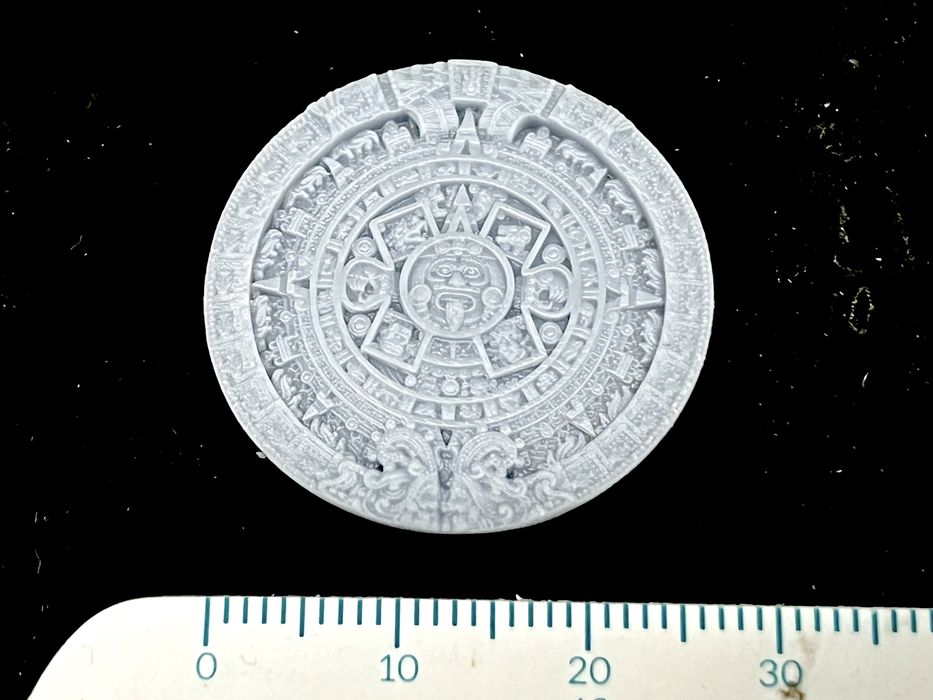
We were quite pleased with the quality of the XY resolution, but noted there wasn’t much depth in the Z resolution — the Z also shrinks just as much as the X and Y axes.
As a final test, we sliced the wheel at 0.01mm layers, the advertised minimum layer height of the printer, just to see if we could get more depth to the model.
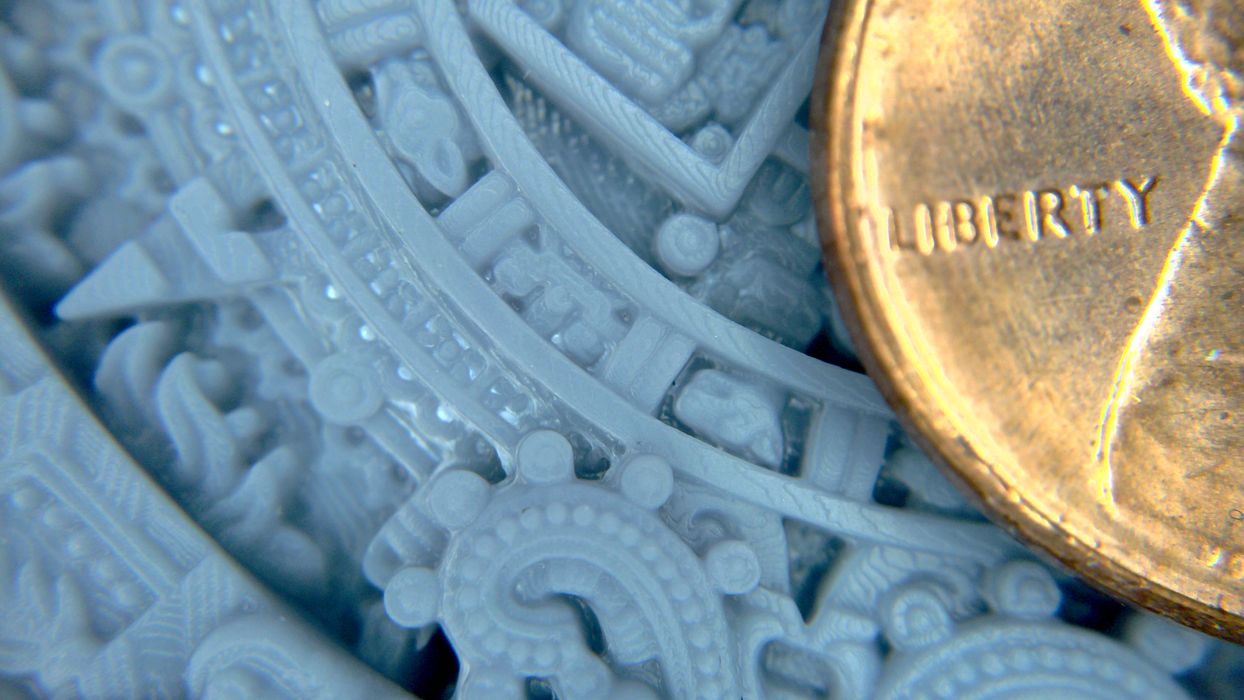
The 12.5% model had lots of depth and detail, however the 25% model seemed to have a flattened surface for a good portion of the model. This was most likely due to the advertised Z-Axis accuracy of 0.02mm in combination with the viscosity of the resin leading to too much resin being cured on each 0.01mm layer, leaving not enough space in z-height for the larger of the two models to complete. It would also explain the thicker than usual rafts for both models.
Nevertheless, the microscopic views of this print showed the outstanding resolution that’s possible on this 3D printer.
Elegoo Saturn 4 Ultra Final Thoughts
There wasn’t much to assemble the printer, so much so that Elegoo’s User Manual didn’t even include the standard step-by-step instructions we typically see. Still, there should have been something included as a sort of checklist for removing protective films, covers, etc., as anyone new to resin printing could easily miss what might seem obvious to everyone else and run into problems further down the road.
It has always been a bit awkward to deal with removing lids from printers, setting them down somewhere so you can remove the gooey build platform from the printer and then somehow pick up and place the lid back on the printer without getting resin goo all over it. The new tilt to open lid is a welcome addition and completely eliminates the need for temporary lid storage space in the work area, but it still requires two hands to rotate it open. A simple handle or knob added to the front of the lid would help in this regard and make it a one handed lift.
When we first powered up the printer we thought we had an issue, as it takes approximately 20 seconds after you flip the power switch for anything visible to appear, but then that’s only a firmware fix away to display something on the LCD and remove any confusion as the printer powers up.
We liked the new tilting tank, self-leveling build platform and the addition of an AI Camera. The components all seemed quite robust, but we did run into a few problems with each of these items very early in the review – a mid job failure where the print detached was not detected by the AI Camera, possibly due to a low light scenario, continued to completion, puncturing the tanks PFA film in the process. We found out shortly after replacing the film that the 12K LCD screen needed replacing as well, because of complications from the leak.
That said, things like this happen and Elegoo was great to deal with and promptly supplied us with the appropriate repair parts. Although the parts were tedious to install, Elegoo provided great installation instructions, with the LCD replacement even having a very detailed video walkthrough of the entire procedure.
Then there was the “Bib” – a fantastic new addition to resin print processing management. Why is this not a standard item included with resin printers? It just took seconds to slip on and off the printer and made life so much easier by keeping the tank and printer deck nice and clean from gooey — and toxic — resin drips. At the end of the review it even cleaned up nicely with some IPA and a paper towel.
We were quite happy that Elegoo had paired the printer with a reliable slicer like CHITUBOX and its great support generation features, and even more so when we found the addition of ChituManager to the software, which now employed direct communication to the printer via WiFi. This was a very welcome addition to print workflow, even if it was only in beta form.
The design of the new self leveling build platform took a bit to get used to with regard to our typical resin management process of wiping off any resin droplets prior to its removal from the printer, but we particularly liked the new easy to flip latch setup and the satisfying clunk when the build platform locked back into place.
The self-leveling aspect of the new design worked for the most part, but we found the gap to be too high on the side where we were having repeat print failures. A quick adjustment to a few of the bolts that comprised the platform’s spring loaded mechanism sorted out the issue moving forward. Elegoo should consider adding this as a possible procedure operators may have to check when installing the 3D printer.
We liked that Elegoo had added a Resin Calibration feature to their firmware, but in our case we weren’t able to use it due to somewhat inconsistent UV exposure across the build platform. If we specified six evenly spaced models and printed them using the same exposure time for all, we ended up with a slightly different exposure outcome for each model. A defective fresnel could most likely be the culprit, but it was something we never bothered with correcting for the review, as we were satisfied with the overall print quality we were getting. Those with a need for precision parts should take note of this finding.
All of this taken into consideration we must say that once we worked out the kinks, the Saturn 4 Ultra became quite reliable and gave us some amazingly detailed prints. This was especially the case when we scaled the Aztec-Mayan Calendar Wheel down to 12.5% of its original size and combined it with the smallest advertised layer height of 0.01mm. All the tiny details still popped.
In the end, the subtle exposure differences across the build platform turned out to be not that much of an issue, as the multiple trays of parts for the Mini Bender figurine required little to no post processing to fit together, and the model looked great and articulated as designed. Had we not had initial multiple issues with the hardware, we would have certainly scored the printer higher.
ELEGOO
SATURN 4 ULTRA 3D PRINTER
★ BEGINNER 6/10
★ ENTHUSIAST 7.5/10
★ PRODUCTION 7.5/10
BEST FEATURES
✔︎ Network printing
✔︎ Drip bib
✔︎ High detail
QUESTIONS
✖︎ AI camera
✖︎ Self leveling
✖︎ Uneven UV light
This is part three of a three part series, please read parts one and two.
Via Elegoo
