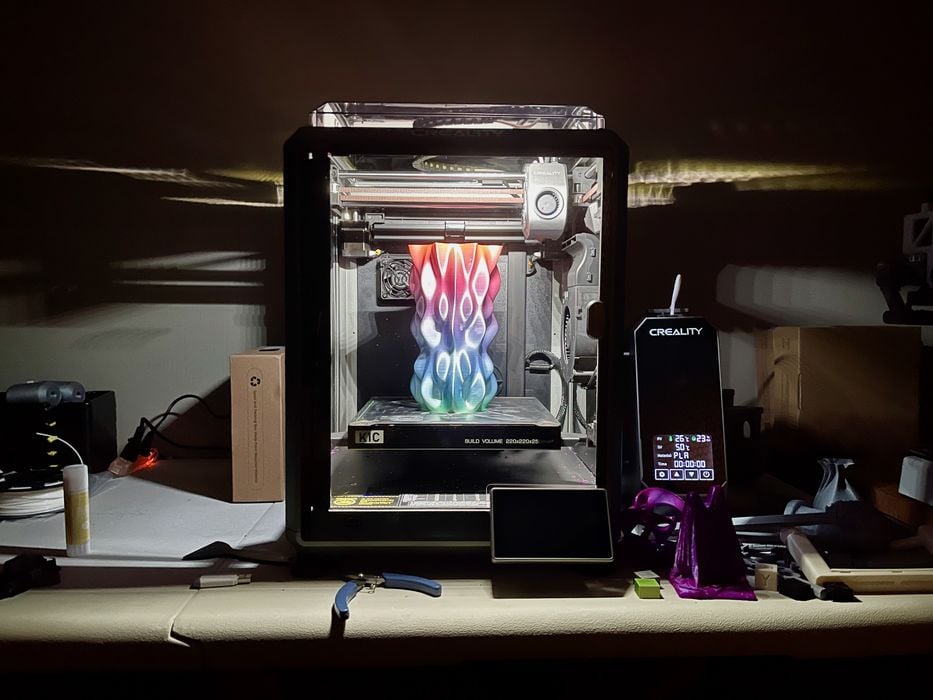
Our review of the Creality K1C 3D Printer concludes with a look at software, print results and final thoughts.
This is part three of a three part series, please read parts one and two.
Creality K1C 3D Printer Software
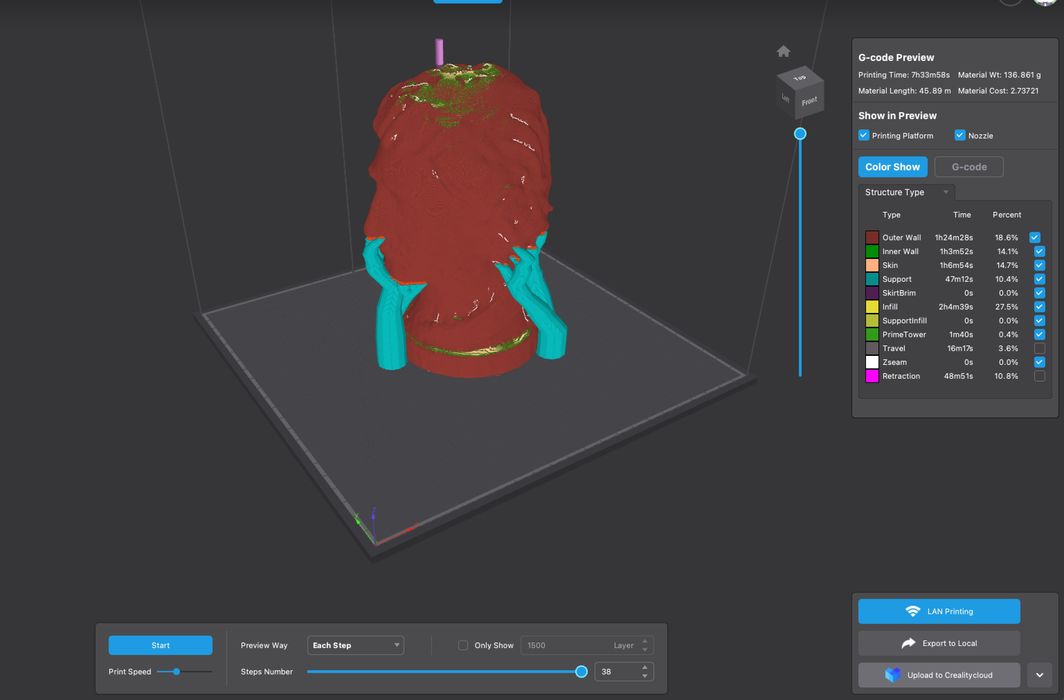
The K1C system includes not only the hardware, but also quite a bit of software. There are three components:
- The smartphone app, Creality Cloud
- The desktop slicer, Creality Print
- The cloud system, also called Creality Cloud
The cloud system ties it all together, routing information between the printer, the app and the desktop. Or at least usually it does.
The software allows you to load in your own 3D models for printing, or find them in Creality’s growing online repository. You can prepare jobs for printing using quite a number of included print profiles for a wide range of materials. Once sliced, the jobs can be dispatched through the network to the K1C. It’s quite convenient, as you don’t have to mess with USB sticks, as almost everything can be done from your desktop (or app).
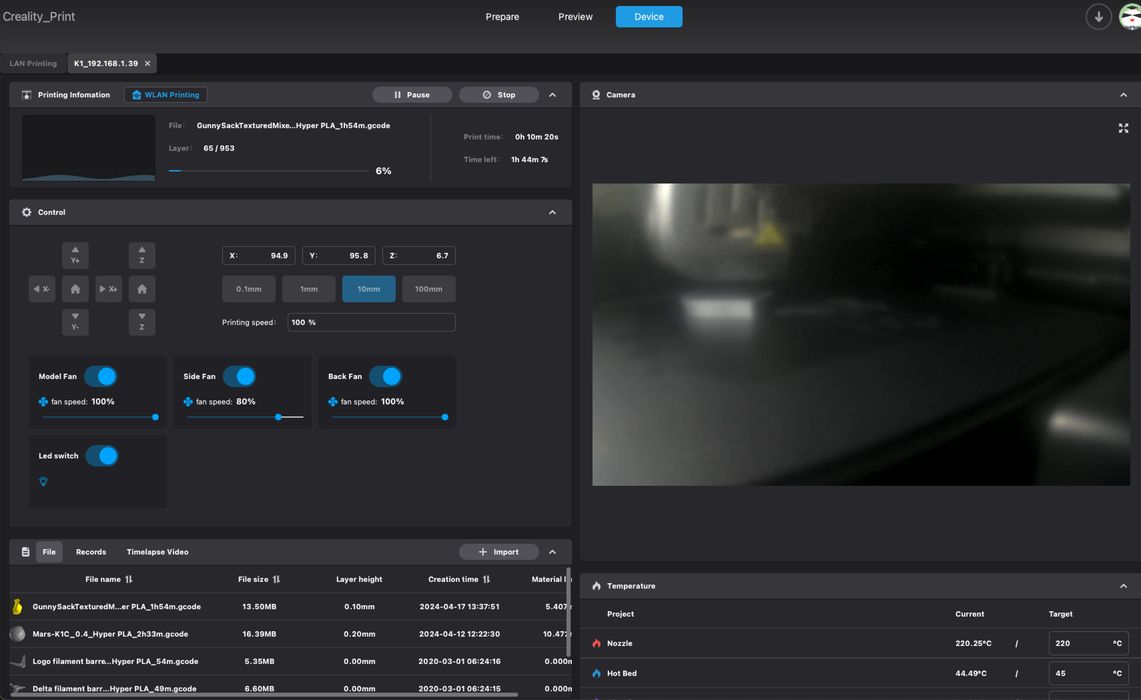
It’s quite a comprehensive system, as it must support an enormous number of users with a large variety of Creality equipment. The Creality software engineers have done a great deal of work to build the system as it stands today.
I found it quite possible to use the software to properly drive the K1C, but it’s not all roses. I encountered quite a number of miscellaneous issues with the software system. All of these would be considered minor issues, but aggregated together it really detracted from the use of the system.
Let’s take a look at a few of the issues.
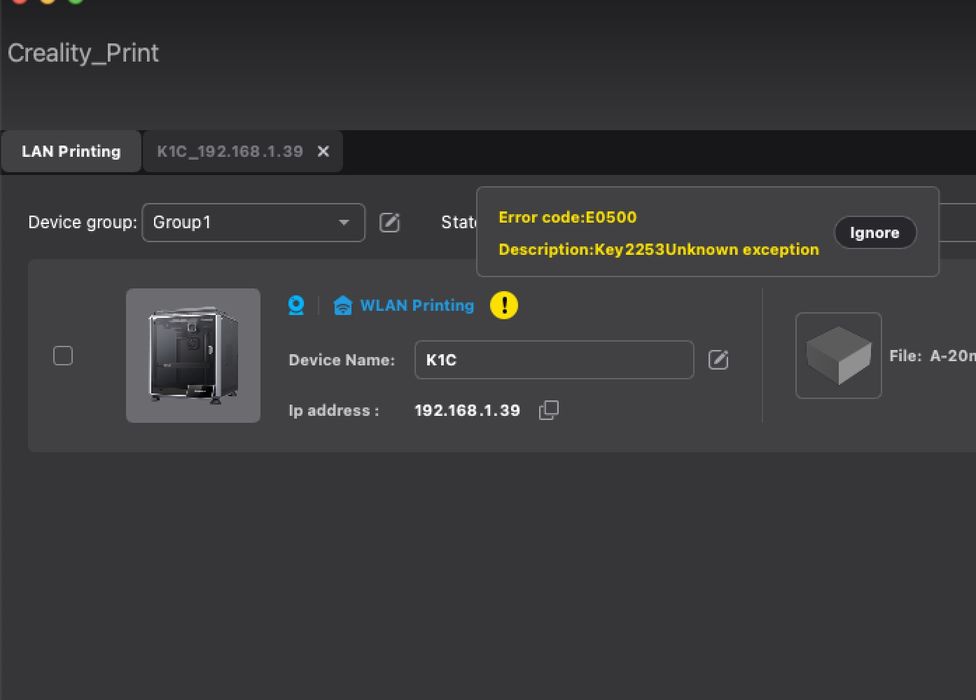
Here, for example, I encountered this mysterious software issue. It popped up one day for no apparent reason. I have no idea what is about, and could not find an answer in the Creality online wiki. Restarting the software cleared the error, fortunately.
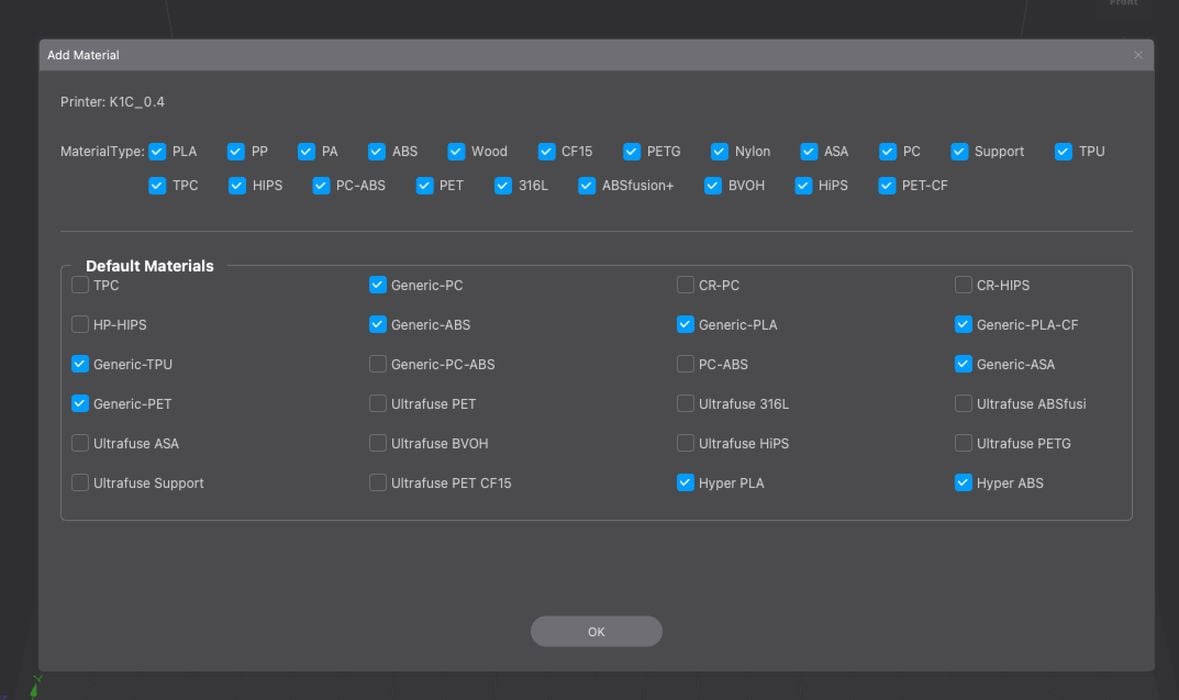
Another bug I encountered had to do with selecting print profiles. Above you can see the huge list of pre-made print profiles that can be selected. If selected they then appear in a shorter menu during slicing. That’s how you keep the list short because no one has all these materials. Pick what you need.
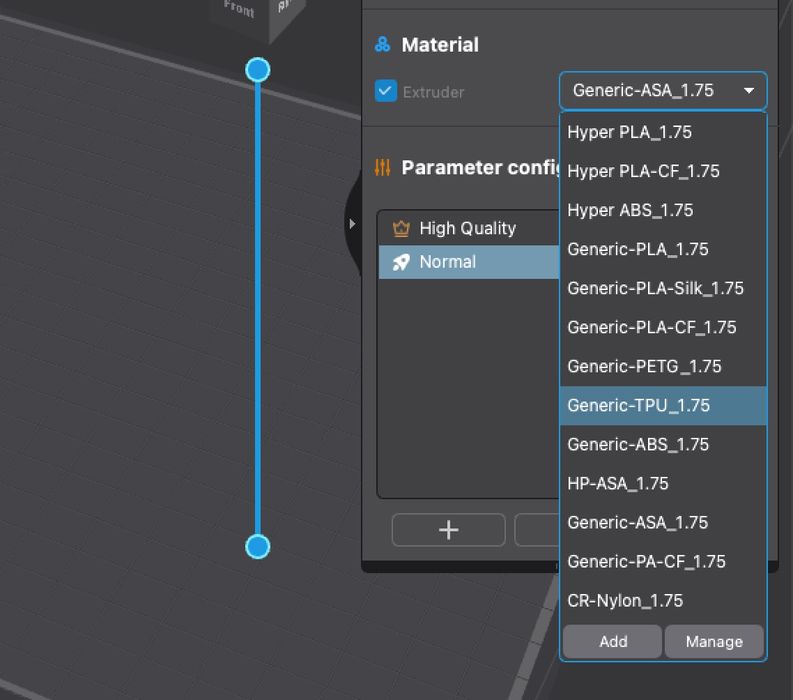
Here you can see how it appears in the slicer: you are presented with only the desired materials.
The problem was that at one point I added Generic TPU to my list, since that was the test for the day. I then attempted to select it for slicing, but it wasn’t there! I selected it again, and then it showed up. But then after restarting Creality Print it disappeared again. It seems there might be a limit to the number of materials you can have in your list? Or something else? I don’t know, none of this is explained anywhere and it doesn’t work in the way you’d expect.
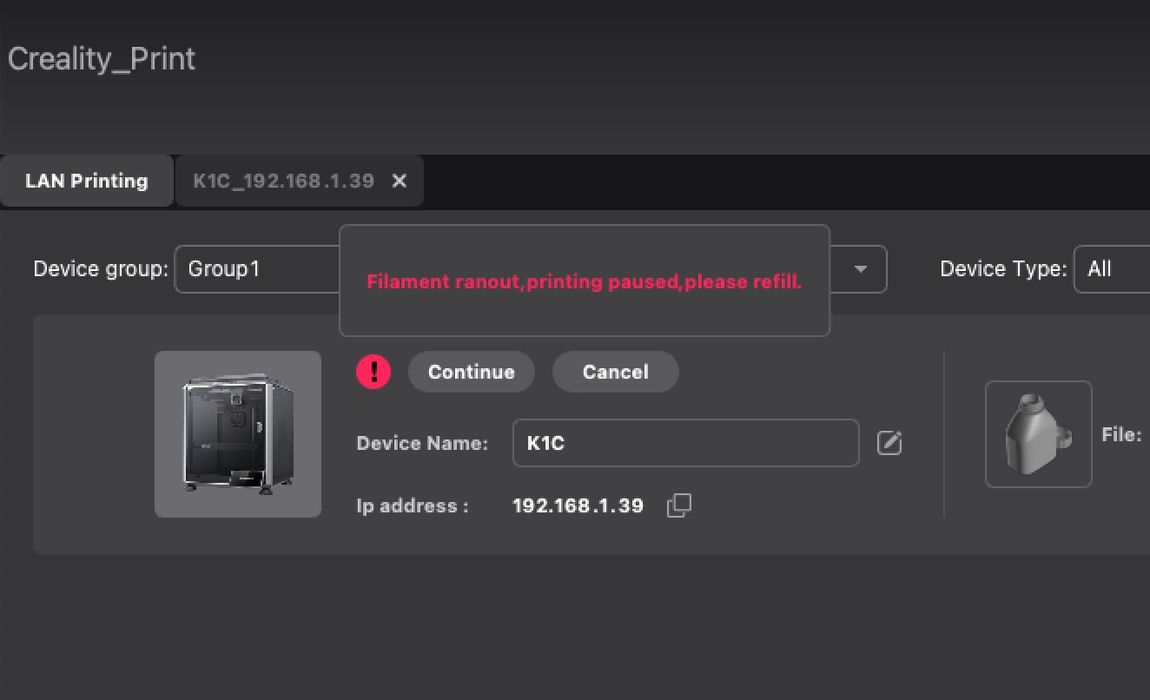
Here’s another minor issue. The print stopped and all you see is a red dot on the display. It turns out you have to click on the red dot to open up an error message — unlike the previous mystery error message that popped up. In this case it meant that the machine had run out of material. This is certainly minor, but it’s just one of many, many inconsistencies in the software interfaces.
I won’t go into detail, but I encountered over a dozen of these issues, including the mismatching print durations earlier. Some of the issues I found were:
- The window blinks full white intermittently for no apparent reason
- It’s hard to read many of the messages because they use light grey text on slightly darker grey backgrounds
- Sometimes the GCODE dispatch uploads the printer take quite a long time, and other times not
- Entering numbers into text boxes is awkward: you cannot have a blank field, so it keeps putting digits in for you
- Creality Print would hang unexpectedly
- Zooming in and out is way, way too sensitive
- “One click printing” actually takes multiple clicks
- Printer status sometimes has leftover job times and images from previous jobs during new jobs
And so on. There are more, but you get the idea: it seems that the software can do everything you need to do, but the overall interface is far more confusing than it needs to be. It can be inconsistent in display and procedure, and I get the sense that it really needs an overhaul with a stronger emphasis on user workflow.
But it does get the job done.
It’s very likely that Creality is aware of many of these issues and is working on fixing them. We may see updates to Creality Print and Creality Cloud that offer improvements, and perhaps even some of them may have been fixed by the time you read this review.
Creality K1C 3D Printer Print Results
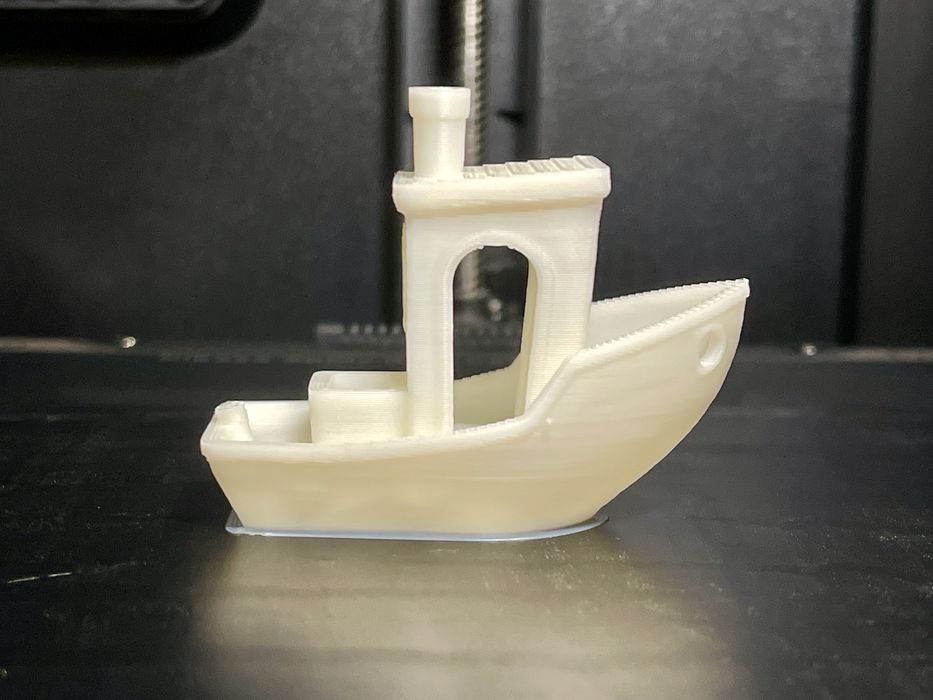
The print results were quite good from the K1C. Aside from a few print failures — due to my mistakes — the prints were quite good quality. The good first layer tends to carry through the entire object.
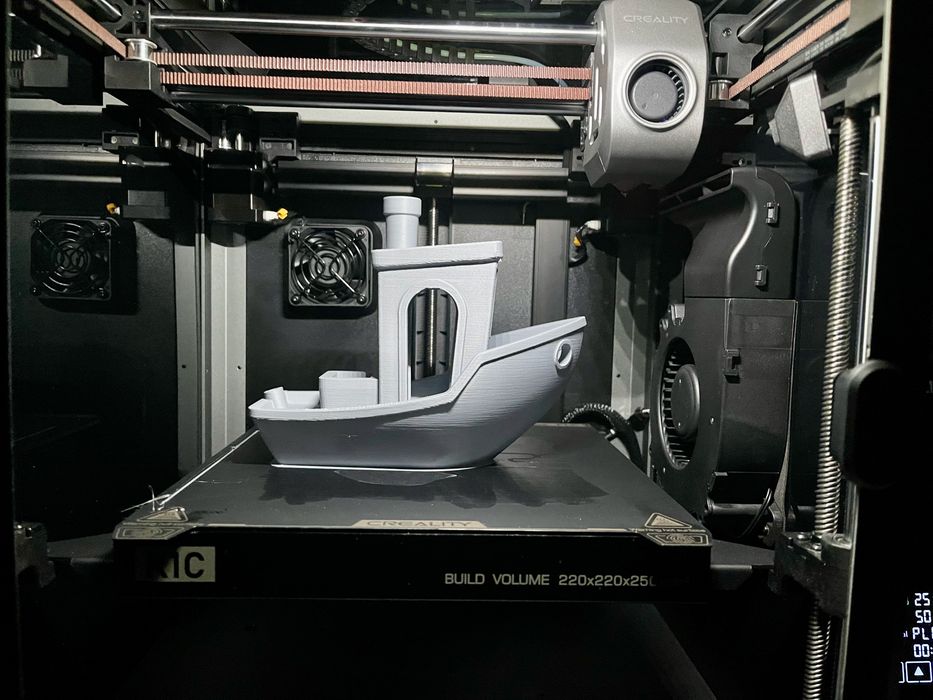
I printed a very large #3DBenchy in PLA for fun, and it came out very well. This is actually something everyone should do, as the larger size enable you to see how the print should look at a higher level of quality.
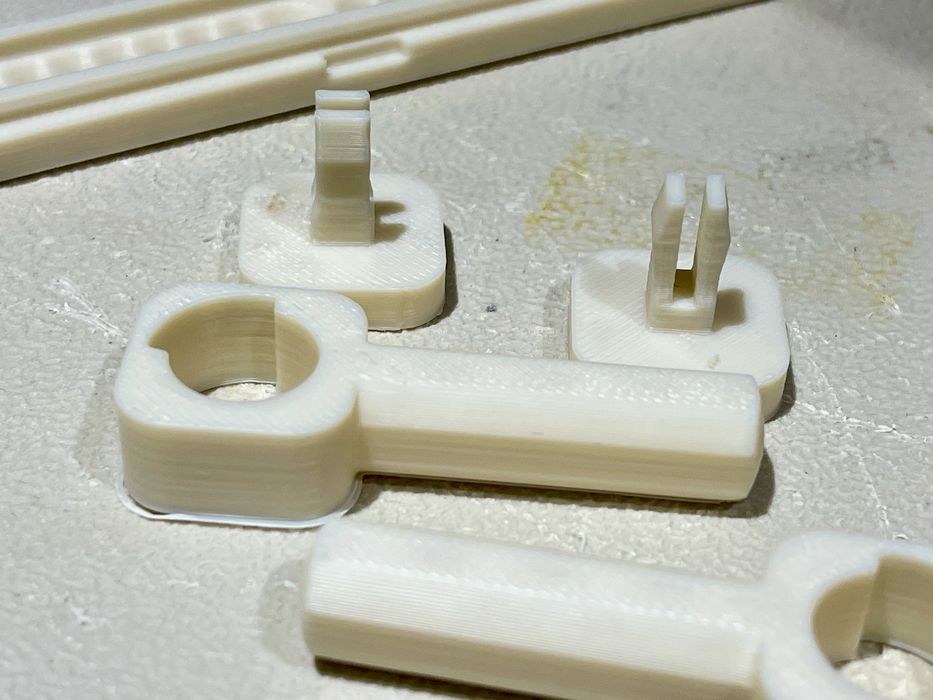
I printed several parts using ASA, which is very similar to ABS. Usually this is a challenging material to print, as it tends to warp and can be blobby. However, using the stock ABS profile I was able to print ASA parts that were absolutely terrific. They were probably the best ASA parts I’ve ever printed. This is likely due to the enclosed chamber, which during printing seemed to range around 35-40C.
Like ABS, ASA is quite a smelly material when heated. These two materials are notorious for particle emissions in many technical reports. When printing ASA on the K1C I did not notice any odors, suggesting that the activated carbon air filter works quite well.

I tried TPU, and it failed miserably. After only a few layers it began to air print. The stock TPU profile had it running at pretty high speed, so I slowed it down. Alas, nothing I could tweak would solve the TPU issue.
After discussing the matter with Creality, it turns out that you should NOT use the dryer when printing TPU. I had been placing all the spools in the dryer because, why not? Dry filament is always better.
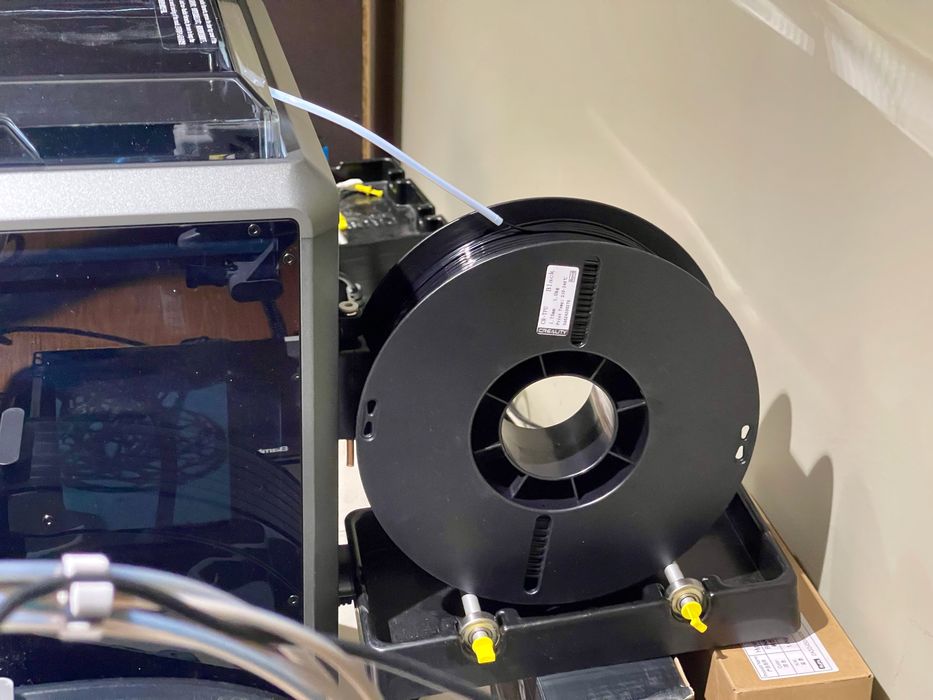
Creality advised placing the spool out of the dryer and directly behind the printer, as shown here. This took out some length of PTFE tube that led to the dryer.
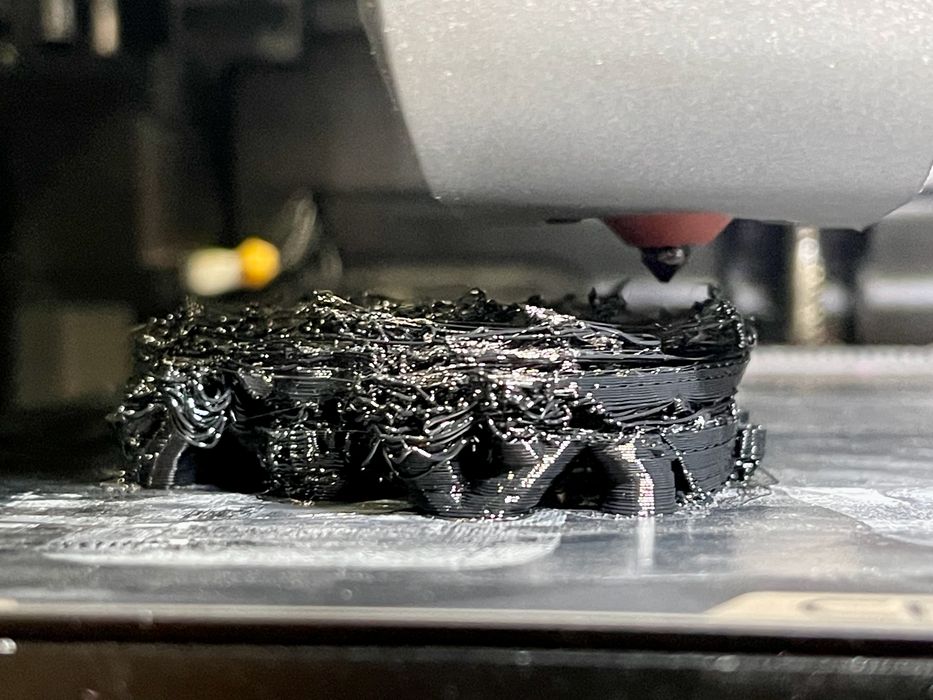
Unfortunately this also failed miserably. I then did some manual filament pulling and realized that any length of PTFE tube cannot be used: the flexible TPU lays down in the tube and creates a huge amount of friction. It’s extremely difficult to pull TPU through the PTFE tubes. The extruder would pull the filament and eventually it would snag in the tube, and stretch until air printing began.
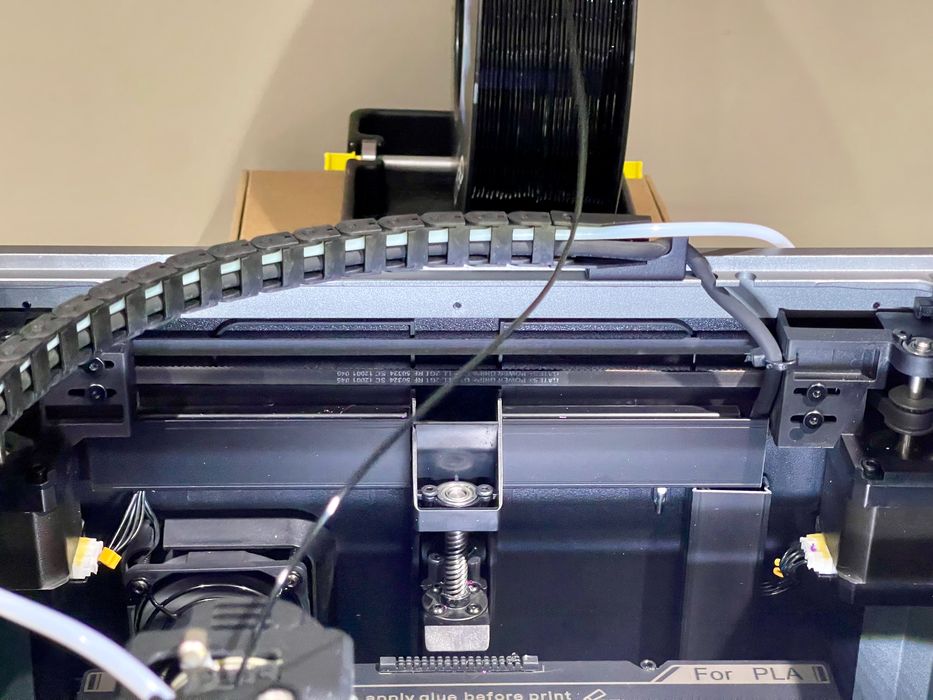
The solution was to eliminate ALL PTFE tubes from the TPU filament path. Here you see the configuration that worked: the TPU filament passes directly into the extruder.
Unfortunately none of this is documented in the instructions, and I had to figure this out with Creality and on my own. But once done, the K1C was able to print even large complex objects in TPU with ease – and speed.
I then moved on to another flexible material, polypropylene. PP is a terrific material for making soft objects, and I was curious to see how it worked on the K1C. I used the same spool configuration as TPU.
However, PP does require some help to adhere to the print plate, as the PEI does not naturally stick to PP. To overcome this issue you must use a specialized adhesion solution, like Magigoo’s PP product.
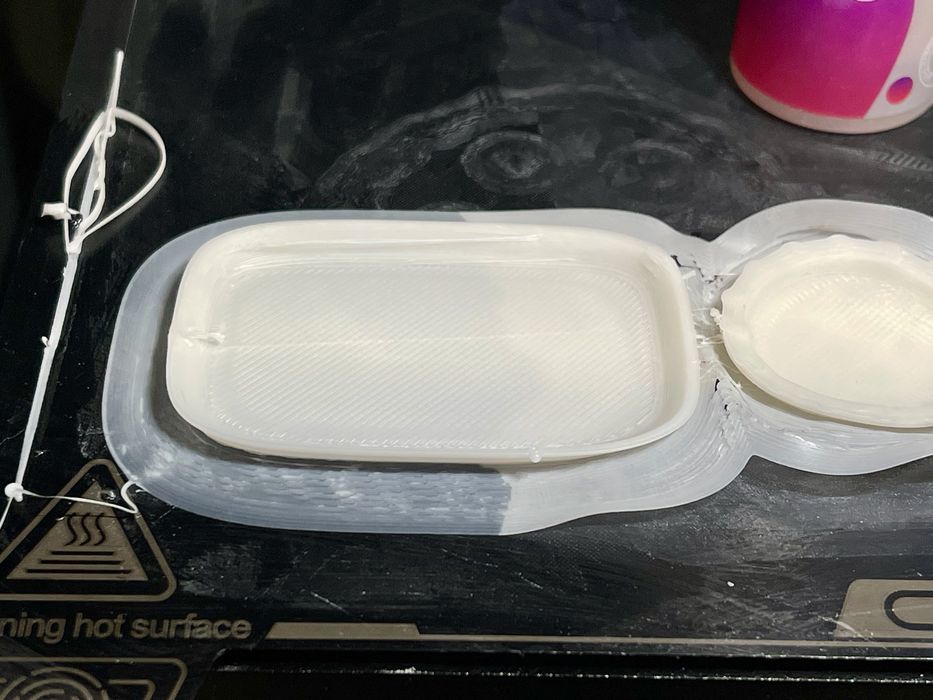
Here you can see how it works. On the left I’ve applied Magigoo, but on the right you can see where I didn’t apply it. I also recommend using a wide brim to help with PP adhesion.

This print of a bottle and screw-on lid worked very well. The surfaces were flawless, and the lid screwed on perfectly.
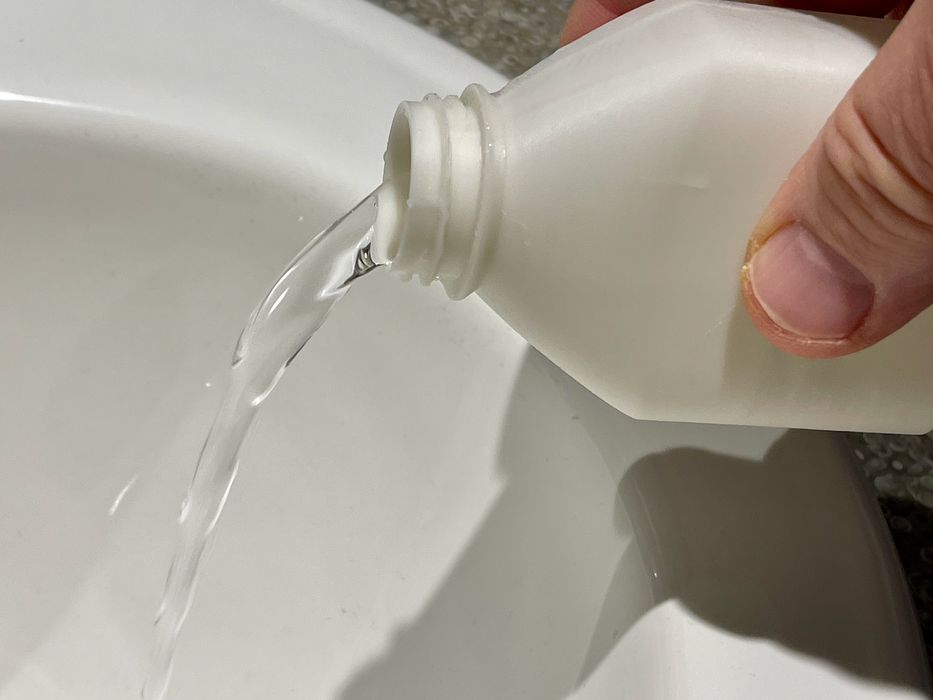
But wait, there’s more: this PP bottle was so well printed that it actually held water without leaking! This is quite rare in 3D prints that I’ve done.
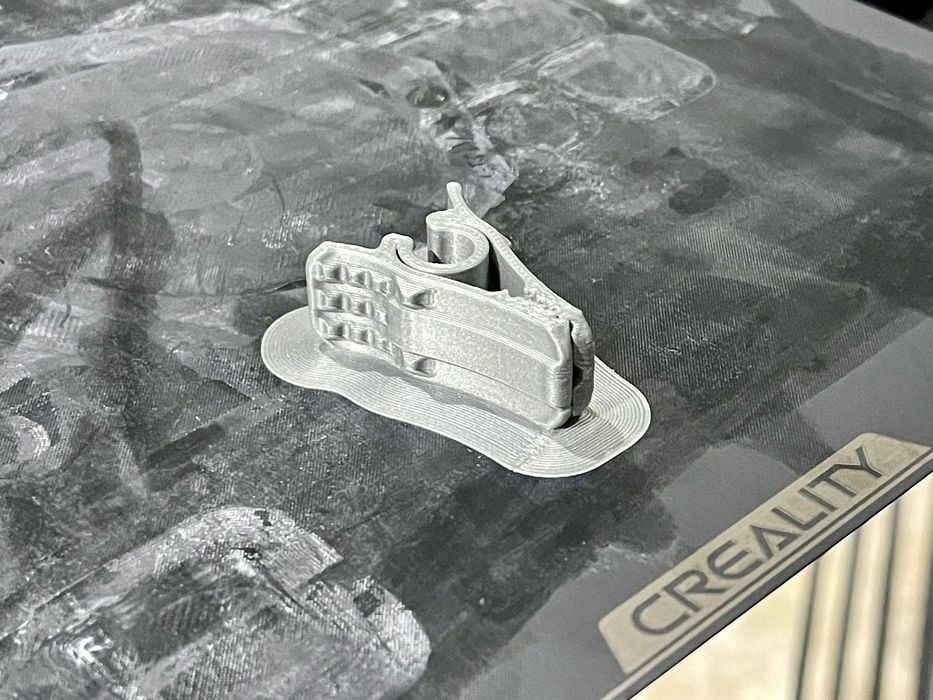
I then tried nylon material, which is also challenging to print. Here I printed a bag clip that worked very well — but it did require a wide brim.
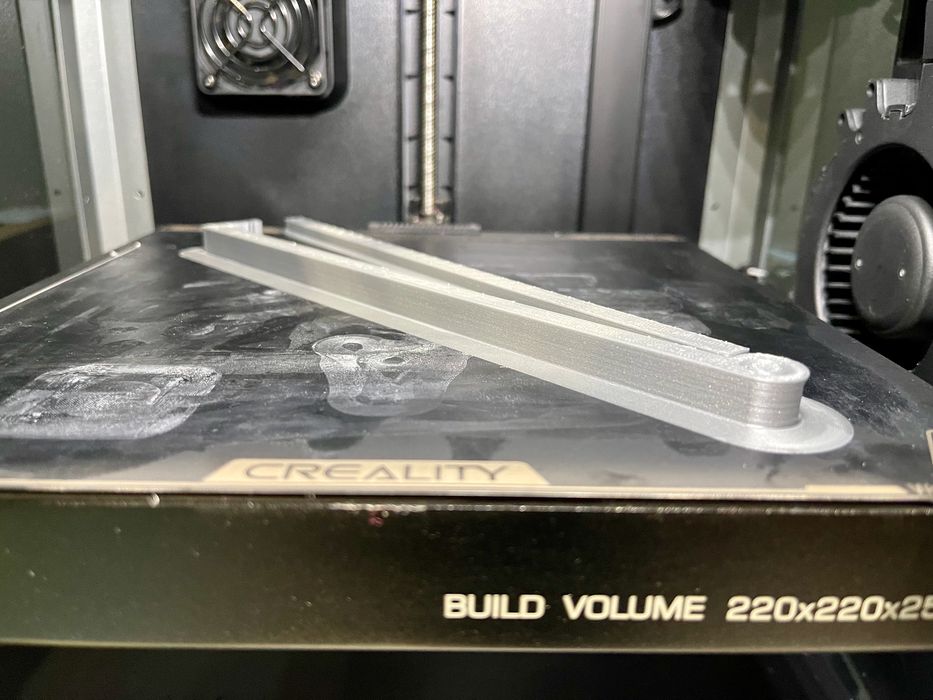
Would the nylon warp in the K1C? Here I printed a very long object and it came out perfectly. The only issue was that the brim has to be trimmed off.

Silk filament works extremely well in the K1C. I printed a cute penguin in rainbow silk, and it looked terrific.

The larger Lumpy-Bumpy vase turned out excellent as well, although there did seem to be some slight Z-axis variations.

Creality provides a unique PLA-CF material, which I used to print a rather strong scoop. This is quite an interesting material that I intend on using for more strong objects — but I have to make sure they don’t encounter higher temperature environments or the PLA may soften.
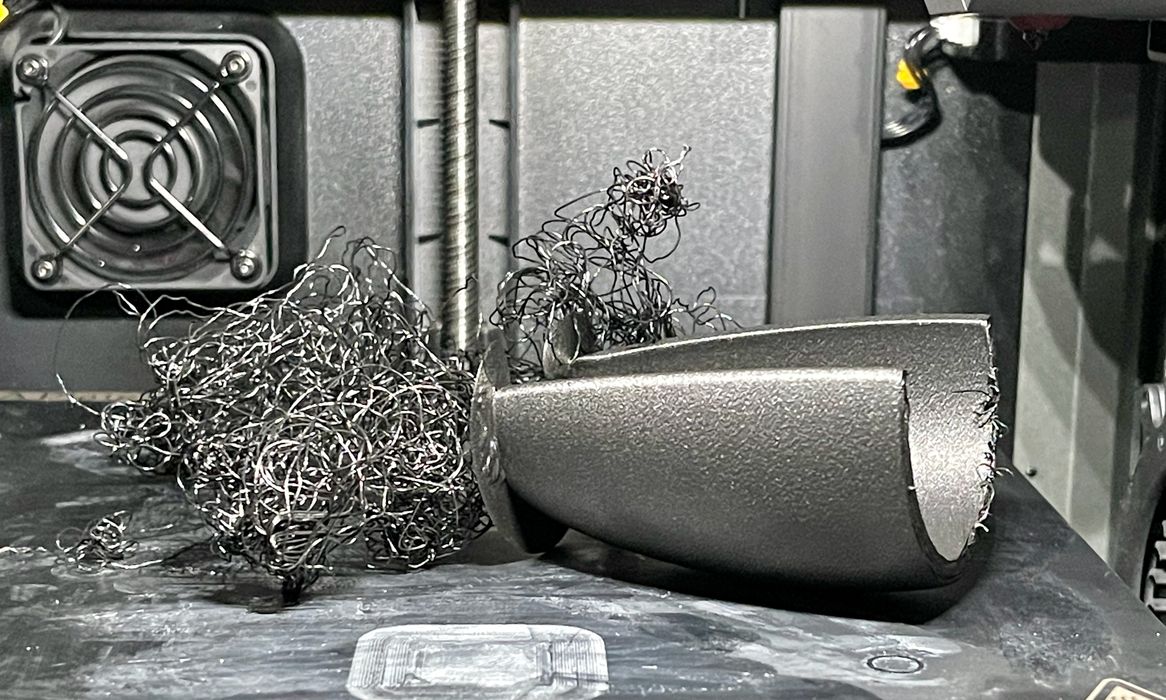
I did try printing Nylon-CF, and my scoop print failed due to poor adhesion (nylon, eh?) However, the part that was printed was extraordinarily smooth and unbelievably strong. This is another material I’ll be using more frequently since it is so easy to print on the K1C.
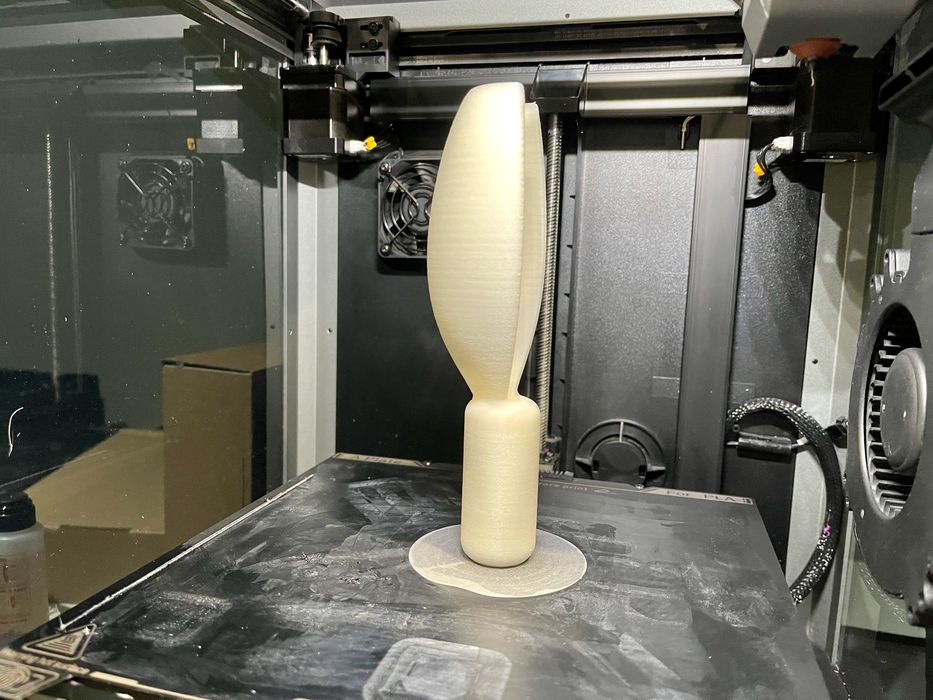
Finally, I tried printing in Nylon-GF — glass fiber reinforced. This scoop printed perfectly. The surface is smooth, but you must be careful rubbing skin against it due to the glass fibers. The scoop was, like the CF prints, extremely strong.
Creality K1C 3D Printer Final Thoughts
In the end, despite incomplete instructions and frustratingly inconsistent software, I really do like the K1C. It’s a very powerful piece of hardware that can truly handle an extremely wide range of materials quite competently. Creality has done a great job with the K1C hardware.
The software does need work. It’s overly busy, a bizarre mix of consumer and professional features and unintuitive user interface elements. Once you find your way through the software, it does work, but it’s not so much fun doing so.
What’s most amazing about this machine is its price: only US$499 as of this writing. That’s an astonishing price for machine whose capabilities a year or two ago would be considered a powerful professional machine that might cost thousands. Here, the K1C is less than half of a thousand to purchase.
If you’re up for a few mysteries and can handle the confusing software, the K1C is an incredible machine. I wouldn’t recommend it for beginners, but it is ideal for enthusiasts and very likely useful for low volume production, particularly with engineering materials.
CREALITY
K1C 3D PRINTER
★ BEGINNER 6/10
★ ENTHUSIAST 9/10
★ PRODUCTION 9/10
BEST FEATURES
✔︎ Great print quality
✔︎ Material range
✔︎ Automation
QUESTIONS
✖︎ Questionable instructions
✖︎ Inconsistent software
✖︎ Flex material spooling
This is part three of a three part series, please read parts one and two.
Via Creality
