
We’ve been testing the feature-packed Anycubic Kobra 3 Combo for the past weeks, and here’s our review.
This is part one of a three part series, please read parts two and three.
Anycubic Kobra 3 Combo Background
Anycubic has been producing desktop 3D printers for many years, and the Kobra 3D is their latest and by far most advanced device. It’s the first device in the company’s history to provide multicolor capability.
The Kobra 3 is an evolution of the company’s incrementally improving Kobra series. We previously reviewed the powerful Kobra 2 Pro, which is one of my favorite 3D printers due to its speed and reliability.
Will the Kobra 3 live up to that reputation? Let’s find out.
Anycubic Kobra 3 Combo Specifications and Features
The Kobra 3 Combo is exactly that: a combination of the Kobra 3 3D printer and the ACE PRO color changing system.
The Kobra 3 has a generous build volume of 250 x 250 x 260 mm, and includes a heated PEI-coated magnetically attached build plate, which is reversible.
Speed is one feature of the Kobra 3, as it can hit 600mm/s — when printing 0.1mm layers — due to the use of vibration-compensating firmware.
The hot end can hit 300C, making it capable of printing a variety of materials. Strangely, Anycubic’s website lists compatible materials as “Kobra 3 only supports PLA, PETG and TPU”, yet the ACE PRO supports: “ACE PRO only supports PLA, PETG, ABS, ASA, PET, PA, PC, PP, HIPS.” I’m not sure how this works when the spool switcher handles more material types than can be printed? I believe this is a documentation issue, and we’re going to try printing some of these materials anyway.
The Kobra 3 also includes fully automatic calibration, which should save a lot of time and trouble.
The ACE PRO attaches to the Kobra 3, and provides automatic filament switching between up to four spools. The device feeds filament through PTFE tubes to the Kobra 3’s toolhead, where it prints in the usual manner.
The ACE PRO doubles as a dehumidification unit: you can set a temperature and time, and it will faithfully dry out any spools in the unit. This is a feature not found in many competing multicolor systems.
Spools mounted in the ACE PRO can be automatically detected by the unit, if they are properly chipped spools from Anycubic. This makes it much easier to use, but it’s also possible to load random spools and manually identify the material from the touchscreen.
Anycubic Kobra 3 Combo Unboxing and Assembly

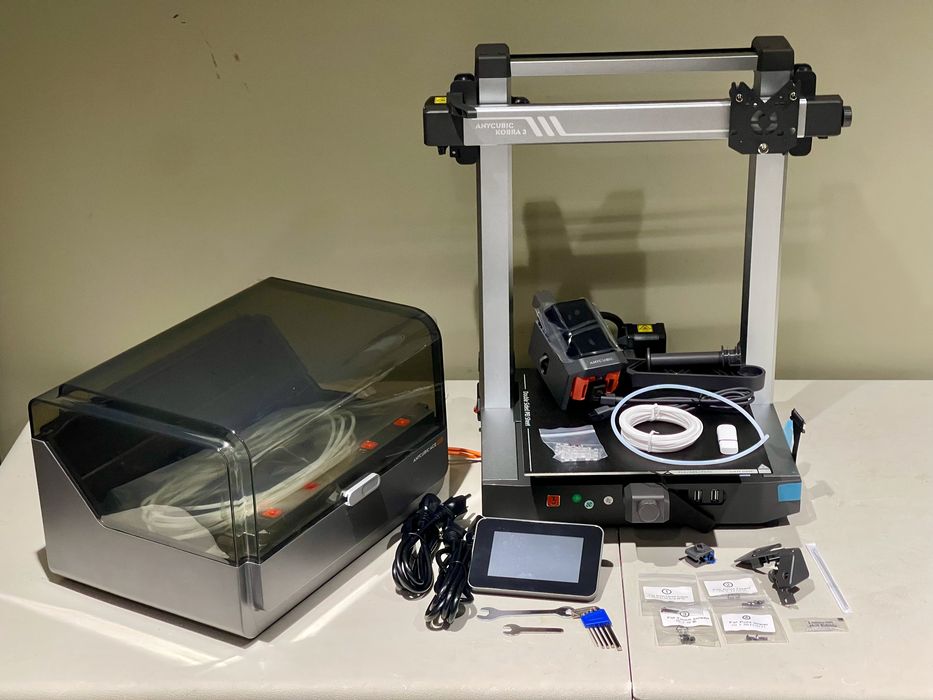
As always, Anycubic packs their 3D printers tightly. We’ve never had a shipping issue with their devices, even after testing quite a few of their machines.
Above you can see how well this system is packaged up, there’s no way anything should go wrong.
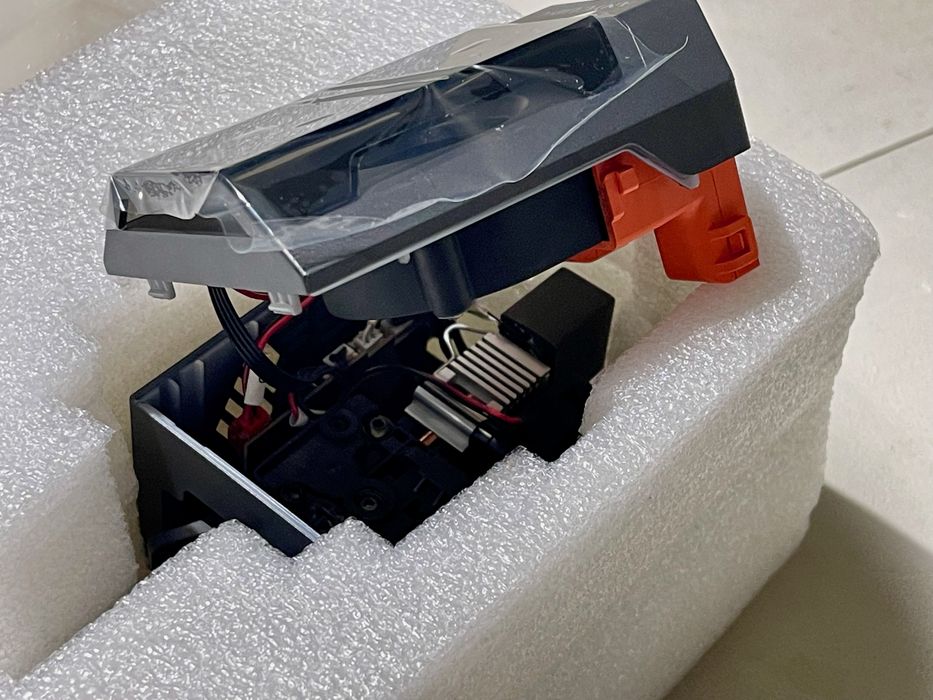
Alas, something was wrong. The cover on the toolhead was loose. This likely happened when the box was shaken during shipment. However, this wasn’t a big deal as the cover snapped back on easily, and I didn’t notice any issues because of it.
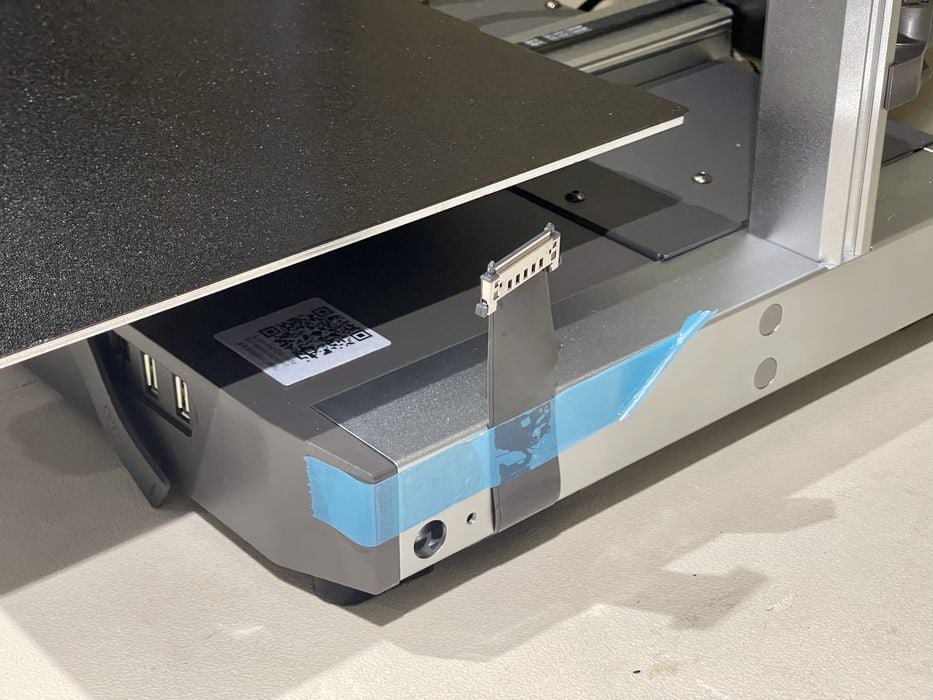
There’s a number of items taped down that must be un-taped, but the instructions don’t say where they all are. I had to carefully look around the machine to make sure there wasn’t something I missed.

It’s always good to see the bolts labeled specifically for usage. Earlier machines often just came with one bag of all bolts, and you had to tediously figure out where they were to be used.
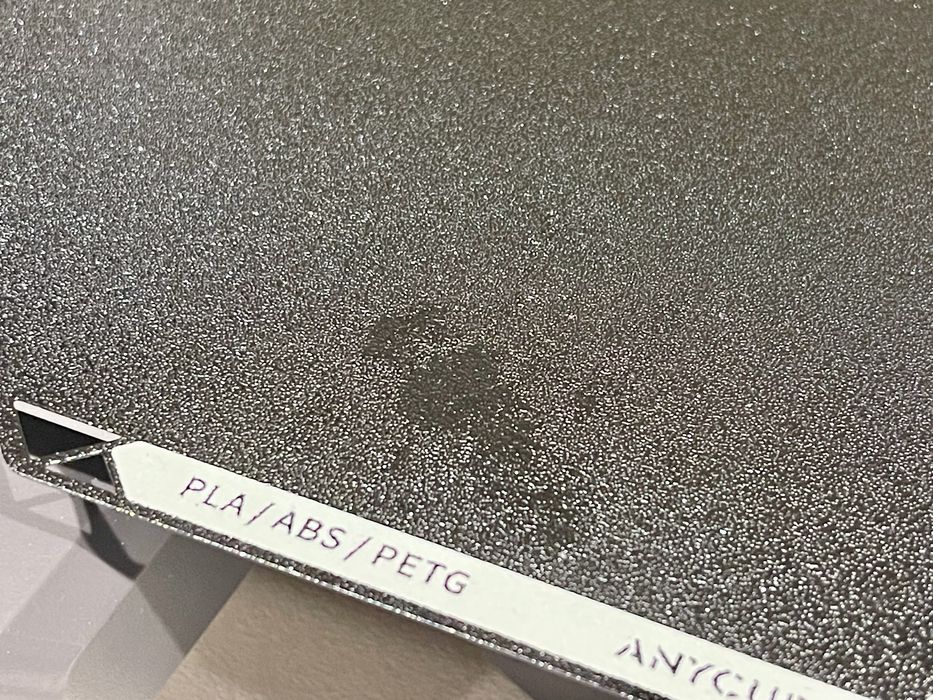
Oh oh. I noticed what seems to be an oil deposit on the print plate. This will have to be cleaned off before I can print anything on it.

Assembly should be straightforward, but it wasn’t. Here we can see the instructions for attaching the touchscreen — which apparently use bag #2’s bolts. But bag #2 is for the print head?

Looking further, I found the printhead was to use bag #1, except it wasn’t.
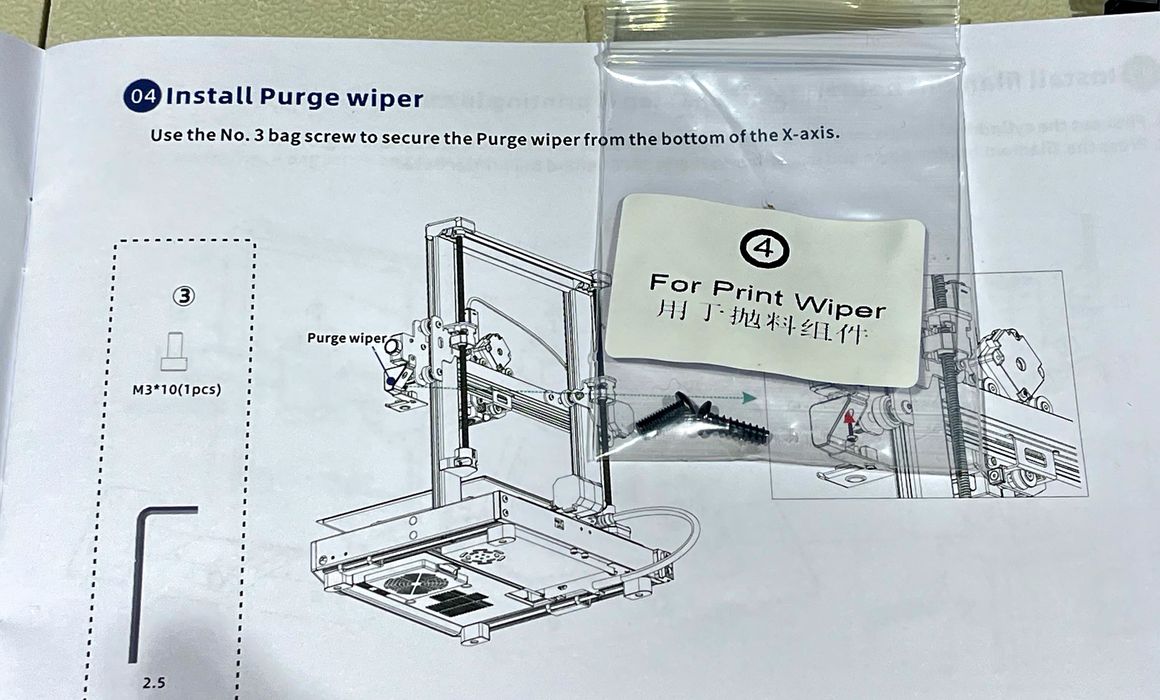
And yes, all the rest of the bags were mislabeled. In the end I had to tediously figure out which bolts were used for which parts, just like the old days.
That said, the machine fits together very well, all bolts were easy to install, and I found the machine to be quite solid.
This is the guide mount for filament tubes, which we’ll see more about later. There are a lot of PTFE tubes to deal with, as that’s how the ACE PRO sends materials to the printer.
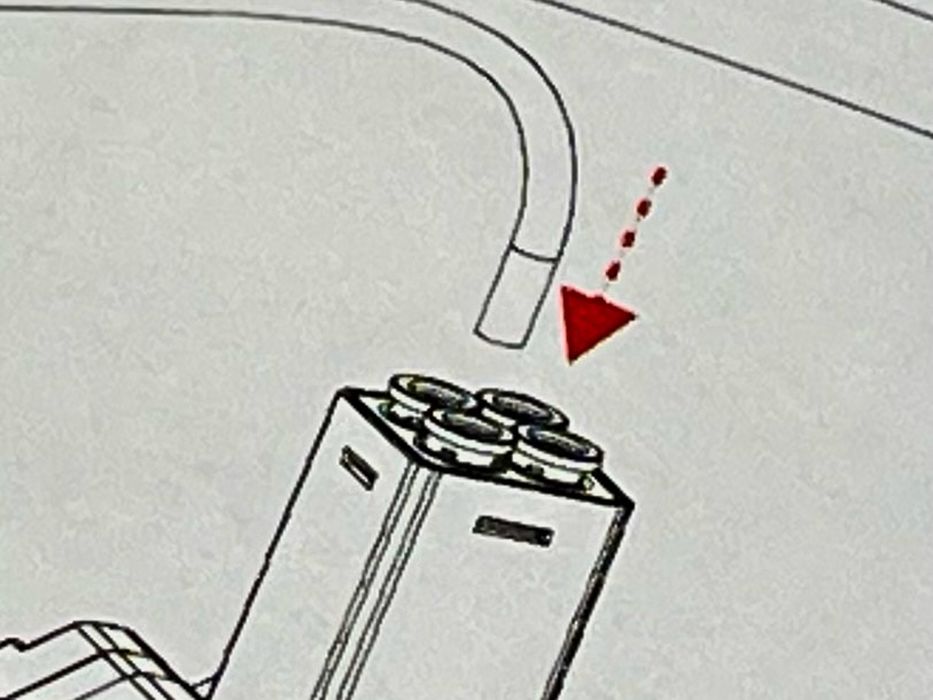
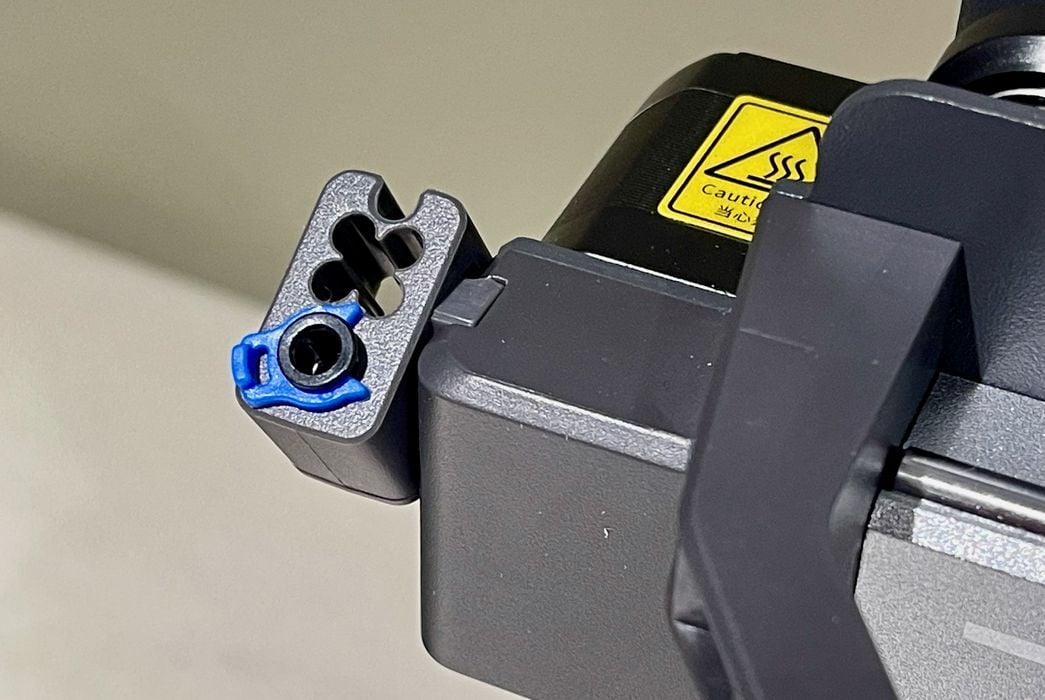
Which tube fits into which receptacle on the Kobra 3D printhead? It turns out it doesn’t matter: a filament pushed forward goes into the hot end regardless of which port it enters. Just plug them into any of the four spots.
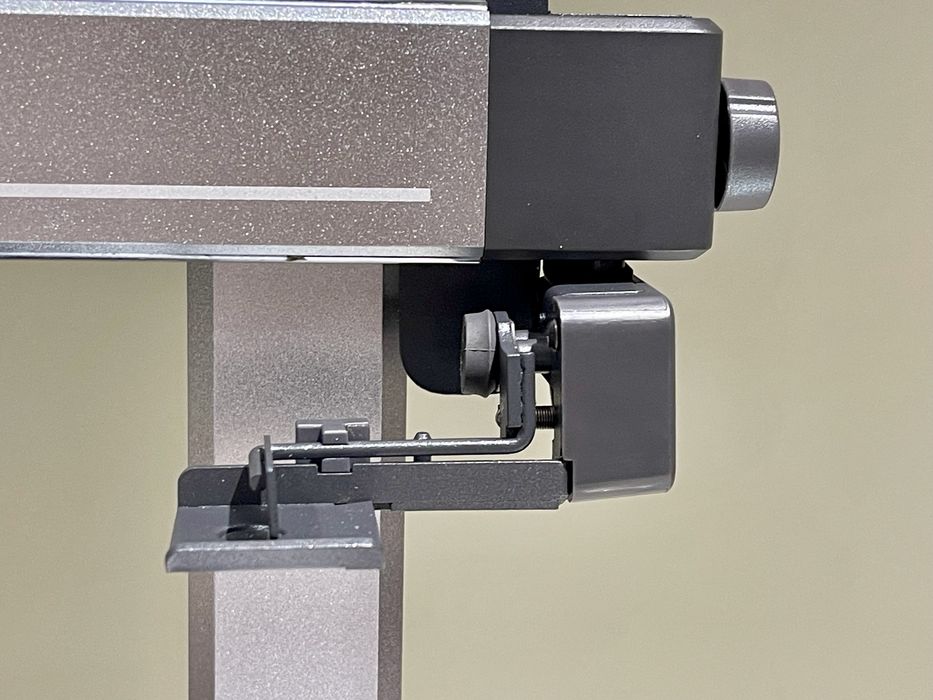
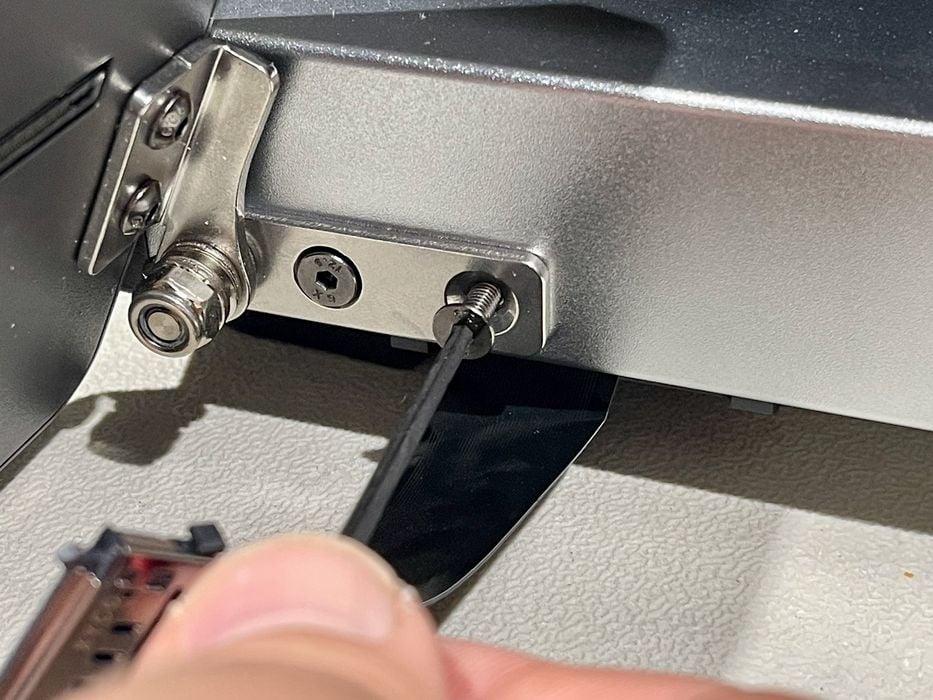
I inspected the ejection mechanism on the Kobra 3, where purged material is shot out on the right-hand side of the machine during filament swaps. The mechanism is very robust, and seems more solid than the ejectors found on the Bambu Lab A1 series.

The toolhead on the Kobra 3 is attached with a single USB-C style cable, which is quite impressive. Normally toolheads attach with a fat ribbon cable and sometimes a separate power cable. Here it is simplified and very easy to connect.

At this point the Kobra 3 was basically assembled. In truth, it’s really almost ready to go, right out of the box, as you just have to attach the touchscreen and toolhead. Gone are the days of lengthy assembly.

It was time to move on to connecting the ACE PRO unit, which requires a power cable and signal cable to the Kobra 3. The ACE PRO requires a Kobra 3 to operate; you cannot operate it with other devices.
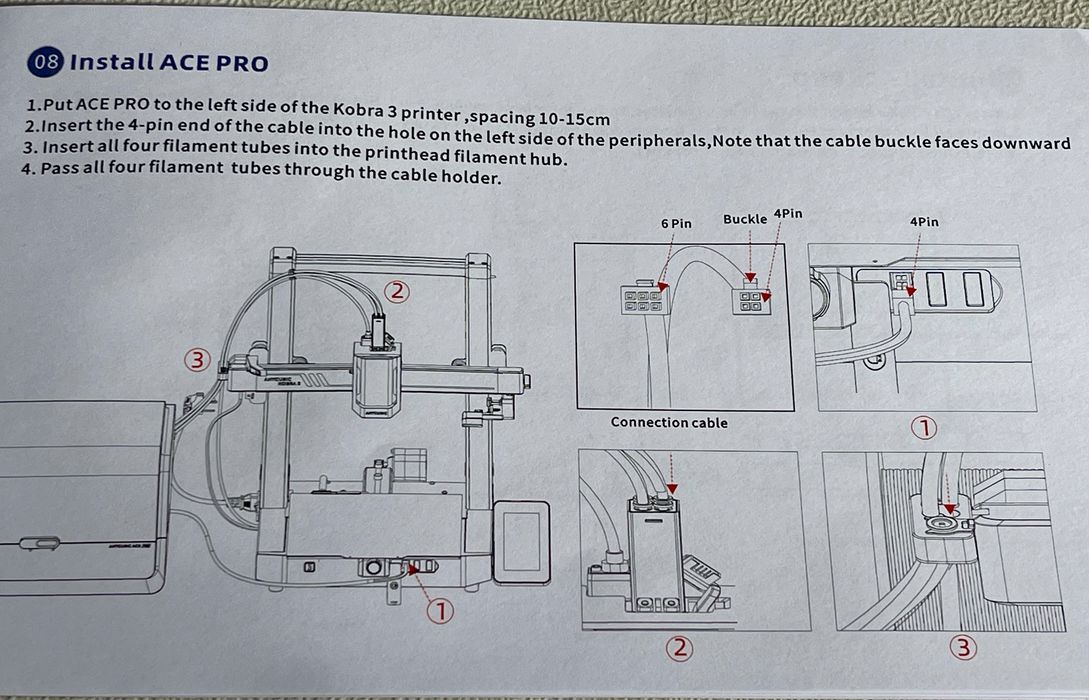
I ran into more documentation problems. The instructions explain that you must hook up the “4 pin end of the cable into the hole on the left side of the peripherals.” Ok, that tells me I need to plug the 4-pin end into the peripheral, the ACE PRO.
In fact, there was a 4-pin receptacle, as well as a 6-pin receptacle on the ACE PRO. Easy!
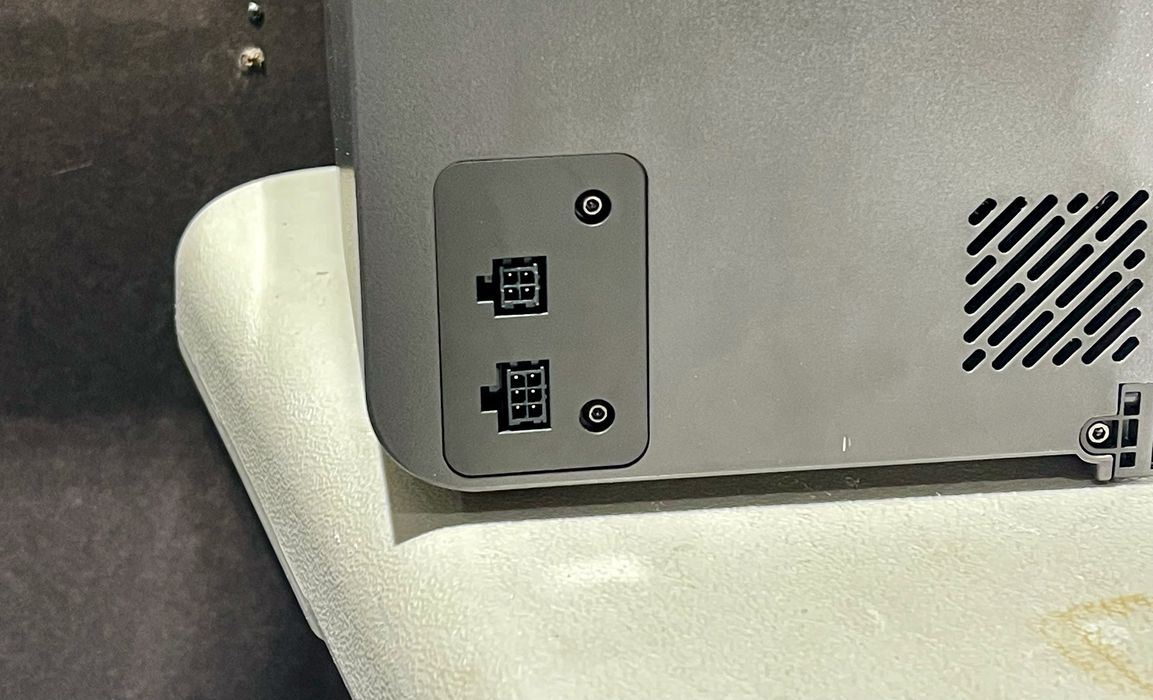
No. The other end of the signal cable is a 6-pin connector, and the Kobra 3 has only a 4-pin port. I can’t plug the 6-pin cable into the Kobra 3! What’s going on?

It turns out the instructions are wrong again. The 4-pin end goes to the Kobra 3, and the 6-pin to the ACE PRO. From the looks of it, it would seem that a second ACE PRO could be daisy-chained from the ACE PRO’s 4-pin receptacle.
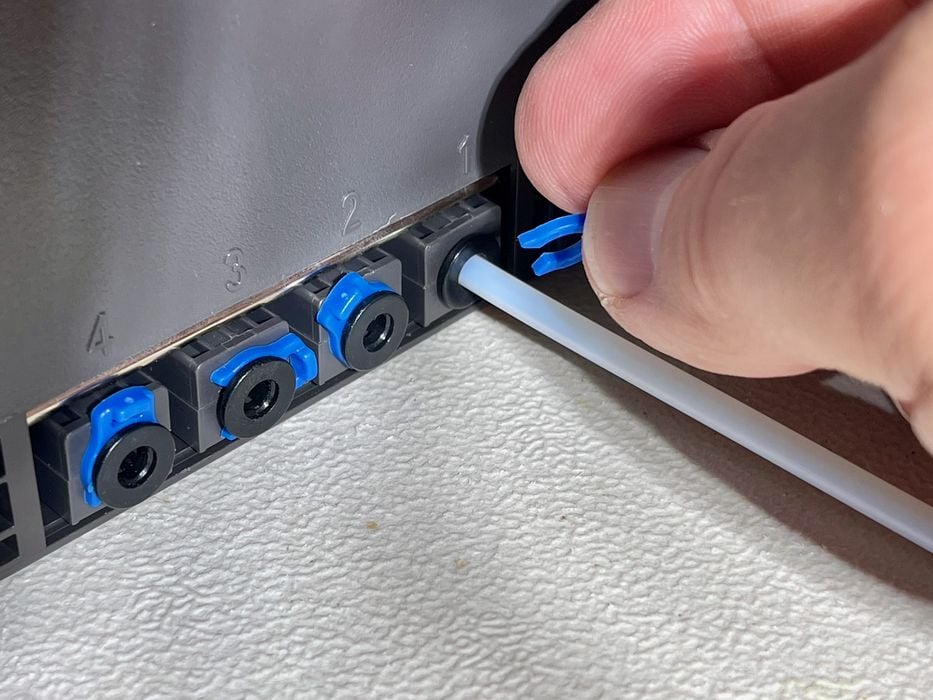
There are four long PTFE tubes to attach to the ACE PRO to guide filaments to the toolhead. Here you can see some blue locking rings, something commonly used with PTFE tubes on 3D printers. You take them off to insert the tube, then reinsert them to lock the tube in place. Unfortunately I could not get them back on no matter what I tried, so I left them off. The tubes seemed strongly attached anyway, and this didn’t cause any issues later.

The result is quite a number of PTFE tubes flying around the scene. Anycubic provides some clips that can be attached along the tube paths to consolidate them.

I noticed the touchscreen smoothly tilts, which will be useful if the Kobra 3 is installed higher than standard desktop height.
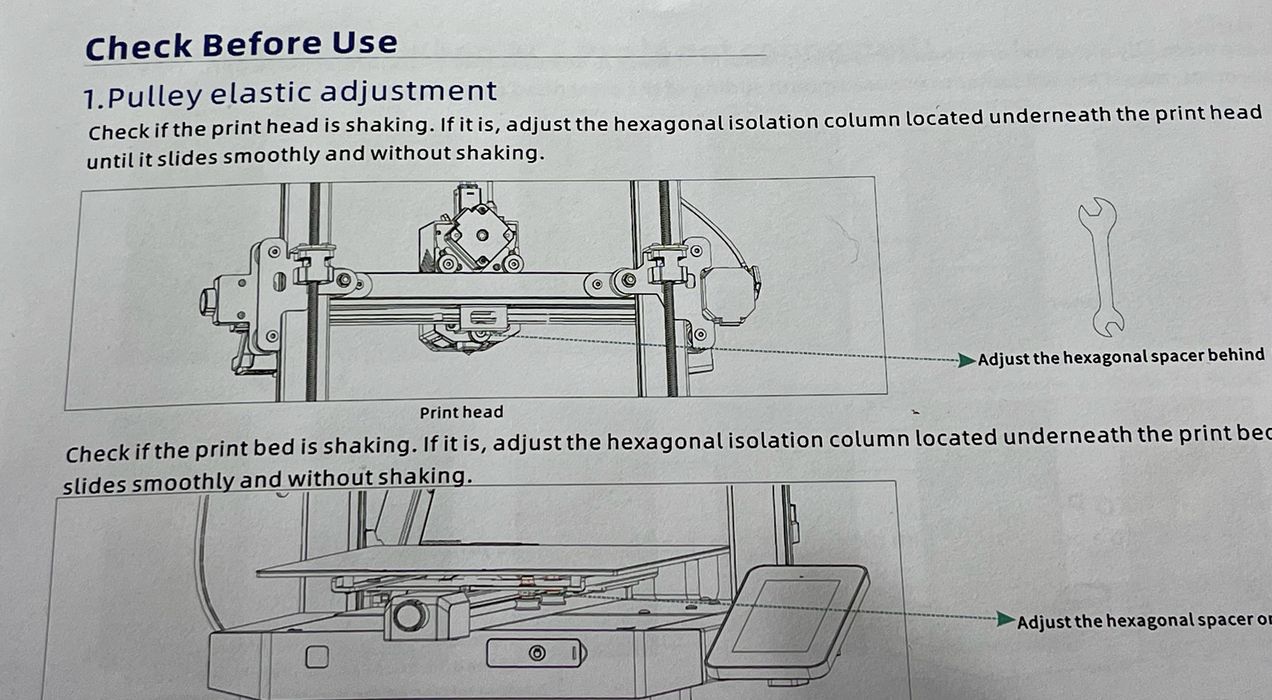
Anycubic advises tightening some motion system bolts in case shipping made them loose. I didn’t find any issues, as they were already tight.
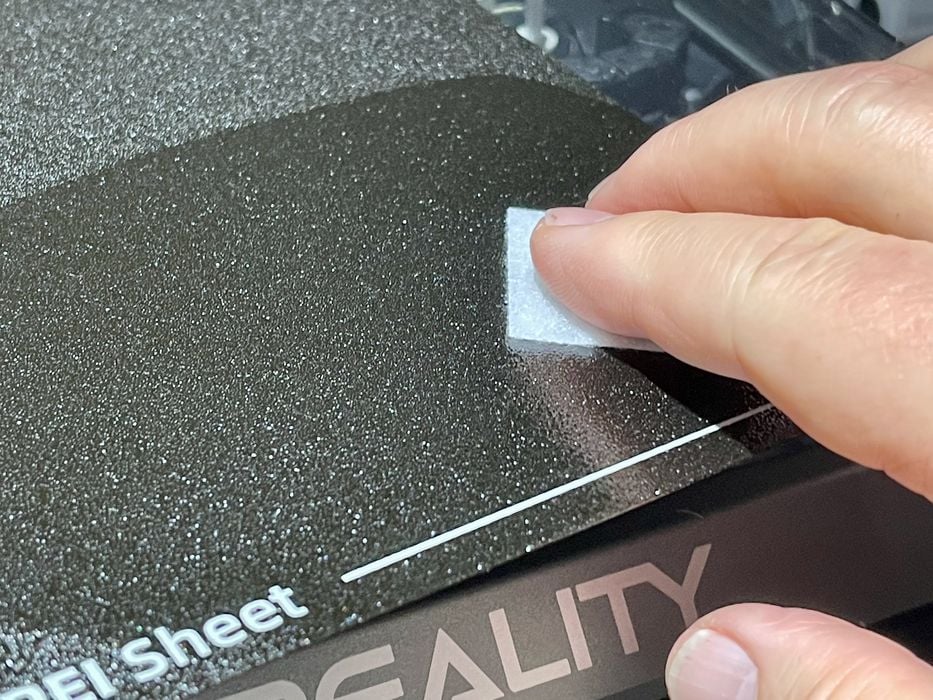
Back to that oil spill. I cleaned the plate very carefully with IPA, then washed it with dish soap to make sure it was very clean and ready to stick to prints.
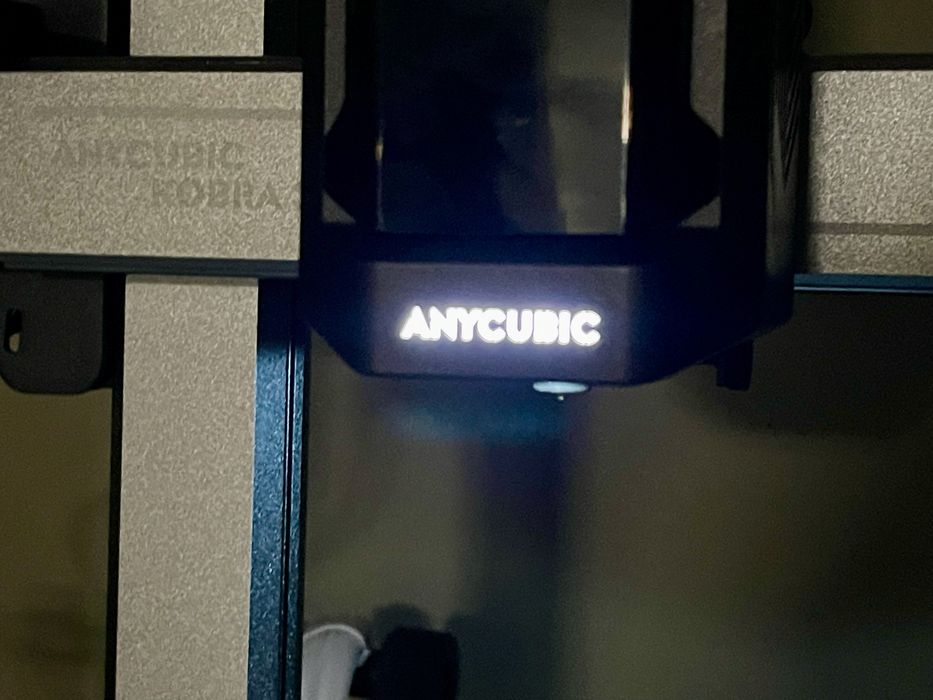
Powering up the Kobra 3, I saw that the toolhead has a fancy logo light, something I don’t think I’ve seen in other desktop 3D printers.
This is part one of a three part series, please read parts two and three.
Via Anycubic