![A DIY backyard workshop — for 3D printing? [Source: SolidSmack]](https://fabbaloo.com/wp-content/uploads/2020/05/image-asset_img_5eb097e16c5cb.jpg)
Purchasing a traditional home may be physical proof that you’ve officially made it as an adult.
Making a custom “micro-home” or heated backyard workshop, however, may be physical proof of your dedication to relatively complex weekend projects.
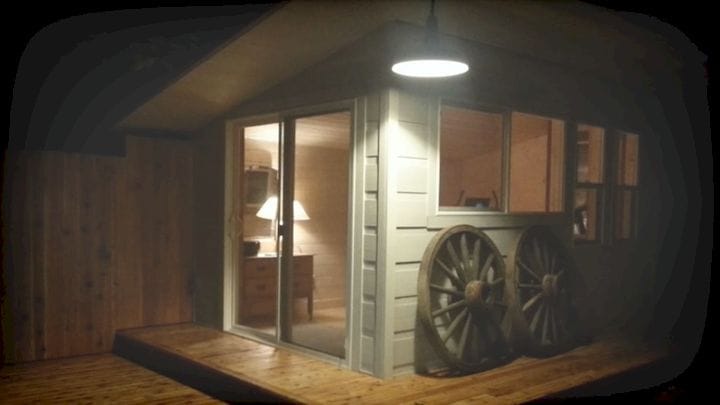
During the winter months of 2014, Jim Howard took to his backyard and decided to build his own 10-foot x 14-foot miniature house, cabin, or workshed (he hasn’t decided on what to call it yet). It took him less than a week to build the structure at the affordable cost of roughly $2,000 for the wood and other materials needed to build it.
The video above is a compilation of still images Jim took of his backyard structure from start to finish. While it would have definitely been more refreshing to see a time-lapse of the building process, you can still see the project take shape over time.
![Preparing the base for the DIY backyard workshop [Source: SolidSmack]](https://fabbaloo.com/wp-content/uploads/2020/05/image-asset_img_5eb097e1c71fd.jpg)
He begins the build by preparing the ground and setting a foundation. After flattening the land, Jim lays down a foundation of railroad ties, a bamboo floor, cedar decks, and pre-painted siding – all of which are relatively easy to come by at a home supply store.
![Building a DIY backyard workshop [Source: SolidSmack]](https://fabbaloo.com/wp-content/uploads/2020/05/image-asset_img_5eb097e215318.jpg)
He then spends most of the week adding the more intricate details, including one horizontal and three vertical windows, a sliding door, and a walkway leading to the main house. He even adds a small porch to provide additional walking room and create a space to admire his backyard from.
The result is a tiny, one-room house with space for—at least in Jim’s case—an exercise bike and a pitiful desk. He adds that it would be relatively easy to add a small kitchen and a bathroom to the home, but decides against it since he doesn’t “cook and crap out here.”
Read the rest at SolidSmack


An inventive designer has developed a method for producing 3D paper objects using recycled paper and 3D printed molds.