Autodesk has introduced something called “VariSlice” for their Ember desktop 3D printers.
The VariSlice approach is an interesting improvement to the slicing process when 3D models are prepared for 3D printing. The idea is that an object of varying geometry might best be 3D printed using different layer sizes.
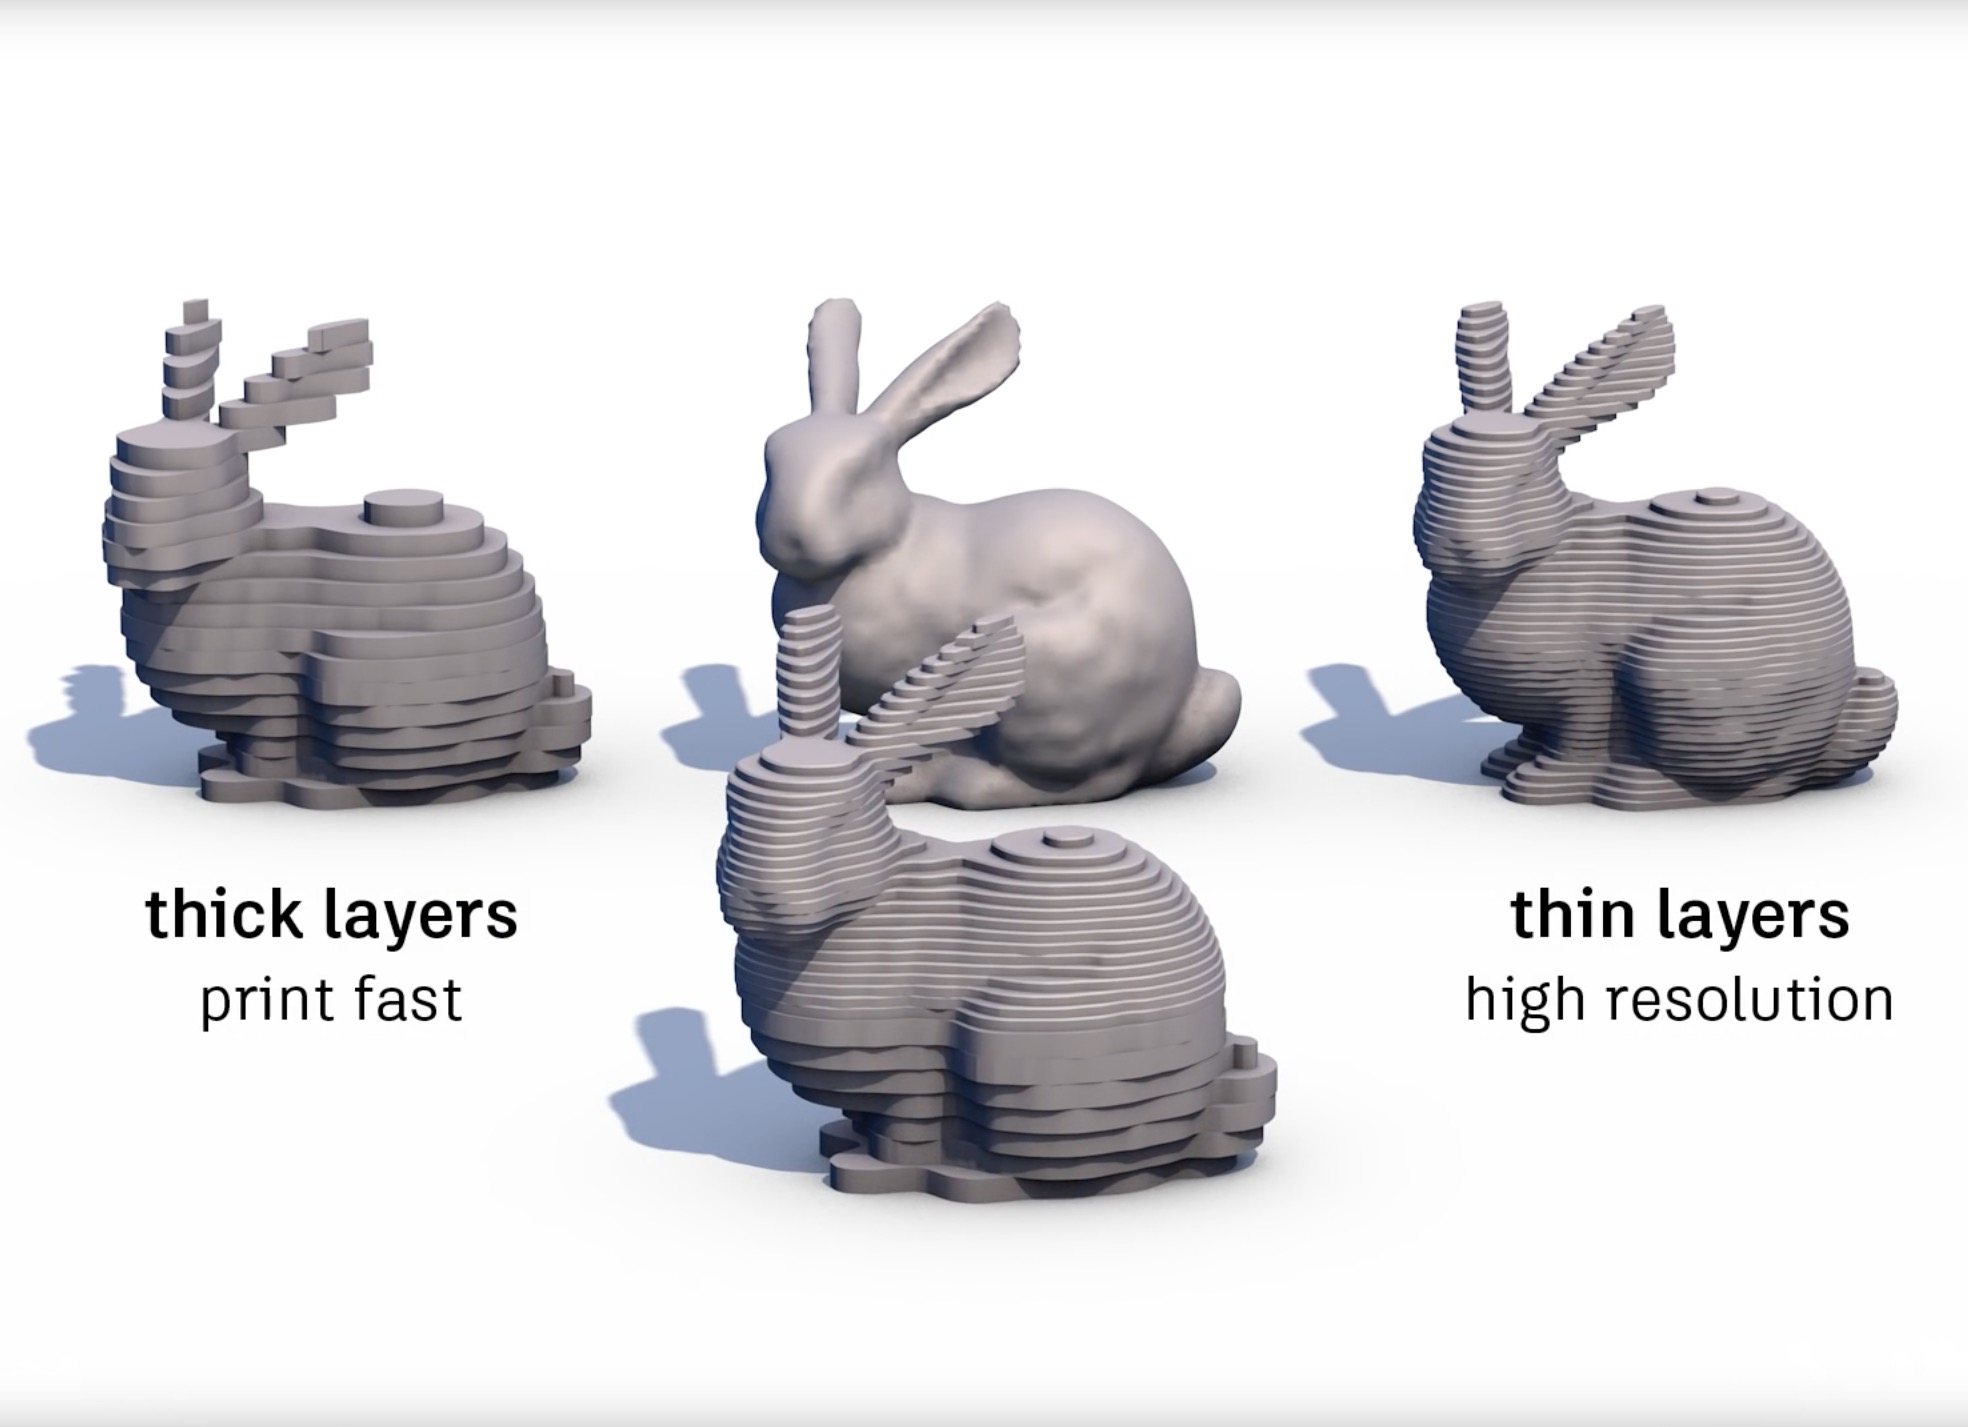
3D printer operators will know that the basic principle of 3D printing is “thicker layered objects are quicker to print than thin layers” and “thin layers provide better surface finish than thicker layers”.
The problem has been that typical slicing programs insist on a uniform layer size for the entire print. This usually means you end up with a print with some good surface finishes and some not. The time to print is essentially a choice between good quality or fast print.
Enter VariSlice, which is integrated into the Ember’s workflow. It permits you to adjust the layer size as the print proceeds. You can, for example, select a thin layer size for a curved surface, but keep a coarse layer size for a flat area where detail doesn’t matter.
In this way the print can proceed at the highest speed and still get the optimum surface finish. Watch their excellent video to see how it works:
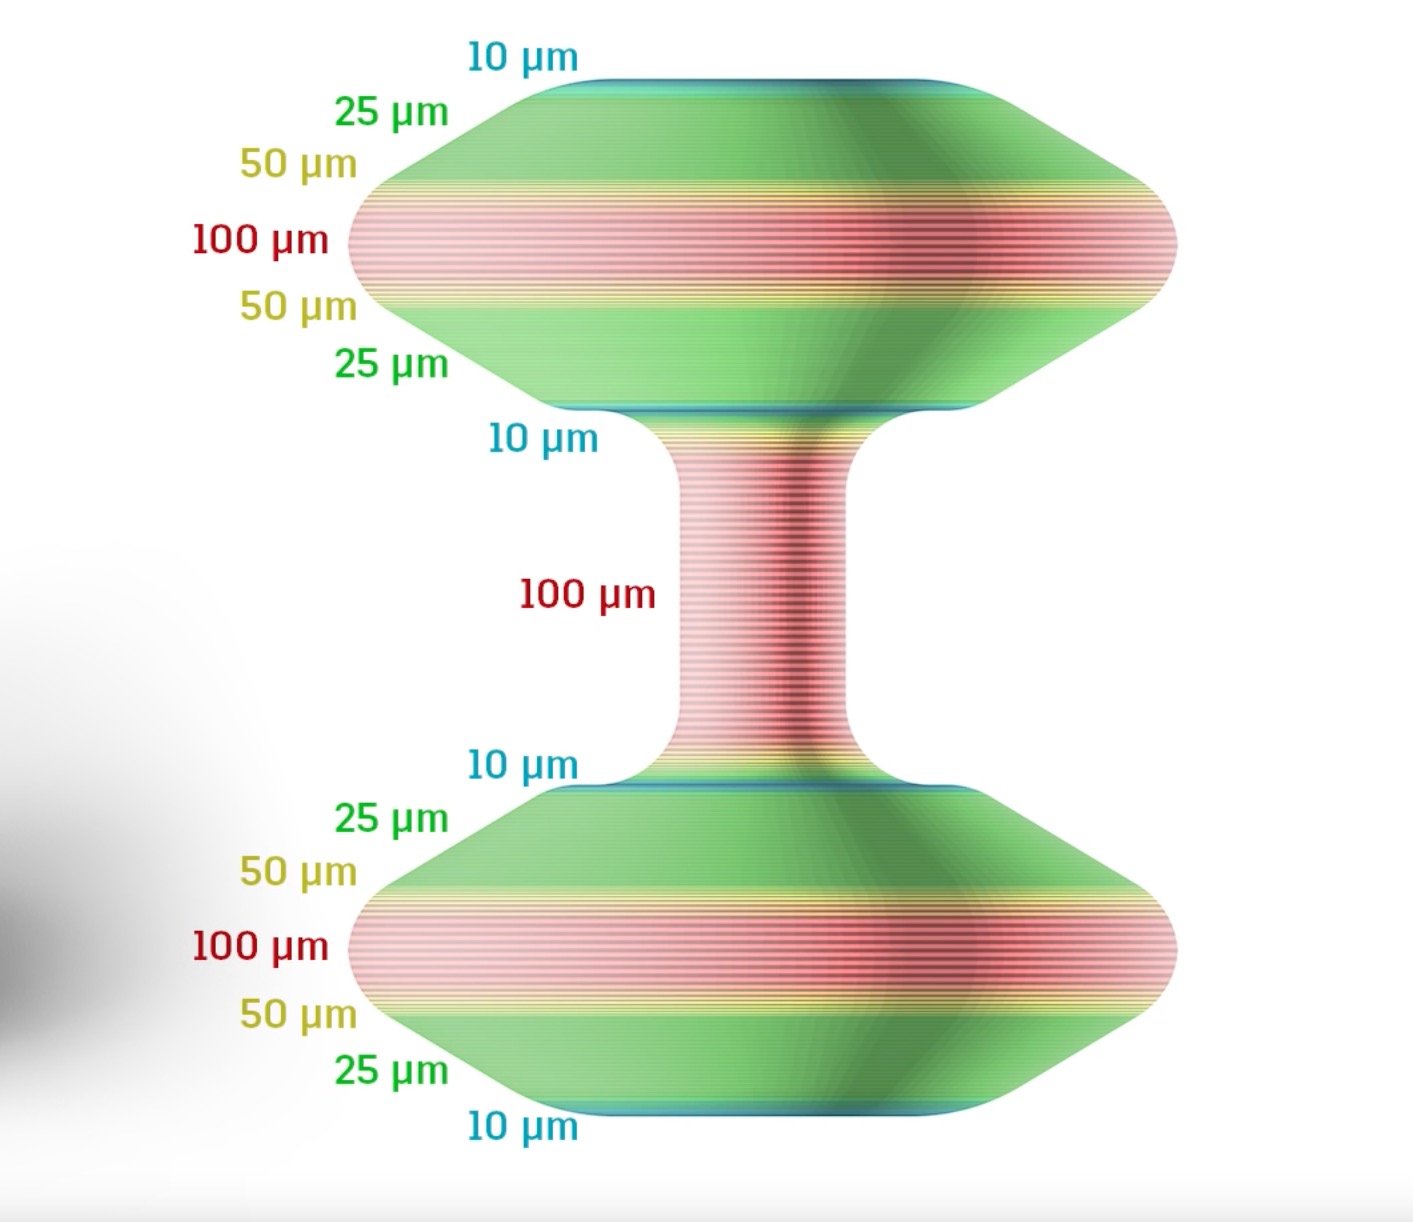
Here you can see an object containing curved parts demanding finer layers, but also flat areas where coarser layers could provide optimized print speed.
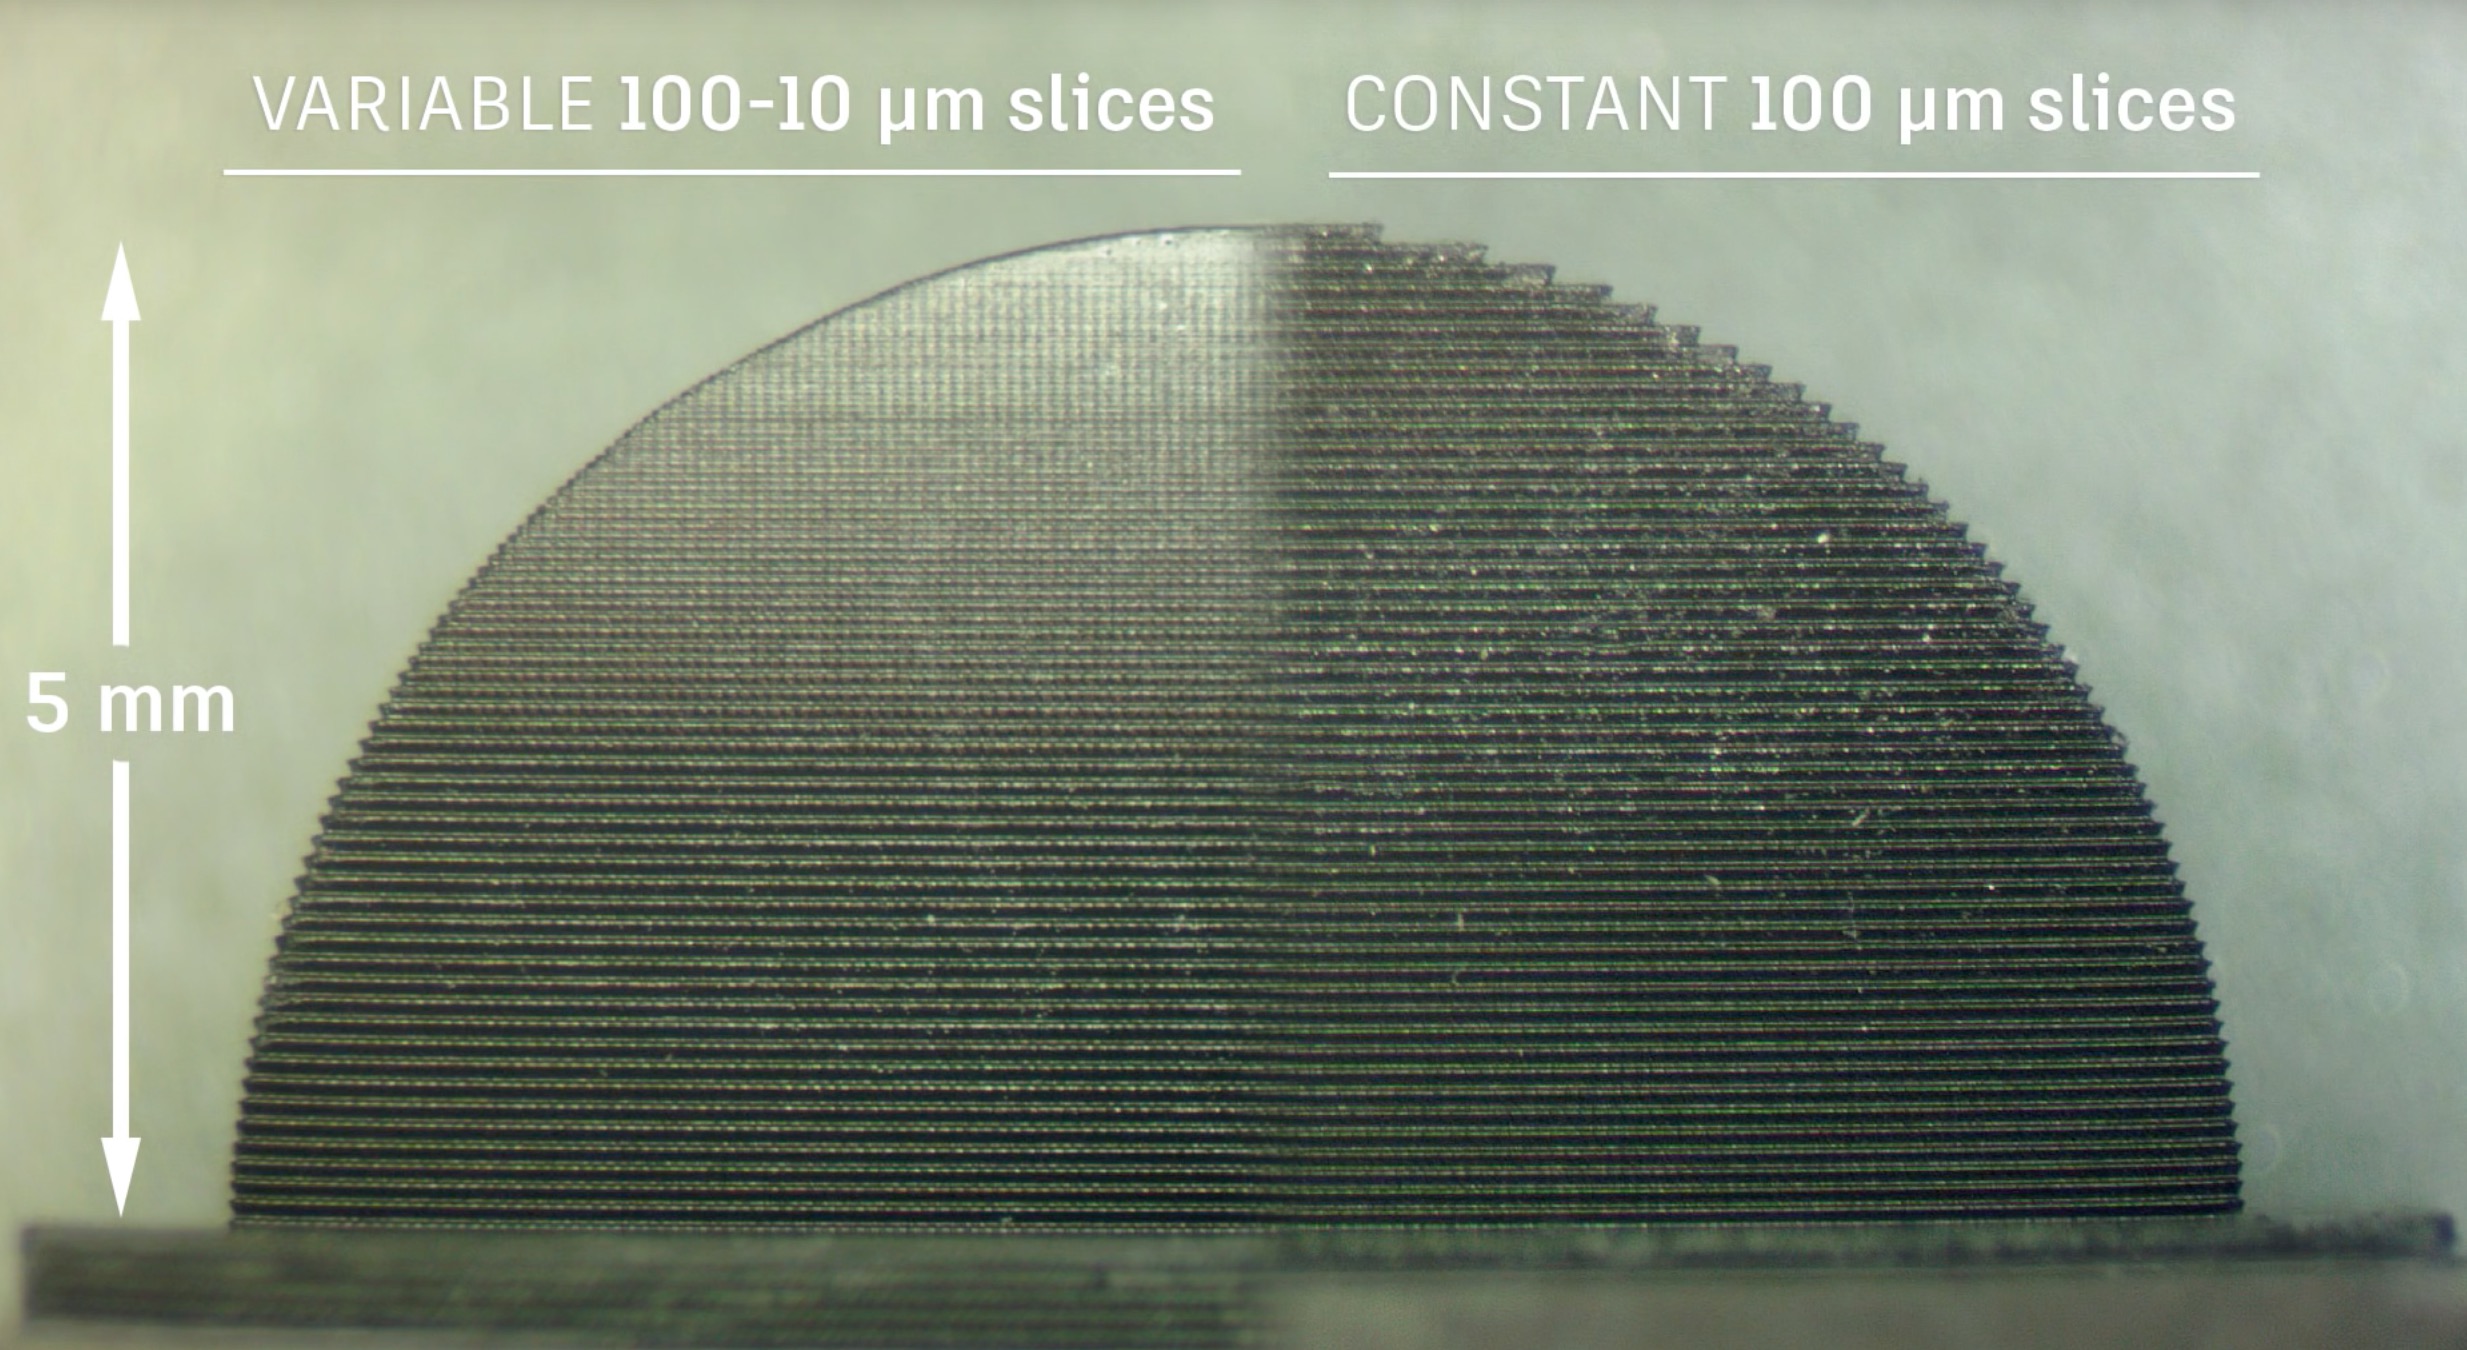
This shows a cross section of two print profiles. Notice how the coarser layers provide a far worse finish than the finer layers.

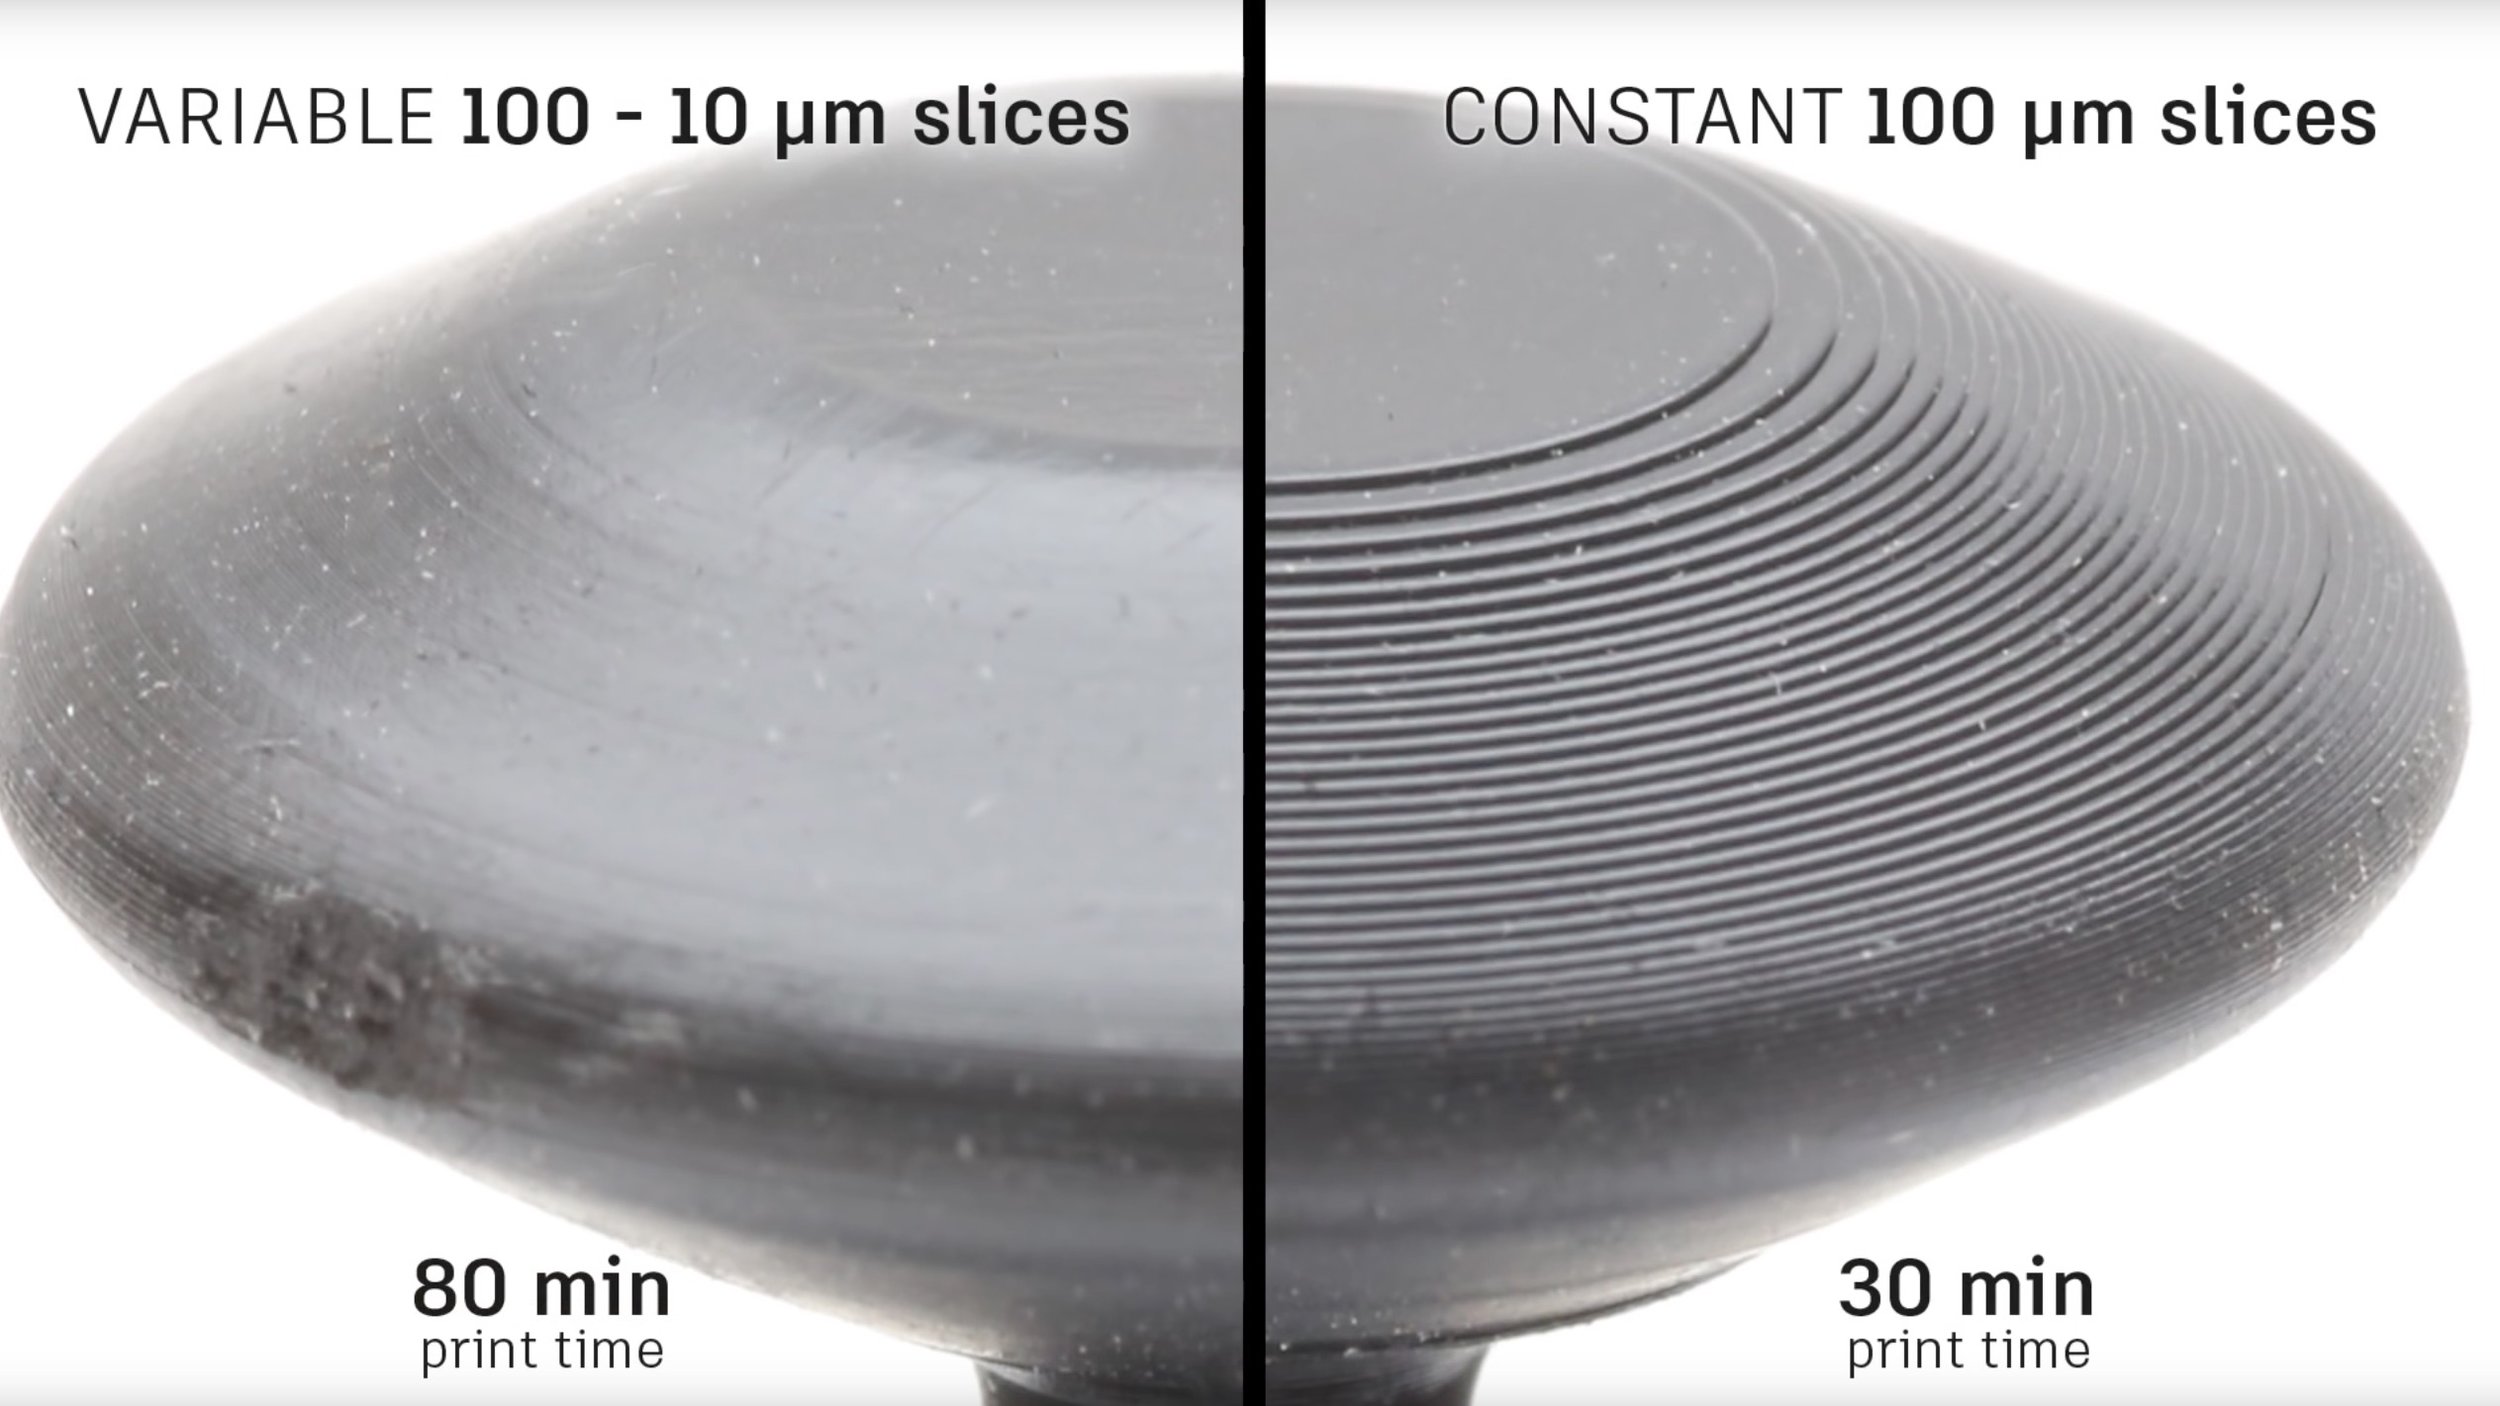
Here’s the same object, actually printed.

While this feature is terrific, it seems to be only available for the Ember. There are some analogous features in other slicing software, such as Simplify3D, where you can vary the characteristics by layer, but it may be that Ember’s approach is a bit easier to use.
Regardless, it would seem now that uniform layer sizes for an entire print is probably not the best idea – if you can manage otherwise.
Via Instructables


