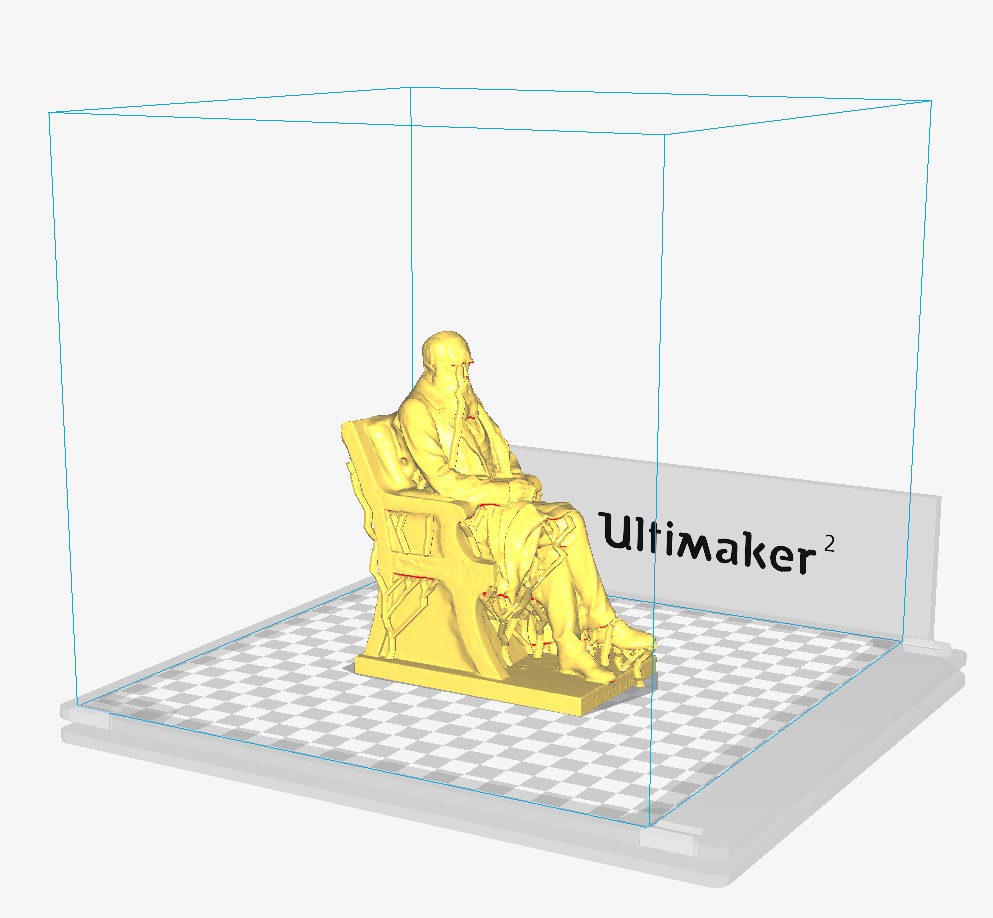
Ultimaker has released a new open-beta version of Cura, their popular slicing software.
[UPDATE] This story as originally written was a huge screw-up as the wrong software version was reviewed. The author has been suitably reprimanded and our sincere apologies to readers for the confusion. This is the replacement story that reviews the correct software version.
According to their announcement about Cura 2.1:
Cura has been completely reengineered from the ground up for an even more seamless integration between hardware, software and materials. Together with its intuitive new user interface, it’s now also ready for any future developments. For the beginner Cura makes 3D printing incredibly easy, and for more advanced users, there are over 140 new customizable settings.
I took the new software for a quick spin to see how things have changed. As you might expect, there are visible and invisible changes.
Visibly, the interface is less flashy, yet still provides the same flexibility and even more simplicity in ease of use. It seems that Ultimaker spent some effort to reduce the complexity in Cura workflow.
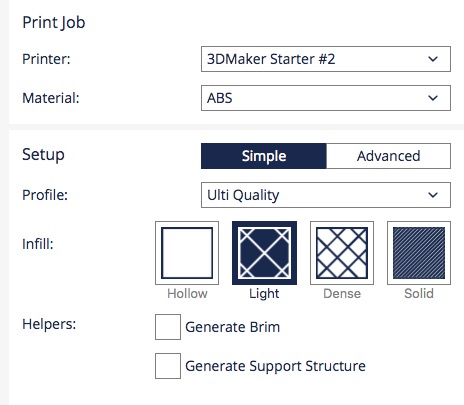
Here you can see the “Simple” interface, which appears cleanly at the top left of the window. You’ll note it includes a method of quickly switching 3D printer configurations, which previously required you to go elsewhere. The stock version of Cura includes profiles for a number of machines (seven Ultimakers and thirteen others), but it is possible to add a new profile for other machines – or even concoct your own custom machine profile.
The Simple interface includes the most frequently altered options when setting up a 3D print job: quality level, support selection, material type, printer configuration and degree of infill. The possible infill selections are shown with graphic icons for clarity, yet the other selections are merely text. I’m not sure why they felt infill deserved icons while other selections didn’t – for novice users it might be useful to show a graphic of how each of their selections might affect the print.
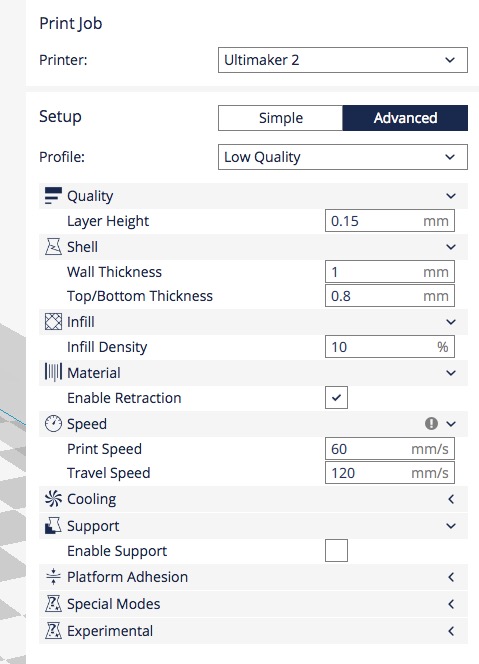
Of course, there’s also an advanced mode, where power users will spend most of their time. This mode permits twiddling of all possible settings.
Like the previous version of Cura, the advanced settings are a bit different than most you’d find in slicing software, where you are besieged with sometimes hundreds of possible settings. Here Cura permits you to select which advanced settings appear in the advanced menu.
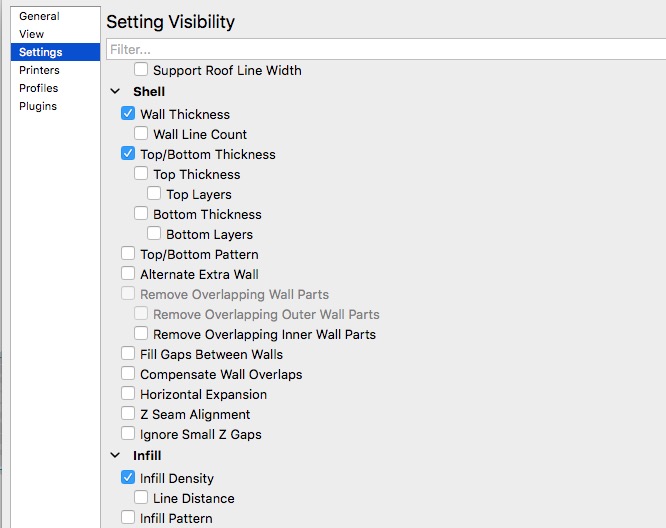
Here we see the preferences panel where you can switch on or off the visibility of each and every item. This is extremely useful when performing iterative testing on a peculiar print that requires unusual settings.
One of the interesting new features is improved ability to handle multiple objects in a single print job.
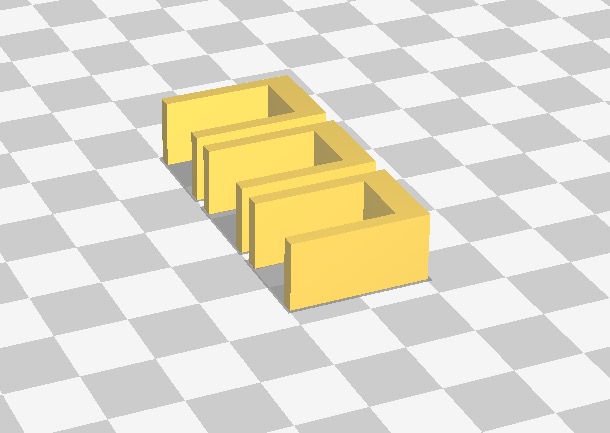
You can repeatedly add objects to the print plate, and Cura conveniently detects collisions with previous objects and neatly moves objects about to fit in the new one. Unfortunately, it’s still not possible to cut and paste objects within the build platform.
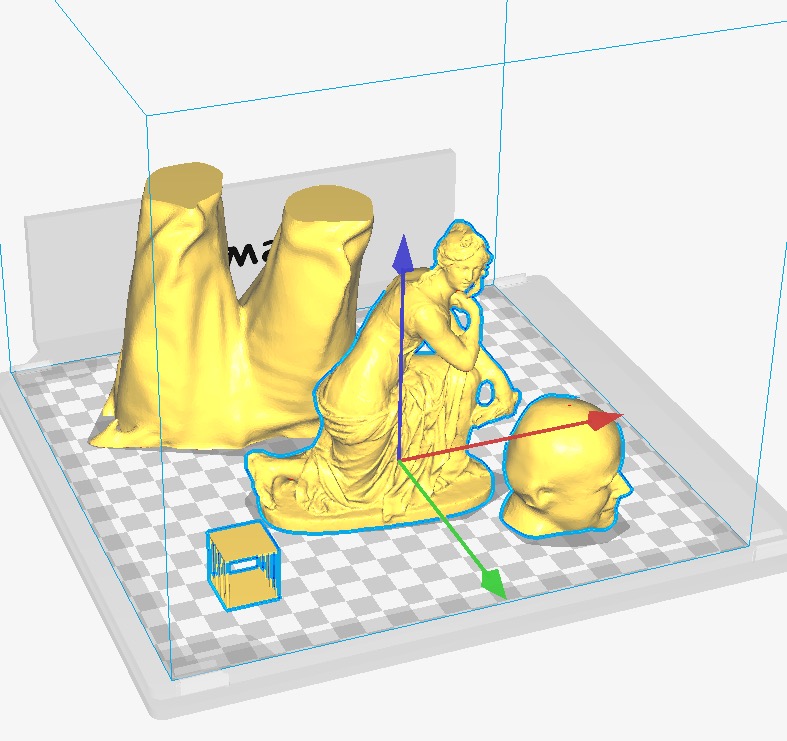
It’s now possible to select multiple objects and perform independent operations on them. Here you can see I’ve selected the box, Robert head and a sculpture, while leaving the upside-down pants unselected at the rear of the platform. These objects can be “grouped” together for simultaneous operations such as resizing, rotating, etc. This is a big time saver if you happen to be using multiple objects frequently, especially large numbers of small objects.
Ultimaker says your can “select different profiles for different objects”, but I was unable to determine exactly how this is accomplished. Selecting individual objects and changing the profile or settings doesn’t seem to operate on anything other than the entire build plate.
Rejoice! There is an Undo function. So even if you screw up rotating those 85 parts, you can now undo the erroneous operation in a single command. You can also redo operations if you screwed up on the undo, too.
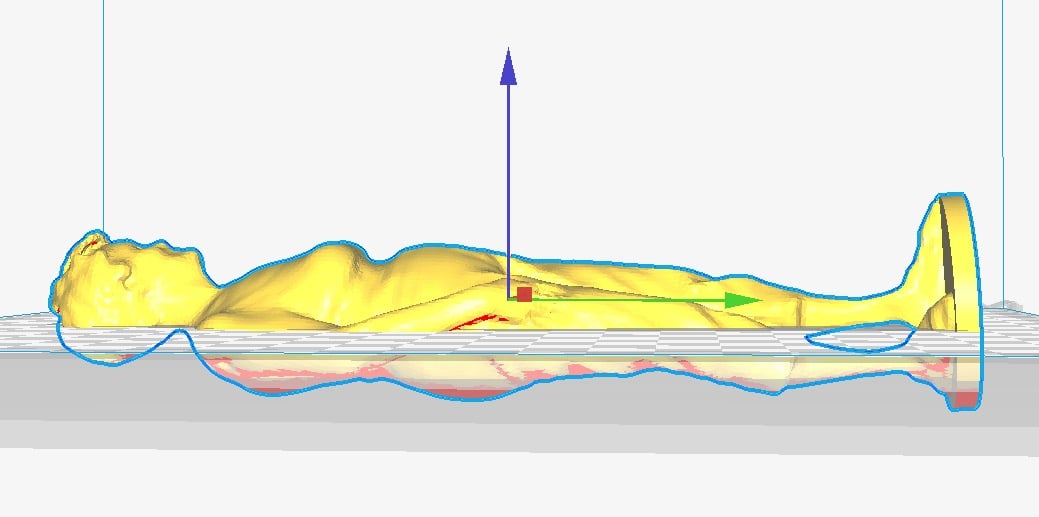
I quite like the “Intuitive Cut-Off Object Bottom”, which eliminates the possibility of attempting to print an object that appears to be flat on the bottom, but isn’t really so. In such cases, you often end up with only a small portion of the object stuck to the print bed on the first layer and you’re doomed to failure. This version of Cura permits you to shift the object below the bed and thus cut off a flat bottom automatically.
The software is now 64-bit, which should permit loading of far larger 3D models. In the past, I’ve had a few situations where Cura would hang or crash, possibly due to this limitation. That scenario should be reduced now.
The 64-bitness doesn’t seem to translate into faster slicing, however. My informal tests seem to have Cura 2.1 slicing a quite a bit slower, perhaps due to a configuration parameter that’s different – even though the visible ones were identical to prior tests, but it’s still quite fast and should not be much of an issue to users.

One thing that still bugs me about Cura is that it does not seem to estimate the usage of print material in weight and instead reports only in filament length. While I’m sure it’s accurate, it is of little value to me because a partly-used material spool’s weight can easily be determined, while you cannot easily determine the length without weighing it and converting to length units.
Yes, weight reporting would require accurate specification of the material used, because filament weight changes depending on the density of the material (copper-filled PLA, for example, weighs a lot more than just PLA). This would necessitate some additional interface changes to Cura, but I believe many people would appreciate it.
I could go on with more features added in Cura 2.1, but there are far too many to discuss. In fact, there are apparently 140 changes listed in their change log, some of which will no doubt be of extreme interest to those of you looking for particular solutions. Check out the changes and try the new Cura 2.1 Beta at this link:
Via Ultimaker

