
 One of the persistent issues with many personal 3D printers has been the tendency of ABS plastic to warp. ABS shrinks as it cools, and this all too often means your ABS prints (and sometimes even your allegedly warp-resistant PLA prints) start curling up at the bottom corners while printing, resulting in a distorted model. In some cases the warp is severe enough to cause the item to come loose from the print bed and tip over. Fail.
 The big commercial ABS printers overcome the issue is by enclosing the entire build volume in a heated chamber. The heat keeps the ABS from shrinking until you open the door – then the entire model shrinks in a uniform manner. A similar approach to reduce used by some personal 3D printers is warp is a heated build platform that keeps the bottom layer from shrinking too much.
For many, the commercial approach is out of budget. For others, installing a heated build platform could be complex, difficult or even impossible on certain machines.
However, there is a way to significantly reduce warp at relatively low cost. You simply need to apply a layer of double-sided carpet tape to the bed are where the print hits. We’ve done a couple of tests and found that ABS surprisingly sticks very to double sided tape and resists warping. Perhaps there are pathological geometries that may still warp, but this method seems to offer improvement. The thickness of the carpet tape is minuscule, so it doesn’t even require re-leveling your print bed.
Some print beds may react poorly to the application of sticky tape and require effort to clean afterwards. You can avoid this by first applying a layer of blue painters tape – this protects the actual bed surface, and avoids having to clean the bed. Then apply the double sided tape to the same area. DO NOT apply tape to the entire bed – that’s a massive waste of tape. Instead apply it to the area occupied by the print. Also don’t remove the second protective layer on the double sided tape until you are actually ready to print – your test extrusions will otherwise drop onto the gluey surface and stick.
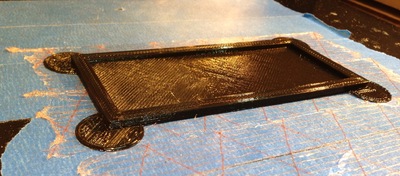
Removing a completed print is easy – just peel off the blue tape, leaving a pristine print bed. Then peel off the blue and carpet tapes from your model.
What kind of double sided tape should you use? Your local stores will offer a variety that changes by region, so we recommend you experiment with a few different brands to determine what works best for your 3D printer. They’re not expensive.
One slight downside is that the bottom of your model will have some glue on it. It can be removed with some standard cleaning approaches, unless you want to stick your model on the wall. That’s what we did.